Pixelated Heart Mini Quilt

Valentine’s day is just around the corner, and I’ve pulled out my Scrappy Pixelated Heart quilt to enjoy.

pixelatedheartquilt

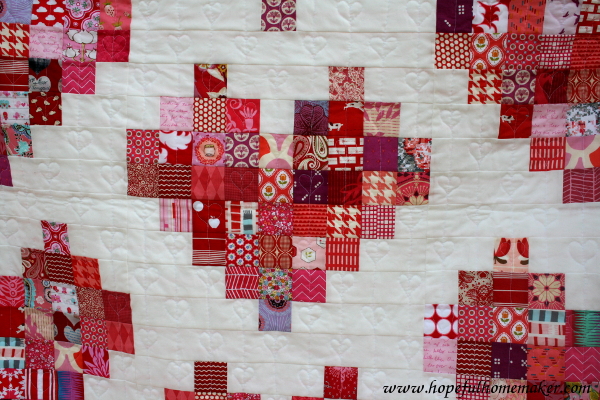
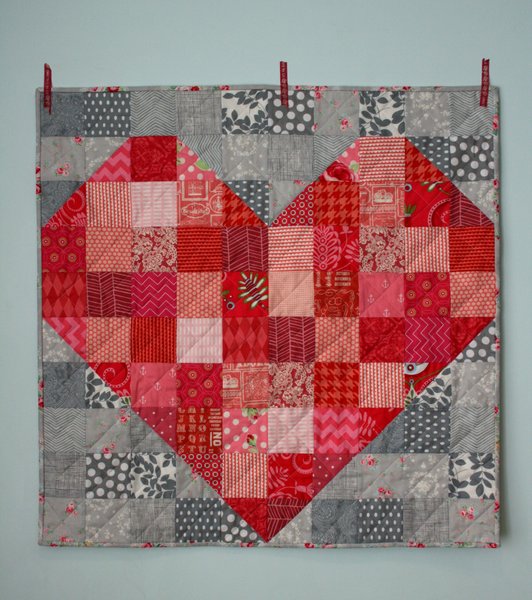
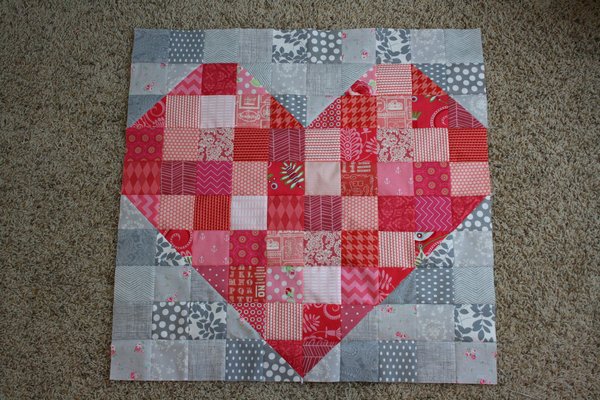
I had made a smaller version of this quilt block and decided to turn it into a mini quilt.  I’m pretty happy with how cute it is.

minipixelatedheartquilt

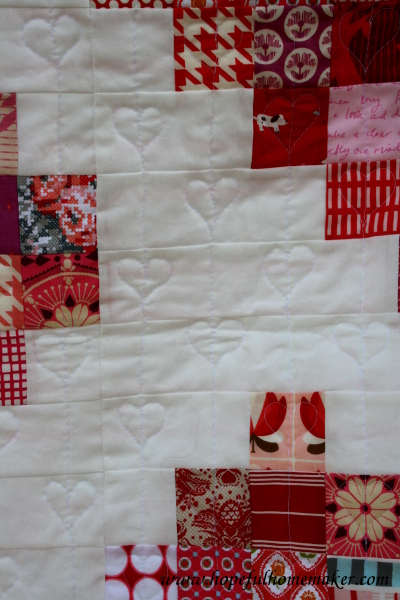
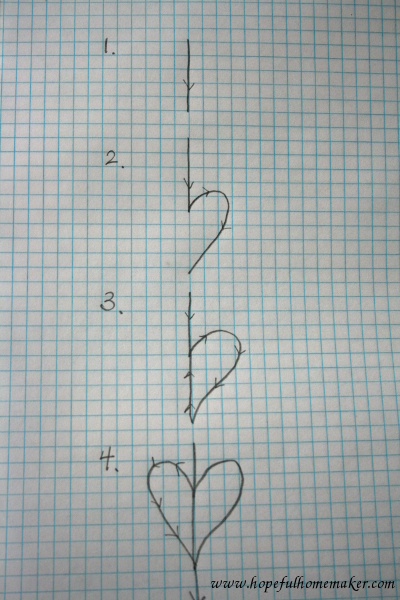
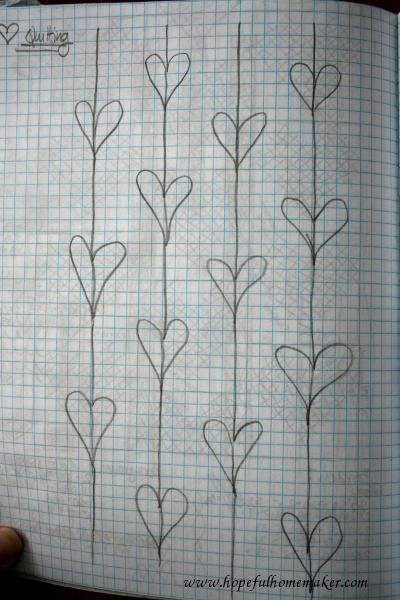
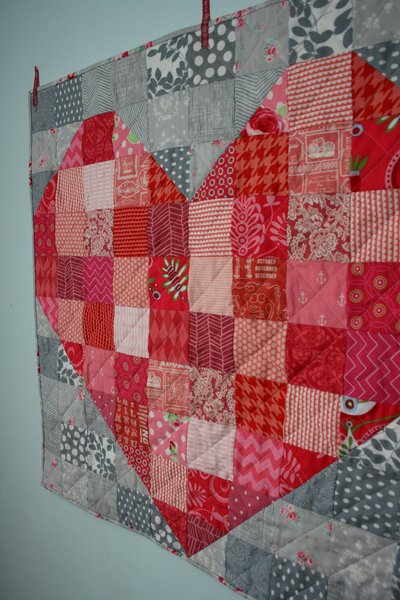
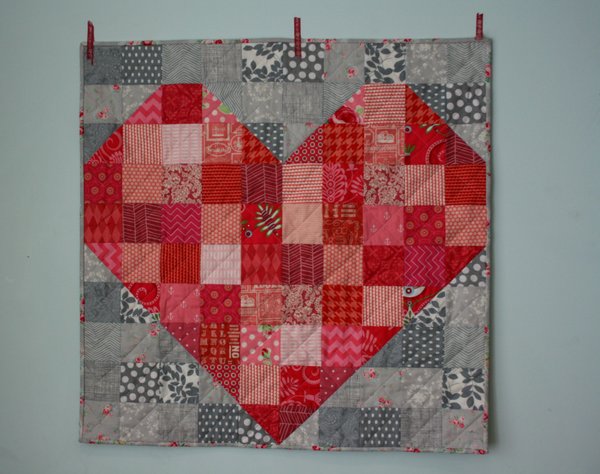
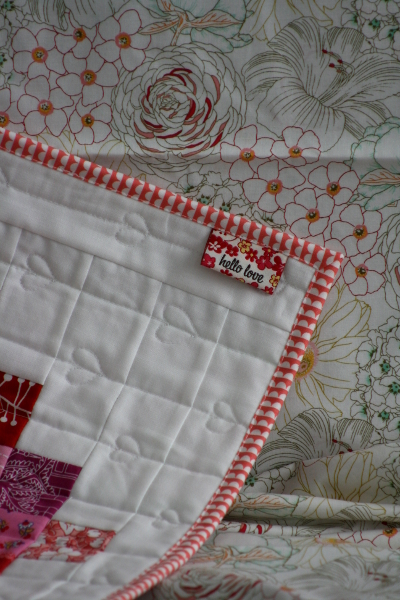
I decided to quilt it with the same falling heart quilting I used on my original quilt, and it’s even better tiny!  I like the vertical lines of the quilting because they break up the strong horizontal lines in the piecing, and the tiny hearts seem to match the cute little block.  It makes me smile!

miniheartquilting

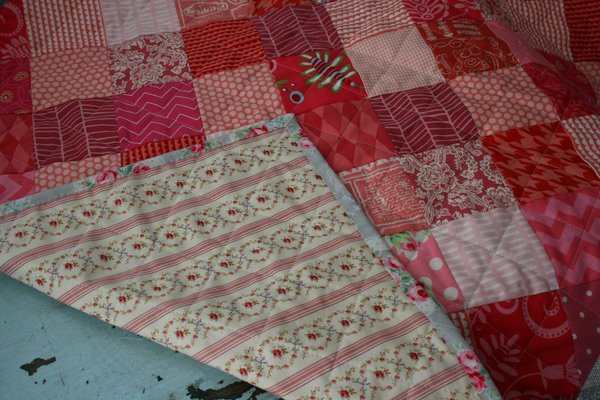
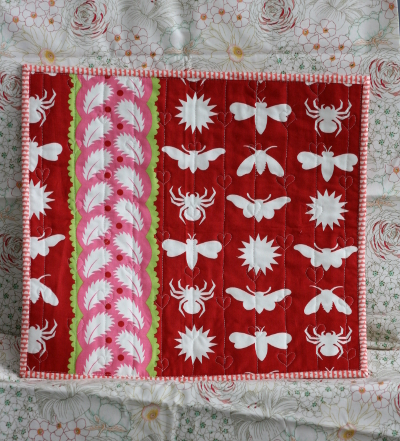
For the backing I used a cheerful Jane Sassaman print that I’ve been saving.  Her work is really intriguing to me.

miniquiltback

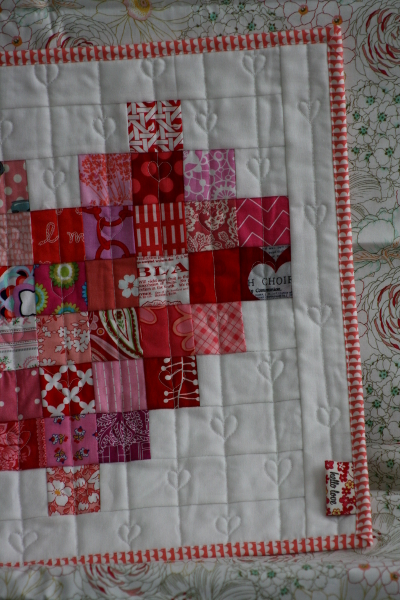
At the last minute I remembered some adorable little woven tags that my sister gave me a while ago.

cutetags

I think they’re a scrapbooking product, but I decided to add one to the quilt when I was binding it.  I’m trying to #sewmystash this year, and use all the random cute stuff that I can because it’s more fun that way, right?

quilttag


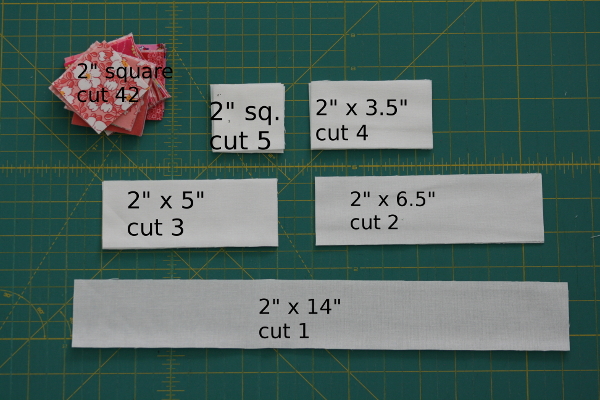
Instructions for the mini block:

The construction is exactly the same as the original block (find the full tutorial with lots of pictures here) , but re-sized for 2″ squares.  To make just one block, here’s what you need:

miniheartbackgroundcuts1

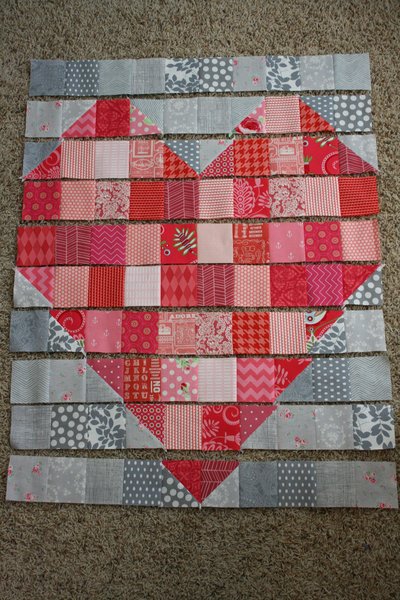
If you want to make more than one block, multiply these numbers by the number of blocks you need.  To lay them out, follow this image:

miniheartlayout1

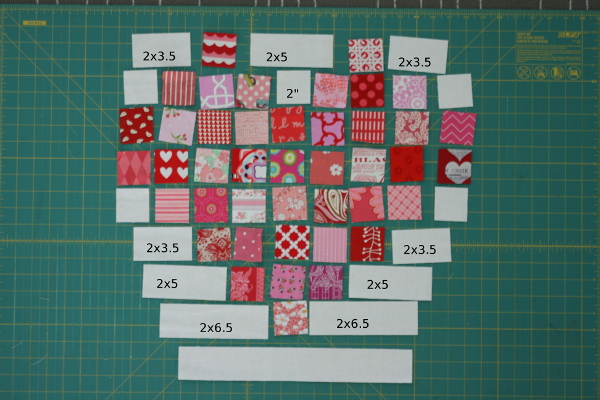
Sew together in horizontal strips and then sew the strips together to make a cute little heart block!  Again, if this confuses you at all, please see my original tutorial .

miniheartblock

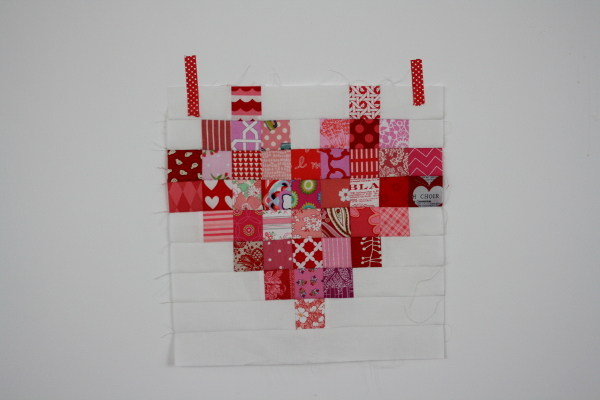
To make my mini quilt, I added a 2″ x 14″ strip of white fabric to the top of the block, and then cut two more strips 2″ x 15.5″ and added them to the sides so the heart is centered in the mini quilt. I then basted and quilted it.  So quick and cute!

minipixelatedheartquilt

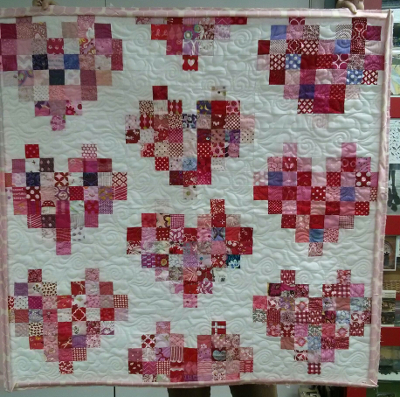
The idea to reduce the block came when a friend of mine decided to invite several ladies to contribute quilt blocks for a mutual friend who has a baby on the way.  She wanted smaller blocks so I re-worked the measurements.  Please excuse the night-time photo, but isn’t the quilt adorable? I’m so glad she had the idea.

miniheartbabyquilt

Happy Valentines Day!

Pixelated Heart Quilt + Heart Quilting


pixelatedheartquilt

My Pixelated Heart quilt , which is also my first finished quilt of 2014 (finished back in February) is something I intended to share here but never did.  I want to share it anyway, largely because the idea for quilting it was such a fun experience for me.

pixelatedheartquilt2

Because there is no sashing between the blocks, the horizontal feel of background fabric throughout the quilt seemed a little stronger than I wanted, so my goal was to find a way to balance the lines in the quilt.  I also wanted to keep the quilting very simple while trying something new, and my daughters hoped it would include hearts.  An idea struck and it worked, and I had so much fun doing it!

heartquilting1

Vertical quilting lines, one line per each 2 1/2 inch strip of the quilt but with little hearts quilted in every other square, was what I did.  Super simple, and yet I’ve never seen it done before and it did the trick!  All of a sudden the movement in the quilt is balanced and there are all these cute little hearts dancing through the background between the pixelated hearts.  This turned out to be a simple way to quilt, almost straight line in nature, with a little bit of free motion quilting thrown in.  Not a bad way to practice, learn, get a little experience and develop quilting skills if you’re like me and spent way too long being afraid of free motion quilting.   I feel like the design adds to the design of the quilt.  Because I’ve had many people try to figure out how I did it, I thought a couple of photos of my sketches might be useful:

heartquiltingdiagram

Essentially, there are 4 steps to the pattern.  A straight line down the center of the strip you’re quilting, then one half of the heart, then straight back up the center of the heart, and then stitching the other half of the heart, ending at the bottom point ready to continue down to the next one.  As I was quilting I kept thinking of hearts dangling on ribbons from the ceiling.  I didn’t like the idea of hearts everywhere, so I quilted each line in an offset way so that there would be open space as well.

heartquiltingsketch

I like the way each pieced heart is now framed by lots of little ones in the background.  Quilting this quilt was a fun experience in trying something new to see if it would work.  I think you could run with this idea of quilting in mostly straight lines but throwing in a small design along that line and use it with all sorts of shapes or motifs.  This is filed away in my imagination as an idea I may want to come back to in the future with some other design.  And like I already mentioned, it’s a comfortable way to step out of your comfort zone if straight line quilting is your thing.  I should mention that I used my darning foot, and not my walking foot, for this design.

heartquilting2

The backing is made up of a vintage piece of fabric I’ve had for too long (on the top) and some sweet hearts on the bottom.

pixelatedquiltback

Continuing with my love of black and white bindings, I used a small houndstooth print to bind this quilt.  I love the way it frames everything.

pixelatedheartbinding

And finally, I found this little label at my LQS and decided it was perfect for the quilt, so it now has a label on the back.  This is something I want to do more of.

pixelatedheartquilttag

The quilt has now seen many hours of use and I love seeing my children snuggled in things I’ve made for them.  When I wrote down my quilting goals for 2014, four main categories emerged for the projects I felt drawn to.  One of them I have labeled “chase an idea.”  I want to leave room in my sewing to follow an idea when it comes and see what happens.  The layout of the quilt (tutorial found here) , followed by the quilting, certainly fall into that category.  I find it is very satisfying when, after sketching and brainstorming, the idea comes and I act on it with decent results.

pixelatedheartquilt3

Hooray!  I hope you’re chasing an idea today!
Jennifer

Heart Mini Quilt


heartquilt

What a fun project this little quilt was!  When I realized I’d gone a little crazy cutting pink squares for my Scrappy Swoon Quilt, I decided to use them right away instead of tossing them in the scrap bin.  With Valentine’s Day approaching, a heart came to mind and I had just enough squares to put it together.  I decided to use grays for the background squares.

crosshatchquilting

Once it was pieced and basted, I quilted it in straight lines on both diagonals.   Simple and cheery, it’s adding a bit of festivity to our wall.

heartquiltback

I backed the quilt in an old Anna Griffin ticking stripe print I had on hand, and the binding is a Flower Sugar print from Lecien.

A few quick stats on making one if you’re interested:

fabric needed:  48 – 3.5 inch squares various pink or red fabrics for the heart, 9 – 3 7/8 inch squares of both pink AND gray fabrics, and 34 – 3.5 inch squares of various gray prints for the background.

Pair each 3 7/8 inch pink square with a 3 7/8 inch gray square and make 18 half square triangles using a scant 1/4 inch seam allowance.

Lay your squares out as follows, from left to right :

Top row:  10 gray squares 2nd row: 1 gray, 1 half square triangle block, 1 pink, 1 HST block, 2 gray squares, 1 HST square, 1 pink, 1 HST, 1 gray 3rd row:  1 HST, 3 pink, 2 HST sqaures, 3 pink, 1 HST 4th row:  10 pink squares 5th row:  10 pink squares 6th row:  1 HST, 8 pink squares, 1 HST 7th row:  1 gray, 1 HST, 6 pink, 1 HST, 1 gray 8th row:  2 gray, 1 HST, 4 pink, 1 HST, 2 gray 9th row:  3 gray, 1 HST, 2 pink, 1 HST, 3 gray 10th row:  4 gray, 2 HST, 4 gray Sew each row together (1/4 inch seam allowance, of course).

heartquiltstrips

Sew strips together to complete quilt top:

heartquilttop

The quilt top should measure 30 inches square.  Choose a backing, then quilt and bind according to your taste.  Done!

heartquilt2

With all the projects I’m in the middle of right now, it was a pleasure to put together a quick little project just for fun.  It’s also my first finished quilt of 2013.  It will keep a smile on my face this month when I walk past it, and that’s no small thing on gloomy February days!

Thanks for visiting, Jennifer

1 2 3 4 6