Favorite Drawing and Lettering Books

I love books, and I love giving books as gifts.  Every year I find myself looking for some good books that encourage my children in some form of art or drawing, especially for those days when we have a little down time.  With all we know about the relaxing effects of coloring and drawing, I like to provide books and pens to encourage my children to explore this hobby.  Some of my favorite Sunday afternoons include sitting around the table together, lettering and sketching and encouraging one another as we create.  Today I’m sharing a few of the books I’ve gifted to my children recently.   All of them have been used enthusiastically in many after-school art sessions, and have improved both their skills and confidence.  So, here are my  favorite drawing and lettering books:


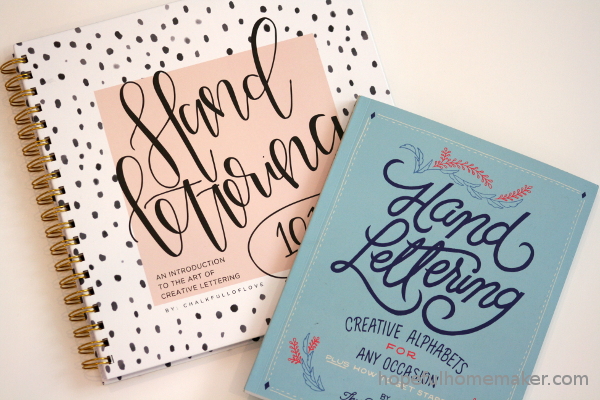
Hand Lettering 101
is a lovely book that focuses on calligraphy-style lettering.  The spiral binding is sturdy and allows the book to lay flat for easy use.  I can’t get over how pretty it is!  My 15 year old daughter loves her copy and often practices her lettering with this book.

Hand Lettering, Creative Alphabets for Any Ocassion
is a fun book that encourages creativity in creating different kinds of letters and fonts.  There are a lot of ideas to explore in this book.  It reminds me of the many hours I spent as a girl trying to find new ways/styles for alphabet letters.  I would have loved to have this book!  We are having a lot of fun with it.


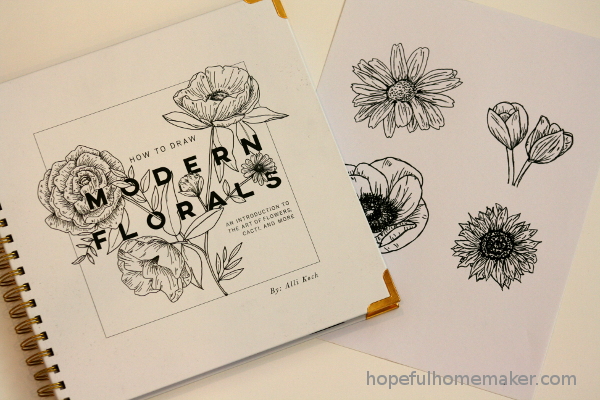
How to Draw Modern Florals
is another gorgeous book.  The beauty of the line drawings are equal to the beauty of the book.  My thirteen year old daughter has been practicing often using this book as a prompt, and you can see her drawings to the right of the book.  I have loved watching her practice and grow in confidence and skill.  I am so glad we added this to our library!


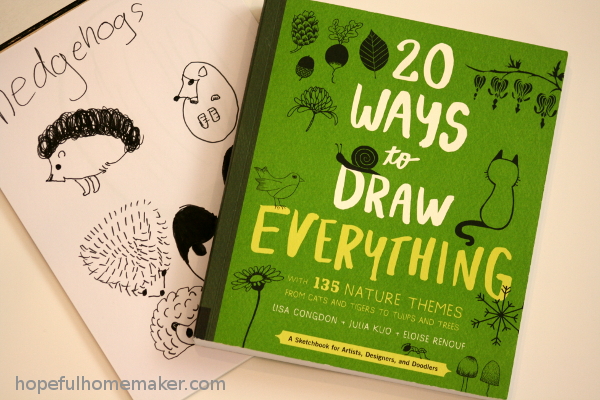
20 Ways to Draw Everything
is a drawing book I purchased on a whim, but which has been the most fun of them all.  There are 135 different themes or objects in the book, and each one is drawn in different ways by the team of authors.  I have been delighted to watch my children explore different ways of sketching based on the drawings in the book.  When they see twenty different sketches of a hedgehog, suddenly there isn’t only one right way to do it, and suddenly their version can be as good as one of the drawings they’re looking at.  This book gives permission to try, and my kids have done exactly that.  This book has kept my youngest daughter busy for hours, and when she gets it out everyone soon wants to draw with her.  (I love her little hedgehogs!)  This is a book that will get my boys sketching with us.


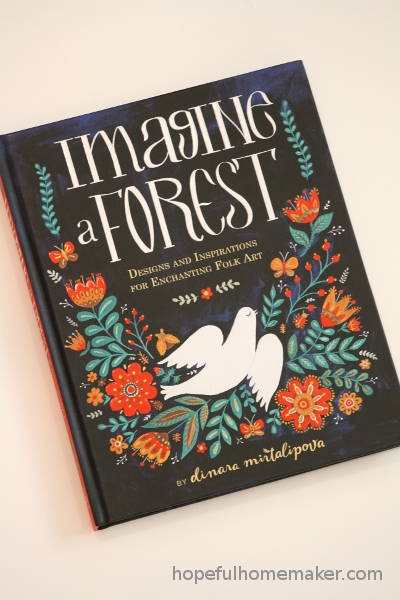
Imagine a Forest
has been my personal favorite.  I am enjoying practicing some folk art, something I’ve never done before.  Dinara Mirtalipova’s illustrations are lovely and I try to practice for just a few minutes every morning.  I would love to someday draw florals like this!  It’s a beautiful book.

I strongly believe in encouraging my children to sketch and draw and try to write beautifully.  I want their practice to be a fun experience for them, so I also invested in a box of Tombow dual brush markers , and what a difference it made!  Using a good instrument makes all the difference when drawing or writing.  The black markers have been instant favorites, and Tombow also makes sets of colors .  These markers, together with a selection of beautiful how-to books, expose my children to a variety of styles and invite them to get drawing and discover/develop their own unique style!

Speaking of unique style, I must also include a favorite chapter book series in this blog post.  These aren’t how-to or art books, but they are the all-time favorite chapter books in my house.  We now own several copies of this series because so many of my children want them in their personal libraries.  One of my daughters has literally read the hardback covers off of her books, they have nourished her soul and been read that much!  My youngest two daughters are currently reading the series and it couldn’t make me happier.

The Penderwicks
are a family of girls whose personalities and adventures are endearing and unforgettable.  We fell in love with this family when the first book, The Penderwicks: A Summer Tale of Four Sisters, Two Rabbits, and a Very Interesting Boy was published in 2005, and we’ve eagerly watched for every subsequent book to be released.  I can’t count the number of times I have recommended these books, and I’m so thrilled to share that a final installment of this classic series, The Penderwicks at Last ,  will be released in May and is now available for pre-order!  Lots of celebrating happened in my kitchen the day I shared that news.:)

So there you have it, our current list of favorite drawing and lettering books to encourage this creative hobby in our home.  We use these on quiet afternoons, cozy winter days, summer afternoons, or any day when life slows down.  There are a lot of them out there; do you have any favorites?

Jennifer

Taste The Rainbow Game


tasterainbow

My five year old daughter and I are planning a birthday party and the first game she requested is Taste the Rainbow.  It’s a really simple game which can be easily used at any kind of party.  We first tried it at one of the parties I hosted in May for a 10 year old soccer team.

Here’s how you play:  Each person will need two small cups, a straw, and enough Skittles candies to fill one of the cups.  Leave the second cup empty.  The cups I used are little condiment size cups like you find at restaurants.  I bought a huge box of them years ago at Costco and we still haven’t run out!  They measure about 2 inches across and are only about an inch deep, so they’re quite small.  If you can’t find something like it you could use little ice cream cups, nut cups, or even sturdy cupcake liners might work.  You should have at least 20-25 candies in the cup so the players are less likely to run out mid-game.  I bought two 14 ounce bags of candy for a group of 12 girls and had about 2/3 of one bag left after the game.  I think you could safely plan on one 14 ounce bag per every 10 players.

The goal of the game is to see how many skittles you can move to the empty cup using your straw in 30 seconds.  Someone needs to be the timer who calls out go and stop.  I’ll never forget the first time we played it hearing one sweet girl exclaim, “Oh!  You’re supposed to suck in!  I was blowing.”  So funny.  We ended up playing it over and over again as the girls wanted to beat each other’s best number.   When you’re done everyone gets to eat their candy (another good reason to keep the cups small).

tasterainbow2

At our soccer party I used this for the last activity of the night.  It kept the girls gathered around my kitchen table while parents arrived to pick up their daughters and made ending the party a little less chaotic.  Those whose parents hadn’t arrived yet simply played another round.

One more thing I like about this game is that it works for groups of people who aren’t the same age.  It would be fun to use for family night, a reunion, a classroom party… anything you want!

Have fun!
Jennifer

How to Make a Stick Horse


howtohorse

Last month I made eight stick horses for my son’s birthday party.  A year ago I made the first one, and as I was making them last month I was kicking myself for not keeping a pattern the first time around.

So here it is, my version of How to Make a Stick Horse.

What you need:

To start, you can draw your own horse’s head on a sheet of 11×15 inch paper, or you can just download my pattern.  It’s not fancy, but you won’t have to draw your own.   Print it (no scaling) then take it to a printer to enlarge it 200%.

DOWNLOAD HORSE HEAD PATTERN HERE
stickhorse1 To begin, you need felt.  One half yard of felt will make two horses, but you must buy the felt in half yard increments because 1/4 yard will be too narrow.  You can get 4 horses per yard, so I bought two yards to make eight horses.  In addition, you may want smaller pieces of other colors for the horse’s mane.  The sheets of felt that stores commonly sell will work for this.

In addition, you need some cotton fabric (a fat quarter should do).  Not pictured but needed:  scissors, sewing machine & coordinating thread, pins, hot glue gun and glue, marker, fiber fill to stuff.  And dowels.

stickhorse2

I bought 36 inch long dowels that are 7/16 inch in diameter.

stickhorse3

To begin, cut out pattern and lay on top of a double thickness of felt.

stickhorse4

Trace with a marker.

stickhorse5

Cut along lines.  On the outer edge of the horse’s neck, continue the line on down and cut along that line.

stickhorse6

Cut out pattern.  You should have two ears and two head shapes.

stickhorse7

Fold ears in half along straight edge.

stickhorse8

Flip one head shape over so it’s facing the opposite direction.   Pin an ear on each shape, with the open side of the ear facing the horse’s nose and the fold line facing the neck.  Pin in place near the center of the top of the horse’s head.

stickhorse9

Sew each ear in place.

Note:  If you have big plans for adding ears at this point, do it now.  I opted to leave the eyes off my horses and here’s why:  I’ve learned it’s important to have a starter activity/assignment for children to do while you wait for party guests to arrive, so I chose to begin the party by having each boy choose a horse and draw his own eyes on it.  I wanted the horse to be their own, since we were also asking them to name their horses.  And they LOVED this activity, by the way.  Some of them wanted their horse to have just one eye, others got going and drew spots on ears or around the eyes.  I wasn’t going for a professional, perfect looking horse.  I was trying to provide the basics so their imaginations could run with the idea.  It worked.

stickhorse10

For the mane, take a piece of felt approximately 8 inches wide by 11 inches tall.

stickhorse12

Fold in half lengthwise.

stickhorse13

Fold down the ear on one of the horse head pieces.

stickhorse14

Lay the folded piece of felt (mane) along the outer edge of the horse’s neck with the fold along the edge of the neck.

stickhorse15

Fold down the ear on the other horse head piece and carefully lay down on top of the mane and first head shape.  You should have both ears and the mane tucked inside the sandwich.  Pin the pieces together carefully.

stickhorse16

Sew along the edges of the felt with a 1/4 inch seam.

stickhorse17

Remove pins.  The horse should look like this.

stickhorse18

Carefully turn horse inside out.  Fold the ears back up and fold the mane piece out.

stickhorse19

Cut the mane into fringe strips, being careful to stop before you snip into the seam and the horse head.

stickhorse20

Stuff the head until it’s filled out to your liking.

stickhorse20A

Cut strips of cotton fabric that are 2 inches wide and approximately 18 inches long.

stickhorse21

Carefully insert one end of a wood dowel into the center of the neck, gently pushing it up into the top of the head while leaving some filling so there’s no hard spot on the head.  I used the end that had the barcode sticker on it so I didn’t have to bother removing it.

stickhorse22

Using a glue gun, place hot glue all around the dowel just above the point where the stuffing ends.

stickhorse23

Squeeze the felt around the hot glue and tie a length of fabric in a knot around that spot to secure the horse head on the stick.

And you’re done!  Keep going until you’ve made as many horses as you need for your group.

pickahorse

For my hitching post I used the frame for a standing chalkboard that my son broke a few years ago.  We tied loops of ribbon to the frame that were just a tiny bit loose, then put a stick through each loop to “hitch” them to the rail.  I made a simple bunting that said “hitching post” and the setup was complete.

Twithhorse

Each cowboy picked a horse, addeyes added eyes, horserace and then they were off!

thegroup

We had a happy group of cowboys which added up to a very happy momma as well.

If you’d like more ideas for simple but really fun games to use at a cowboy party, you can read more about ours here .  As for the horses, my younger girls all want one now, so there will definitely be more of them in our future.  I hope you enjoy making yours.

Jennifer

1 2 3 4