
Lone Star Tree Skirt Sew Along: Piece Diamonds
Welcome to Week Two of the Lone Star Tree Skirt Sew Along! If you’re just joining us, it’s not too late. The pattern is available here and you can jump in anytime. We’re going to finish our tree skirts well before Christmas!
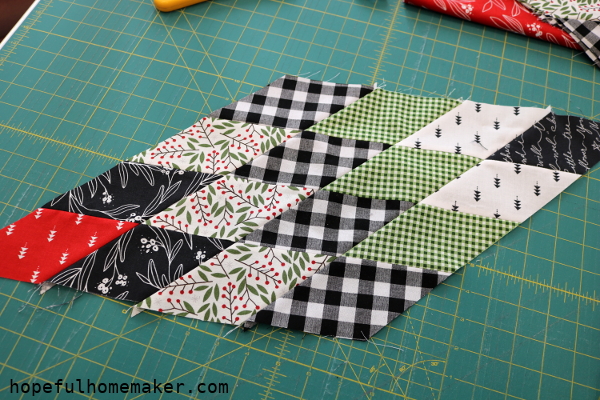
Last week’s video covered sewing the fabrics into strips and then cutting them into strips of diamonds. This week we will sew the strips into eight large diamonds to make a star so BE CAREFUL in handling your fabric.
You have a lot of bias edges and don’t want to stretch them!
Once again, the video is in two parts. In them you will find all my tips for marking, pinning, and sewing. I love this step because the beauty of the lone star begins to emerge. Here we go!
The first video covers marking and pinning your strips together.
The second video covers sewing the strips together into large diamonds.
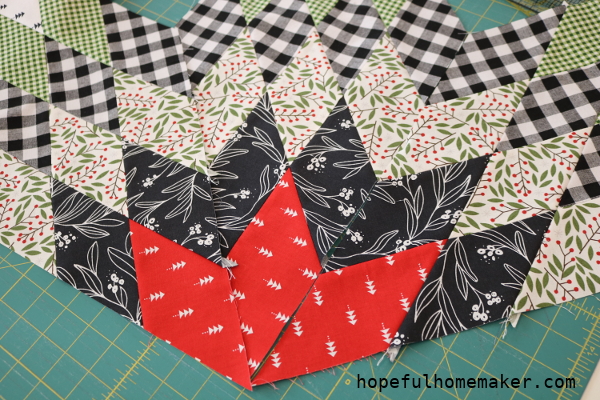
There you have it, eight large diamonds!
When the diamonds are sewn together, play with them to see how they look if you flip them around. I’m planning to put the red diamonds in the center of my star, which will look like this:
But if I wanted to flip it around, it would look like this:
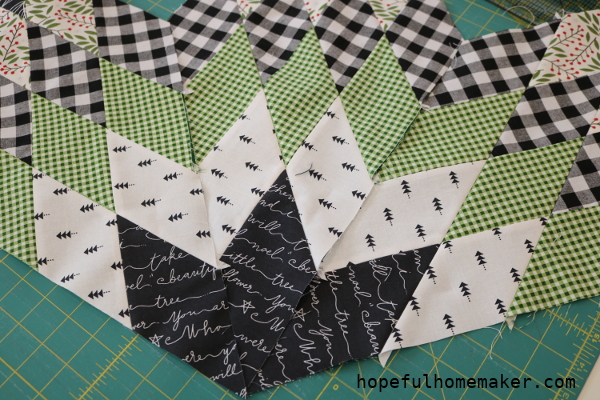
You can see that the star looks very different when I switch them! Last week I shared photos of an unfinished mod lone star as I deliberated on which way to sew it together. I’d like to focus more on value in the future; I’m sure I will learn a lot!
We will meet back here next Monday for week three of the sew along. Please share your progress with the hashtags #lonestartreeskirt and #hopefulhomemaker. I’ll be watching for them!
Remember that all posts for this project can be found on the Lone Star Tree Skirt Sew Along page.
Have a great week, and happy sewing!
Jennifer
I have always pressed the seam one way on the first strip and then the other way on the second strip. When you sew them together it is easy to marry the two seams. Perfect seams without the marking and pinning. Try it.