Scrappy Swoon: Fabric and Cutting
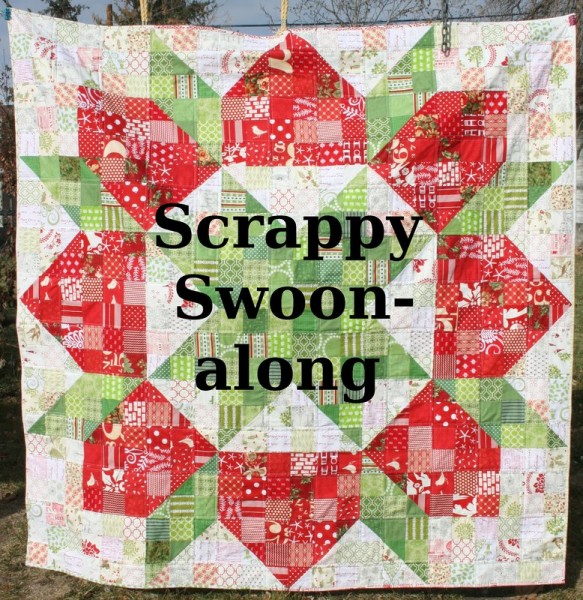
Welcome back everyone! It’s time to talk about fabric requirements for your Scrappy Swoon quilt. But before we do that, I want to share a few thoughts about fabric selection.
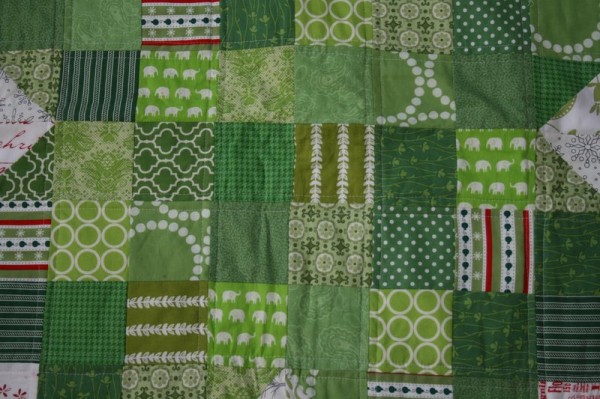
This is a large patchwork quilt, and the fun of it is having all sorts of values and tones in your choices. As you can see above, I used a large variety of greens. Some of them are very warm toned, while some are cool. I have dark greens, olive greens, and the brightest of them is the elephant print. A variety of large and small scale prints will also add interest to your quilt. I really believe that in a quilt like this, the more the better! Because this was a Christmas print, I limited my greens to just green on green or green and white prints with the exception of the stripey ornament print which I added. That little stripe of red, sprinkled throughout my greens, is fun, and it coordinated with the quilt as a whole. I didn’t use that fabric with a red stripe in it on any of the half square triangles, however, because I wanted the lines between the colors to stay clear and strong so I didn’t lose the Swoon pattern at all. So, when choosing your fabrics, you may find that some of them will work best in the center of a section and not as a “border” print.
Something I realized as I started pulling pink fabrics for the quilt along was how many of my pinks are floral prints, meaning that they actually have a lot of colors in them. I’m going to use those prints very sparingly because I want the pink areas to read as pink, not a rainbow. That said, I’d love to see someone interpret this quilt with a rainbow of colors; I’m sure it would be amazing! I also think this would be a fun project using all solids, but in a variety of shades.
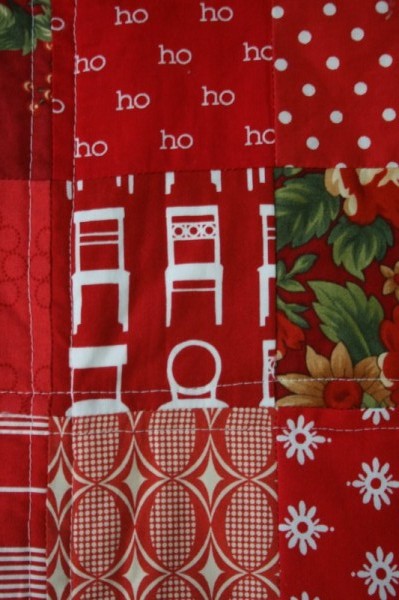
In my red fabrics, you can see that I used a couple of Christmas prints I had which have green in them and they work well. You can also fussy cut your fabrics to make them work. I used Laurie Wisbrun’s chair print but cut the orange chairs out so I only had a red and white print.
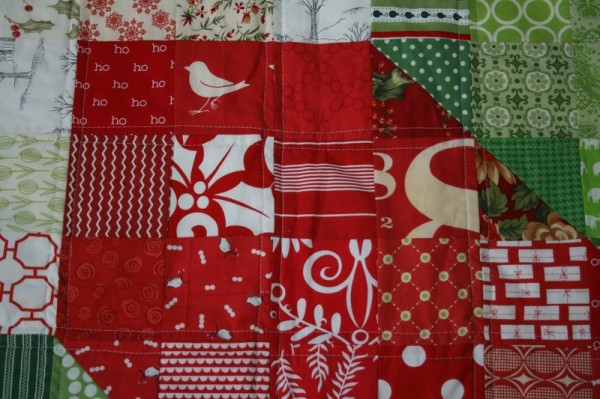
As you can see in the picture above, I used some prints that had a lot of red AND white in them. The holly leaf square above is a good example. I used this print sparingly and always buried it in the middle of my red sections, but it works and adds a lot of visual interest to the quilt, especially when you’re looking at the quilt as a whole.
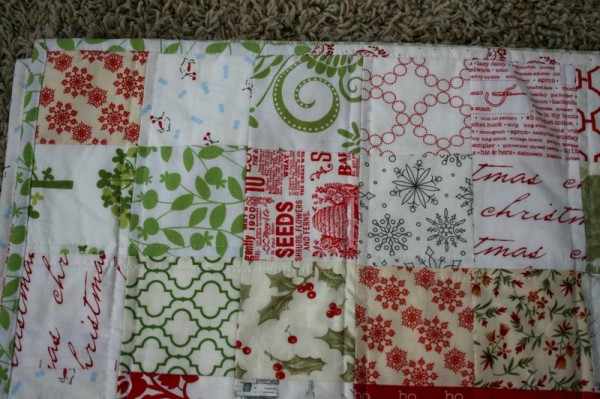
Now for the background prints. There is actually more background fabric in this quilt than there is of either color. With this in mind, I wanted the entire quilt to be visually interesting so I was pretty liberal with my “whites.” I don’t know that anyone would call the Annie’s seed packet print “white” but it looks right at home amidst the other prints. I opted for mostly whites with green or red patterns on them, but I also have a bit of brown, black, blue and other colors in there. I also chose to include prints with both a true white background as well as creamy backgrounds and anything in between. When you’re choosing your background fabrics, remember that if everything is pretty much the same, there won’t be as much to look at when you’re finished. Make this a quilt full of your favorite prints, no matter how different they may seem. I have old fabrics that were left over from quilts I made years ago mingled with new, much more modern prints in this quilt. Remember that the finished product will be all the more impressive if you have a lot of variety.
FABRIC REQUIREMENTS AND CUTTING:
For your background fabrics, you’ll need 42 – 3 7/8 inch squares and 192 – 3.5 inch squares For your primary color (the center star color) you’ll need 36 – 3 7/8 inch squares and 132 – 3.5 inch squares For your secondary color (the outer ring) you’ll need 30 – 3 7/8 inch squares and 168 – 3.5 inch squares The quilt will finish at 72 inches square How to cut:
If you’re cutting strips of fabric, assuming a 42 inch width of fabric, here’s what to do. Cut a strip of fabric 3 7/8 inches wide. Trim selvedge and then cut 2 – 3 7/8 inch squares. If you then trim the remaining part of the strip to 3.5 inches wide, you can cut another 9 or 10 3.5 inch squares from that strip. So, a strip of fabric will yield 2 – 3 7/8 inch squares and 9 – 3.5 inch squares. If you cut 3 of the larger squares from a strip, you’ll get 8 – 3.5 inch squares from the rest of the strip. Once you have all the 3 7/8 inch squares you need for that color, you can cut your remaining strips 3.5 inches wide and one strip will yield 12 – 3.5 inch squares.
If you’re cutting fat quarters, assuming the corners are squared and it’s truly 18 by 21 inches, you can cut it this way:
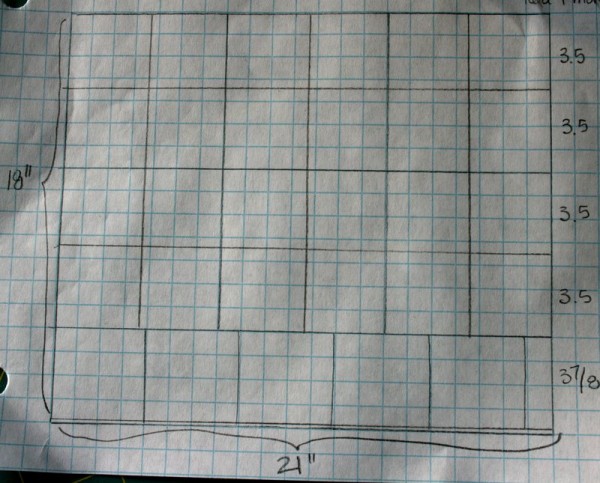
Note: cut carefully! You only have an eighth of an inch wiggle room here, but it isn’t hard to do. If your fat quarter isn’t square or isn’t really 18 inches wide, then you’ll lose one row of 3.5 inch squares. But assuming your fat quarters are the size they should be, one fat quarter will yield 5 -3 7/8 inch squares and 24 – 3.5 inch squares.
With these basic guidelines, here’s what you’ll need for each color:
Background fabric: 15 – 3 7/8 inch strips (cut 3 – 3 7/8 inch squares from each strip) plus another 6 – 3.5 inch strips OR 8 fat quarters plus two additional 3 7/8 inch squares OR some combination of the two. *If you need to just cut an entire strip of 3 7/8 inch squares, you will get 10 squares per strip.
Primary fabric: 16 – 3 7/8 inch strips (cut 4 – 3 7/8 inch squares of 3 fabrics instead of just 2) OR 7 fat quarters (you’ll have extras) OR some combination of the two Secondary fabric: 15- 3 7/8 inch strips plus another 3 – 3.5 inch strips OR 8 fat quarters (you’ll have extras) OR some combination of the two Now, the larger the variety of fabrics you use, the less you’ll need of each. I won’t end up using an entire strip or fat quarter of any of my prints.
If you want to just cut everything out now, then go ahead and get started. Know that you will be cutting 600 squares, which is a lot of squares to keep track of. I prefer to cut mine as I make each section, so if you want to do it that way with me I’ll be posting how many of each square you need at the beginning of each post.
Well, that’s it for today. Don’t forget to upload a picture of your fabric to the flikr group . I can’t wait to see your awesome color combinations. Next Monday we’ll meet back here for instructions on piecing the first two sections of the quilt. Good luck with your fabrics, and we’ll see you soon!
Jennifer To read the next post in this QAL, click here .

Did you mean 36 of the background 3 7/8″ squares? That is what it looks like to me.
Ramona,
You’re right, I made a mistake and I’m so glad you caught it! You will actually need 42 of the 3 7/8 inch squares for the background color. I’ve corrected it in the post and adjusted the cutting/fabric requirements accordingly. Thank you, thank you, thank you!
I really want to do this with a rainbow of colors (surprising, I know) but I’m not sure how, other than to only cut each section as we go along. Do you think it is possible?
E
Seriously sooooo excited! I’m gonna do red, aqua and black. Totally popular combo but its for a girlfriend that will love it!!
I will take the rainbow challenge 🙂 I already have it planned out and it will help chip away at my scraps since I’m not doing the Scrappy Trip Along.
You might have said this somewhere, but I can’t find it & I’m curious- how big will this quilt finish?
Kate,
The quilt will finish at 72 inches square. Thanks!
I have a question for you: I have enough 5″ squares in my chosen colors for this quilt. I know that you have 2 different sizes for the squares, but I was wondering if I can use them keeping them at the 5″ size? I realize I would get a larger quilt, but if it saves me from cutting them all down…. Not knowing how you put this together, I wasn’t sure if having them all the same size would work or would it cause more headaches in the end? What do you think?
Jennifer,
The 3 7/8 inch squares are for making half square triangles. If you want to use a 5 inch square in place of the 3 7/8 inch squares, then your half square triangles will finish at 4.5 inches square. This means that all of your other squares would need to be trimmed to 4.5 inches instead of the 3.5 inch square that we’re using. If you do this, your quilt will finish at 96 inches square. It is true that doing it this way would mean less cutting for you, and less fabric waste. I hope that helps!
If you were choosing Aqua as one of your colors, would you go as far into blues to include navy’s or would you stay along the border of aqua and blue and just include deeper tones? How about between green and aqua? Would you go all the way to teal?
I really appreciate this explanation. I’ve been having fun pushing my fabric selections to their limits and this kind of quilt is perfect to really experiment with that on. In fact, I think I’ll make two. I’ve been wanting to do something for myself in Aqua and Orange and I’ve been looking for a good two color pattern for my MIL who loves Yellow and Green.
This is going to be fun!
Caryn,
I really think the decision is yours. I would probably stick mostly with the range of color you’re comfortable with and add a few squares of the hues that are on the edge of what you’re going for. For instance, with the aqua I’d probably use lots of aquas, some turquoises, some light greens and teals, and maybe cut a couple of navy squares and just lay them out in the block before sewing to see if they add to the look you want or if they bother you. If it sticks out too much, just sub it out for a square you like better. We all have different comfort levels with the degree of “busyness” that comes with increasing numbers of colors and patterns in a quilt. So do what you love, but experiment a little? I really think this quilt is big enough to allow for variety and still have a definite “two color” look. Hope that helps, and thanks for joining in!
GORGEOUS! Absolutely GORGEOUS!!! Just found my way through the internetz to it….what is the finished size?
Heidi,
The quilt will finish at 72 inches square. Thanks!
have started sewing but can you plz double check the number of hst needed for each color – i’ve counted a couple of times and can’t work out where the 30 fits?
Janine,
I’m very sorry for your confusion. When I first posted the cutting instructions, I wrote the wrong number of 3 7/8 inch background squares. For the background you will need 42, not 30 squares. I corrected it within a couple of hours, but it looks like you didn’t see it. I apologize. Please refresh the page and re-read the numbers so you can get them correct. Good luck!