Winged Blog Tour: Flight Quilt


winged-blog-tour


wingedfabrics

Welcome to Day 7 of the Winged Blog Tour .  I feel like one lucky girl to have this opportunity!  This blog tour celebrates the beautiful Winged fabric collection , designed by Bonnie Christine of Going Home To Roost .  There have been some fun and creative things made so far, including the lovely tote yesterday at May Chappell .

Bonnie’s fabrics have been among my favorites since the release of her first collection, Reminisce.  I made my Scrappy Hunter’s Star quilt from that line, and you can find my Sweet as Honey Hexagon Beehive mini quilt here.
This new Winged collection is no different.  The colors are vibrant and beautiful and the designs have a lot of movement to them, which made sewing with them a delight.

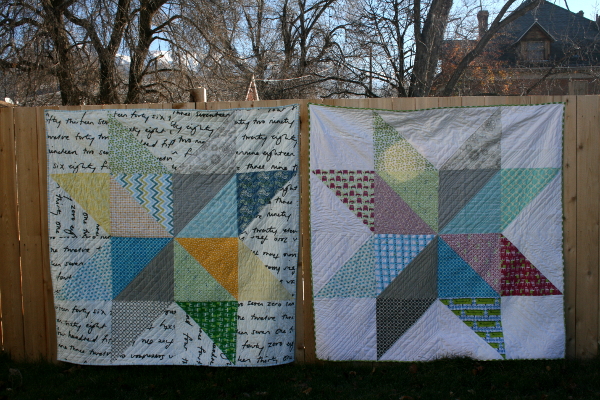
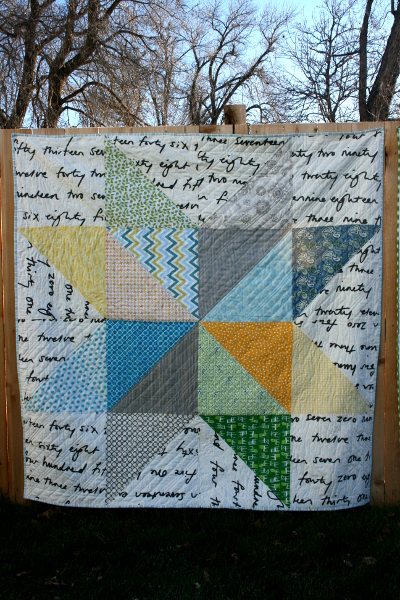
With that, let me introduce you to my Flight Quilt:

flightquilt2

I have always loved watching birds.  Not only are they beautiful, but they inspire in me a sense of potential.   Most of them are small and fragile, yet when they take flight they seem capable of anything.  They remind me that I, too, can do great things.  Even before I saw the fabrics in Bonnie’s collection, I loved what she had to say about them:

“this feeling of spreading one’s great wings and soaring is one that connects with me deeply. a long time ago i decided that i would pursue my dreams no matter what. i would make great sacrifices, journey into the unknown put my heart and soul on the line to live my creative dream.

that is what winged is about.


spreading your wings and flying into the unknown.

”  – Bonnie Forkner Her words resonate with me, as this theme has been much on my mind in recent months.  I believe her fabrics capture this idea beautifully and I wanted to sew something that would elevate my thoughts and remind me of my own potential – of the potential within each one of us.

flightquilt4

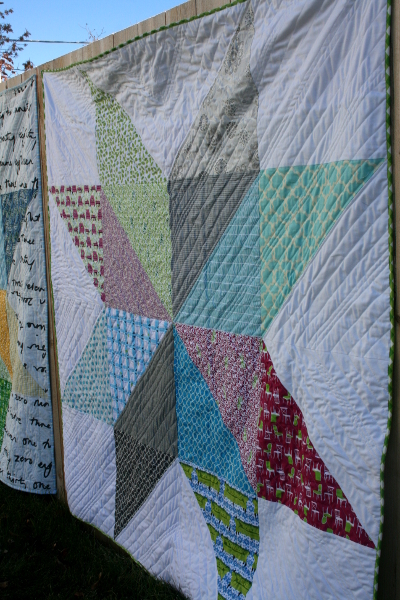
As I explored ideas for sewing with these fabrics I was drawn to the traditional circling sparrows block.   The problem was, most of them are quite small, designed for English Paper Piecing, or requiring a lot of Y seams.  I wanted to showcase the beautiful prints with a larger block and simpler construction, so I drafted a foundation piecing pattern that worked with my vision.   Each of the blocks in this quilt are 26 inches square, so they are big and beautiful and allow each fabric to shine!

flightquilt3

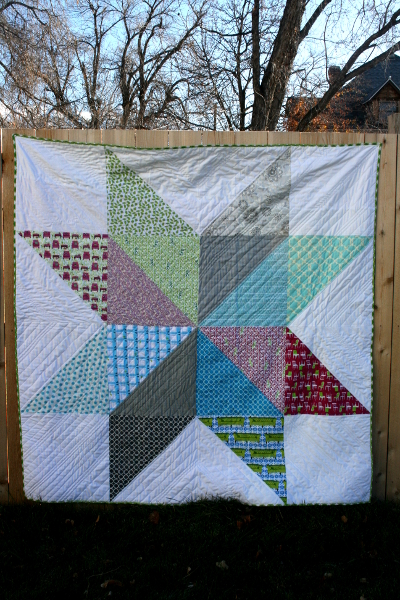
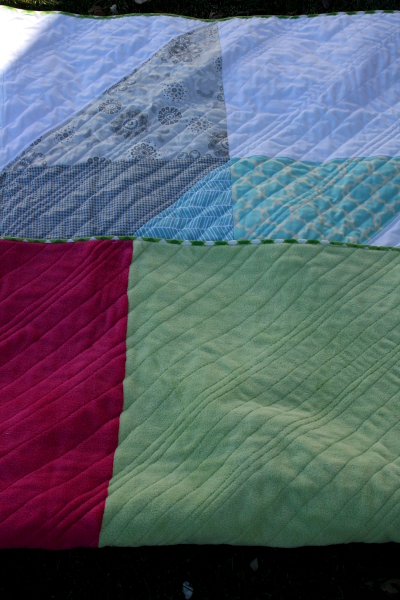
To unify the blocks I quilted the quilt in a spiral, lines about 1/2 inch apart.  This was my first time quilting this style and I enjoyed it immensely.  The spiral echoes the circling pattern of the “sparrows” in each block without competing with the fabrics.  The finished quilt measures approximately 52 inches square.

flightquiltback2

The quilt back is a vintage sheet I purchased a while ago.  The birds sitting among blossom-covered branches were the perfect compliment to the quilt top, and the colors a great match!

flightquiltback1

As the weather turns cold and blustery, these fabrics bring cheer to my heart.

flightquilt5

The green flyaway petalums print makes a perfect binding for this quilt.

flightquiltbinding


flightquilt6

These photos may be my favorites; I love the cute little fingers of my daughter peeking over the edge of the bench.  She was so patient while I took photos, but was definitely feeling done by this point!

flightquilt7

As I was taking these pictures a bird lighted on a branch in the tree above.  The words of Victor Hugo came to mind:

“Be like the bird, Who Halting in his flight On limb too slight Feels it give way beneath him, Yet sings Knowing he hath wings.”

My wish today is that all of us will spread our wings, rejoice in the abilities we have, and soar a little higher.


flightquilt1

Many thanks to Bonnie for putting together this blog tour!  I’ve been hopping along with the schedule and seen some beautiful things.  Tomorrow’s stop will be with Jessica at Snickerdoodle Stew and I’m sure she’s got something awesome ready!

Thanks for visiting!
Jennifer

Scout Quilt


scoutquilt1

Meet my Scout quilt!  It’s been a year since I finished it, but somehow I managed not to share it here.

scoutquilt2

The pattern for the quilt is Scout by Cluck Cluck Sew , and you can purchase it here .  It’s a strip pieced quilt and comes together very quickly. For my version I used mostly Art Gallery fabrics with a few other favorites added in.   Lots of saturated color and flowers in this one!

scoutquilt3

For the backing, I took the leftover pieces of my strips and made them into a scrappy strip to add to my backing.  This large music notes print is an IKEA print that I stumbled upon.  I haven’t seen it there before or since, but it makes a great quilt back!  As you can see, I quilted it in a simple chevron pattern horizontally across the quilt.  Nothing fancy.

scoutquilt4

The binding is a scrappy one and makes me smile.  I think it compliments the quilt well.

scoutquilt5

Much as I loved it, I chose to gift this quilt to an old friend of mine, who also taught violin lessons to my daughters for a couple of years.  It felt like an appropriate gift of gratitude to offer her, especially with that quilt back!

scoutquilt6

As the days grow short and the weather more blustery, I’m grateful for warm quilts to wrap around loved ones.  I really love this hobby!

scoutquilt7

Thanks for visiting!

Jennifer

Friendship Star Mini Quilt


friendshipstarmini1

I posted about the American Glory quilt top I pieced, and as I was working on it I wondered what the pattern would look like if it was smaller.  I also thought it would be interesting with a scrappy spin on the fabric choices, so I reduced the blocks and pulled out some scraps.

friendshipstarmini2

This version required more planning and careful piecing, but I really like the results.  I started with my fabrics for the stars.  For each star I cut:

1 – 1.75 inch square (center square) 2 – 2.25 inch squares (HST squares) The background fabric for these blocks required:

4 – 1.75 inch squares (corner pieces) 1 – 2.25 inch square (HST squares) And finally, I needed:

1 – 2.25 inch square of the fabric I wanted to use for the stripe behind the star friendshipstarmini7 Next I decided to have each vertical strip be consistent, but to alter the fabrics in the strips.  I selected fabrics with grays and yellows in them, to offeset the bright colors of the stars. Where possible, I cut long strips and pieced them the same way I did in my large version of this quilt.  Once again, I used a tiny polka dot for the background.  These strips were all cut at 1.75 inches wide.  For strip piecing I cut them 18 inches long; where I had to find scraps I needed pieces that were 1.75″ wide by 4.25 inches long.  My mini quilt is made with 7 rows of 7 blocks, so some vertical columns needed 4 stripe blocks and others needed 3.  From each of these fabrics (the stripes) I also needed 3 or 4 – 2.25 inch squares for the half square triangles in the star block.

friendshipstarmini8

Once the stripe blocks were finished, I placed everything where I wanted to be certain I was pairing the proper background stripe with each star to make the half square triangle blocks.

friendshipstarmini9

I chain pieced as much as I could without confusing myself too much, and it came together fairly quickly.  I will say that the arranging of all the fabrics did make this version take much longer than the larger version did, where I had only two fabrics to worry about, but the results were worth it.  As with the larger quilt, I found it far simpler to piece the the top together in vertical rows.  Joining the rows together was fast with fewer seams to match because the stripes were already taken care of.  The results, however, were worth it!  I like this pattern much more in miniature – the negative space doesn’t bother me so much, and the stars really stand out against the more neutral stripes (another change from my first version).  These scraps are also a reminder of a special project, and of thoughts & feelings I don’t want to forget, so I’m glad to have them in this mini quilt.  It now hangs in my laundry room, where I’ve claimed a wall for hanging minis.

friendshipstarmini3

I quilted it in loopy horizontal rows.  The backing is an alphabet print from Maude Asbury which I think compliments the Cotton + Steel fabrics nicely.

friendshipstarmini4

Once again, a black and white binding is the perfect finish for this colorful project.

friendshipstarmini5

This mini quilt measures almost 27 inches square.  Each block is 4.25″ square, so they’re nice and little!  This is the second mini quilt I’ve made, and I’ll admit that before I made one I wasn’t sure I thought they “counted” as a finished quilt (why do I do things like that?!?).  They seemed too small and easy.  Having made this mini quilt and my mini hexagon beehive quilt (one of my favorite projects ever!), I’ve learned that tiny means time, and both of these quilts took honest effort to make.  While the quilting of them is very quick, dealing with such little pieces requires patience and careful piecing for accurate results.  SO, they totally count!

friendshipstarmini6

Hooray for a finish!

Jennifer

1 119 120 121 122 123 524