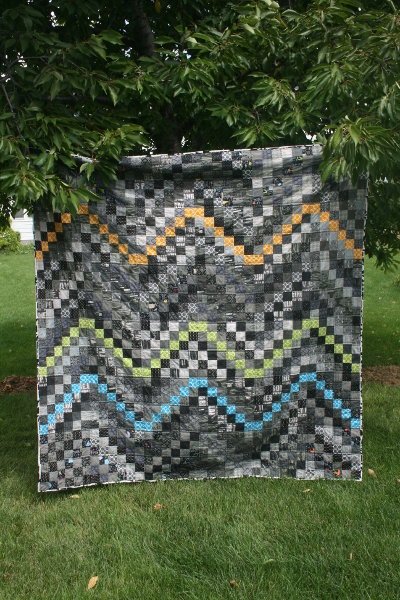
Tone It Down Quilt


toneitdown1

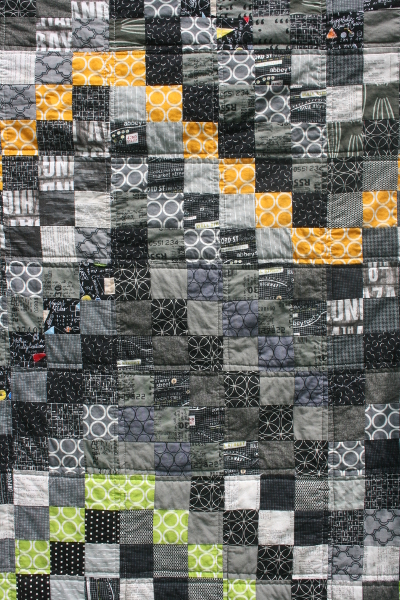
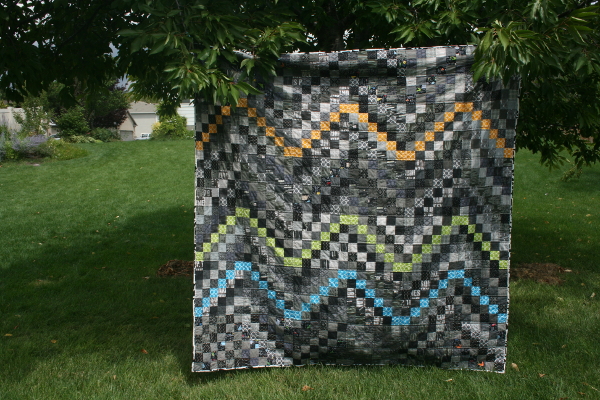
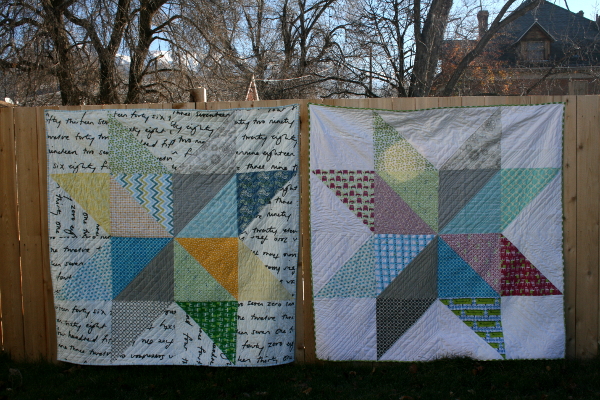
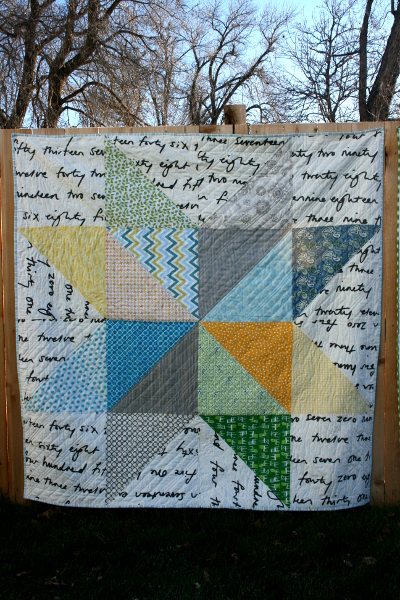
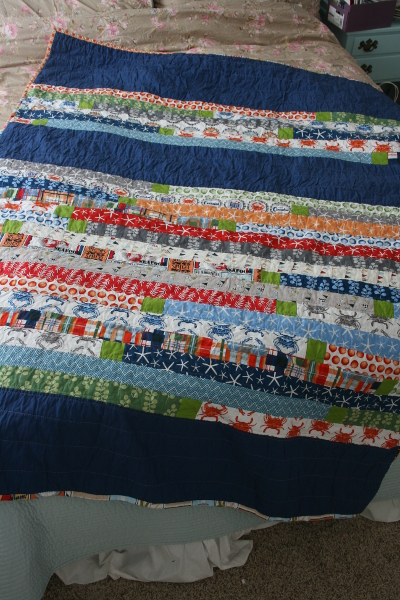
My Tone it Down quilt blocks have become finished quilt #3 for the year and given how busy life has been, it seems amazing that I’ve finished anything at all.

toneitdown5

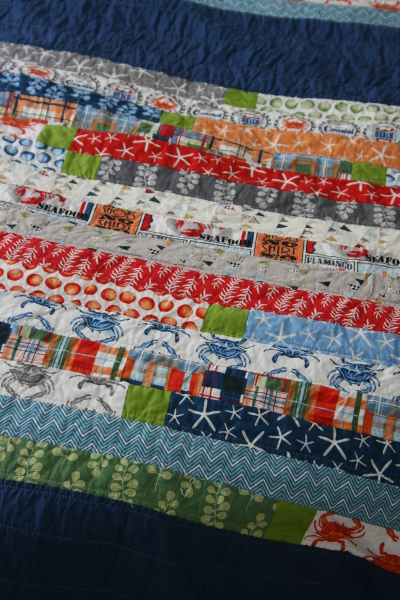
I love this quilt for several reasons.  First, it has pieces of so many fabrics in it.  I love the scrappy look it has, and having so many little bits I love in one quilt makes me smile.  There’s also a distant memory that kept coming to mind as I worked on it.  Many years ago my mom’s sister made her a quilt and I remember looking at it in awe.  The pieces were so small and I remember wondering if there would ever be a time in my life when I would be capable of making something so complex.  Twenty (or more?) years later I look at all the little pieces of this quilt and think “maybe I’m a real quilter, after all.”

toneitdown2

The navy and green together remind me of an outfit my mom bought me in high school.  I was running for class president and we found the perfect thing for me to wear when I gave my speech.  I’ve always loved navy and green together but when I see this combination the first thing that comes to mind are those clothes.   I’m so glad navy is back in style.  I never stopped liking it.

toneitdown3

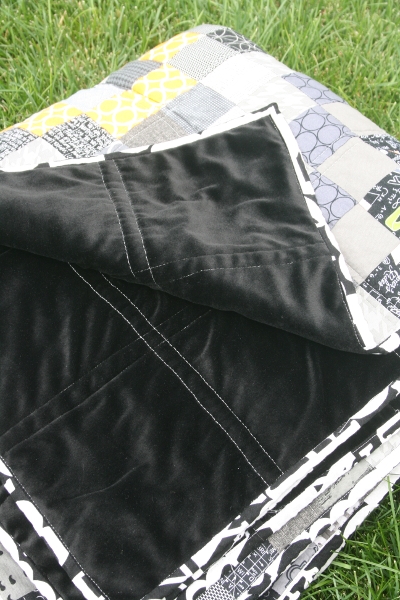
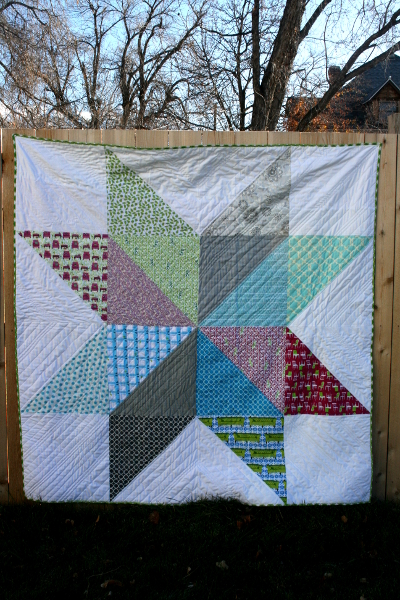
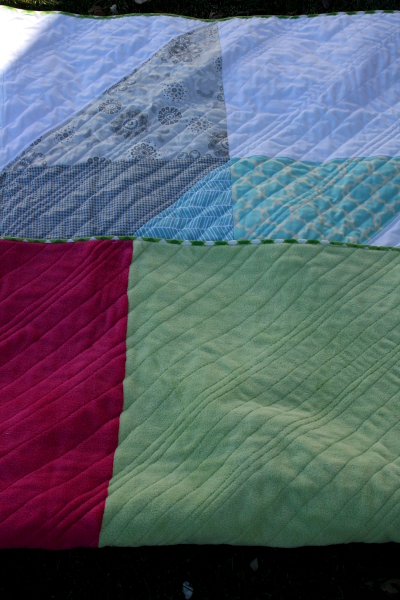
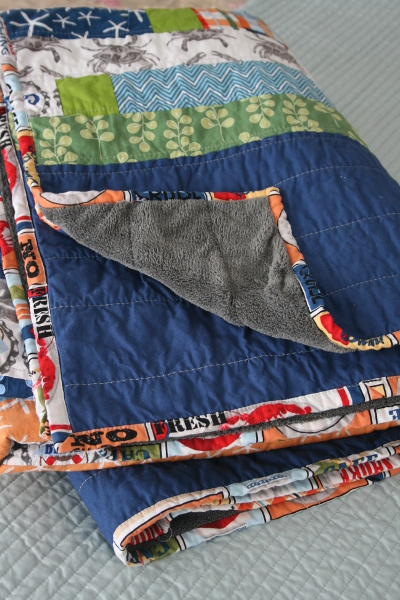
The backing was pieced in an attempt to “use it up” without worry of running out (something I’ve always struggled with).   The Pillow & Maxfield prints were a gift from my sister, the veggies print by Maude Asbury reminds me of Broadbent’s quilt shop where the Utah County Modern Quilt Group meets.  There’s a piece in there that I’ve had for at least 15 years because I loved it and couldn’t even explain why.  I have very little of Denyse Schmidt’s Katie Jump Rope but used it anyway.

toneitdown4

There is a funny story about one of the blocks in this quilt.  When I was half done I suddenly felt that I couldn’t bear to make another block.   I wanted to do something else, but this project had taken over my space and I’d committed myself to finish it.  I started working faster, trying to crank them out, but 97 pieces only go so fast, even when you’re chain piecing.  If you look carefully at the top right corner of the quilt, you’ll see in there a bright aqua fabric that’s not very “low volume.”  That was the block on the sewing table when my desire completely fled, so I fussy cut a little “keep calm and sew on” piece to swap into the block in place of what I had planned.  It would be the reminder block – the one that would make me smile when I remembered how badly I wanted to put it away.  In fact, when I had the quilt top finished the first thing my children wanted to do was find that square.

toneitdownkeepcalm

What really makes me laugh about that block is the fact that on the top row of the block, the green pieces are upside down!  In my lack of enthusiasm I completely failed to notice that I pieced it incorrectly.  In fact, I didn’t notice it until the quilt was bound and finished and one day I looked at it and it was the ONLY thing I saw.  I guess that’s what happens when you look at something too much.  So there’s an imperfect block in there that will stay as it is, and the whole thing just makes me laugh. I guess a mistake like that is a great way to make sure your quilt is one of a kind!

toneitdownmistakeblock

Every time I piece a quilt top I think to myself “I’ve got to have this one professionally quilted” because I love it so much.  And then I finish it and hang it in the closet and get back to work around the house.  I look at my children, how quickly we get holes in shoes, how much they eat, how much their activities cost, and remember that we’re in our most expensive years – and will yet be in this stage for a while.  So I go back to the quilt, baste it and take a deep breath, and do my best.  My quilting leaves much to be desired, but I’m trying and I’m slowly improving.  On this quilt I tried the loopy pattern that Denyse Schmidt made so popular with the release of her most recent book, Modern Quilts, Traditional Inspiration .  (A paragraph in that book provided me with a life lesson, shared here .)

toneitdownquilting

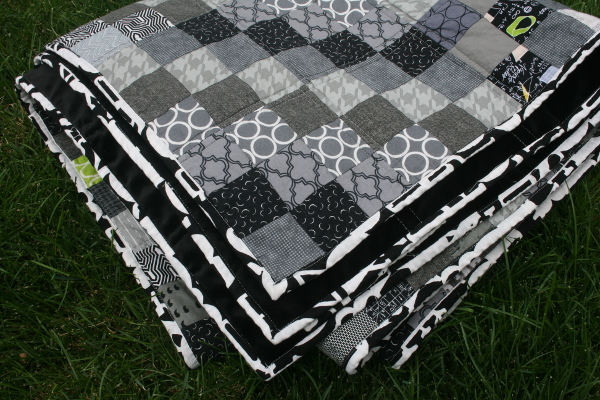
The rows vary in height (I did that on purpose) and it’s full of mistakes but I suppose that means it has even more of me in it.  For the binding I hunted down the diagonal navy stripe from Bonnie & Camille’s April Showers collection and it was the perfect thing.

toneitdown6

A finished quilt is better than a perfect quilt, and this beauty will always be a reminder to me of where I am right now – my skills, my tastes, the craziness of life, my sudden desire to quit, the popularity of low volume fabrics (a trend I’ve totally fallen for) and even a reminder of other quilters, well-known or not, whose work influence me at this point.  The evening walk we took as a family to take these photos and the afternoon my kids spent crawling all over it playing “I spy” are memories already wrapped up in it, too.

toneitdown7

Thanks so much for visiting!  For more information on the source of this pattern see this post .

Jennifer

Pixelated Heart Quilt + Heart Quilting


pixelatedheartquilt

My Pixelated Heart quilt , which is also my first finished quilt of 2014 (finished back in February) is something I intended to share here but never did.  I want to share it anyway, largely because the idea for quilting it was such a fun experience for me.

pixelatedheartquilt2

Because there is no sashing between the blocks, the horizontal feel of background fabric throughout the quilt seemed a little stronger than I wanted, so my goal was to find a way to balance the lines in the quilt.  I also wanted to keep the quilting very simple while trying something new, and my daughters hoped it would include hearts.  An idea struck and it worked, and I had so much fun doing it!

heartquilting1

Vertical quilting lines, one line per each 2 1/2 inch strip of the quilt but with little hearts quilted in every other square, was what I did.  Super simple, and yet I’ve never seen it done before and it did the trick!  All of a sudden the movement in the quilt is balanced and there are all these cute little hearts dancing through the background between the pixelated hearts.  This turned out to be a simple way to quilt, almost straight line in nature, with a little bit of free motion quilting thrown in.  Not a bad way to practice, learn, get a little experience and develop quilting skills if you’re like me and spent way too long being afraid of free motion quilting.   I feel like the design adds to the design of the quilt.  Because I’ve had many people try to figure out how I did it, I thought a couple of photos of my sketches might be useful:

heartquiltingdiagram

Essentially, there are 4 steps to the pattern.  A straight line down the center of the strip you’re quilting, then one half of the heart, then straight back up the center of the heart, and then stitching the other half of the heart, ending at the bottom point ready to continue down to the next one.  As I was quilting I kept thinking of hearts dangling on ribbons from the ceiling.  I didn’t like the idea of hearts everywhere, so I quilted each line in an offset way so that there would be open space as well.

heartquiltingsketch

I like the way each pieced heart is now framed by lots of little ones in the background.  Quilting this quilt was a fun experience in trying something new to see if it would work.  I think you could run with this idea of quilting in mostly straight lines but throwing in a small design along that line and use it with all sorts of shapes or motifs.  This is filed away in my imagination as an idea I may want to come back to in the future with some other design.  And like I already mentioned, it’s a comfortable way to step out of your comfort zone if straight line quilting is your thing.  I should mention that I used my darning foot, and not my walking foot, for this design.

heartquilting2

The backing is made up of a vintage piece of fabric I’ve had for too long (on the top) and some sweet hearts on the bottom.

pixelatedquiltback

Continuing with my love of black and white bindings, I used a small houndstooth print to bind this quilt.  I love the way it frames everything.

pixelatedheartbinding

And finally, I found this little label at my LQS and decided it was perfect for the quilt, so it now has a label on the back.  This is something I want to do more of.

pixelatedheartquilttag

The quilt has now seen many hours of use and I love seeing my children snuggled in things I’ve made for them.  When I wrote down my quilting goals for 2014, four main categories emerged for the projects I felt drawn to.  One of them I have labeled “chase an idea.”  I want to leave room in my sewing to follow an idea when it comes and see what happens.  The layout of the quilt (tutorial found here) , followed by the quilting, certainly fall into that category.  I find it is very satisfying when, after sketching and brainstorming, the idea comes and I act on it with decent results.

pixelatedheartquilt3

Hooray!  I hope you’re chasing an idea today!
Jennifer

Scrappy Hunter’s Star Tutorial (a layer cake friendly pattern)


scrappyhuntersstarquilt

Early this week I shared photos of my scrappy version of a Hunter’s Star quilt .  I realized when I was finished with it that I had stumbled on a great pattern for a layer cake, so I thought I’d share a quick tutorial.

hunterstarwithdots

Fabric requirements:

Each 8 pointed star in a hunter’s star quilt is made up of four smaller blocks.  For the quilt I made, which is 64 inches square, I used:

32 – 10 inch squares of various fabric prints (which is most of  a layer cake, although I cut my own squares from Bonnie Christine’s Reminisce collection for Art Gallery Fabrics) 32 – 10 inch squares of background fabric (2.5 yards of fabric.  I used a black on white swiss dot print for my background) Note:  If you’re using a layer cake, you should have 40 prints to choose from.  I recommend eliminating those prints that most closely match your background fabric so they don’t get lost in the quilt and make it more difficult to see the pattern.  For example, if you’re using a solid white background and the layer cake has a solid white print in it, or a white print with a very light pattern on it, you may want to skip it.  That said, you can see in the photo above that I did use some low volume prints from the collection in my quilt top.  I liked using a few of them, but there were other prints that were even softer which I set aside and didn’t use in this project.   Also, because I used a swiss dot print for my background, the softer prints I included still looked different from the background fabric.

If you want to increase or decrease the size of the quilt, know that one print and one background square will make two blocks.  Four blocks will give you a full star in the center of the blocks.

teninchsquares

To make the blocks, we’ll be cutting triangles, diamonds and trapezoids from each 10″ square.  To begin, cut your square in half diagonally:

step1

Place the two triangles on top of one another for faster cutting.  With a ruler, measure 2.5 inches from the edge of the diagonal cut, as seen below with the small ruler.  Notice that on the bottom left and top right edges of the triangle my cutting ruler is more than 2.5 inches from the point of the triangle.  The measurement that matters is the one from the diagonal edge we just cut.

step2

Cut along that line, creating two smaller triangles and two trapezoids.

step3

Set aside the triangles and line the trapezoid strip up carefully on your cutting mat.  I prefer to use my 45 degree angle lines and I line the far right edge up on an inch line.  From that far right side, measure into your trapezoid 2.5 inches once more.

step4

Cut your fabric, creating two diamonds.  Repeat once more, measuring another 2.5 inches from the cut you just made and cutting two more diamonds.

step5

From one ten inch square you should now have two triangles, four diamonds and two trapezoids.

threeshapes

Repeat this process with the remaining prints.

cutallpieces

Now do the same thing with all the ten inch background squares.  Every piece in this quilt is cut the same way.

repeatwithbackgroundsquares

Once all the shapes are cut you can put together a block.  Think of each block as having two triangles.  One uses background fabric for the diamonds and prints for the triangle and trapezoid, and the other triangle uses background fabric for the trapezoid and triangle and the diamonds are prints.  Below is the layout for a hunter’s star block:

huntersstarblocklayout

Sew the diamonds first.  Carefully turn a printed diamond piece right side down and carefully line it up with the right side of a short end of the background trapezoid.  Because we are sewing angles, do not line the pieces up from corner to corner.  Instead you will need to have a tiny (1/4 inch) triangle sticking out on each end.  This will allow your fabrics to line up straight after you sew them together.

sewdiamondtotrapezoid

Here’s a closer look at how to line them up.  Sew the pieces together using a 1/4 inch seam allowance.

lineupseam

Do the same thing with the diamond at the other end of the trapezoid.

addseconddiamond

Press the seams open.  *In this quilt I pressed every seam toward my printed fabrics so the seams would nest when pieced together.

pressopen

Now repeat the process, sewing the background diamond pieces to the printed trapezoid piece, again ironing the seams toward the print.

repeatwithotherside

Next, sew the triangles to the trapezoids.  Once more, you will have the corners of the triangles hanging over the edges of the trapezoid piece.   On this seam the overhang will likely be more than 1/4 inch, which is fine.  Just try to center the triangle as best you can with equal overhang on each side.  sew together.

addtriangles

Repeat with the other half of the block.  Note:  At this point, I ironed the seams toward all the printed fabric triangles, and on the other triangle I ironed my seams toward the printed fabric diamonds.  If you do this, your seams will nest when piecing together your quilt top.

bothsidesdone

And finally, sew the two triangles together.  The most important thing is getting the seams between the diamonds and trapezoids to nest together (see where my pins are).

sewsidestogether

Once again, press the final seam toward the printed fabric diamonds.  Your block is finished!  Once you have the hang of the block, chain piecing them together is very fast and efficient.  I chain pieced a diamond to one end of every trapezoid, then did the same thing with the other end.  Finally I chain pieced all the triangles on and then sewed the blocks together.  It really is a very fast finish.

scrappyhuntersstarquiltblock

Trim each block carefully to 8.5 inches square and you’re done with the block!

trimblock

When you’ve pieced your first four blocks together you will see the 8 pointed star that emerges in the corners of the blocks.  This really is such a beautiful block.

huntersstarquiltblocks

Lay out your blocks in 8 rows that are 8 blocks long (each block making 1/4 of an 8 pointed star) and sew them together, paying careful attention to matching the seams on the diagonal points and in the corners.  Sew the rows together and you have a finished quilt top!  I really love the scrappy look of this quilt, as it freshens and updates the traditional hunter’s star block in a beautiful way.  If you want to see what a quilt would look like in just two colors, you can see my traditional red and white Hunter’s Star quilt here .  You can also find pictures of a Hunter’s star made with solid linen and a single print in my Hunter’s Star pillow here .  There are so many different ways to interpret this quilt block.  I hope you have fun!

scrappyhuntersstar1

Jennifer

1 96 97 98 99 100 213