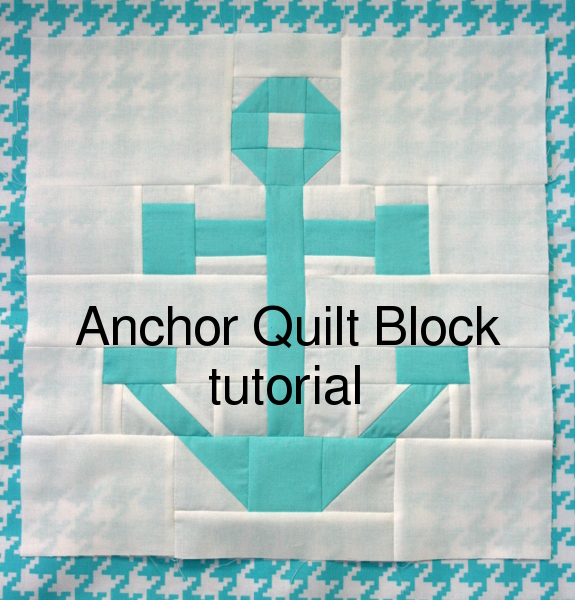

As promised, I’ve written a tutorial for the anchor quilt block I designed. Are you ready? Let’s go!
This block has a lot of seams and may seem complicated, but if you take it one step at a time it’s really not difficult.
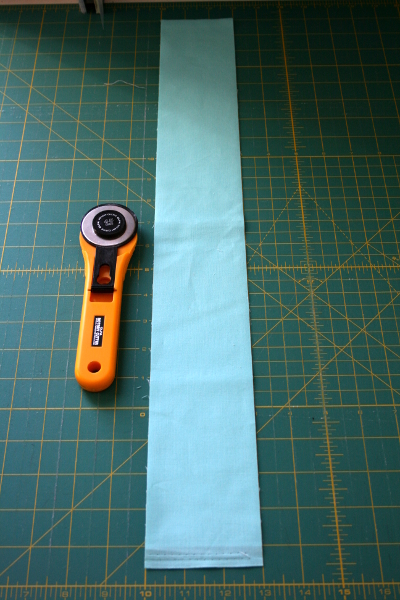
Anchor Fabric Cutting To begin, the pieces for the anchor can be cut from one 3 inch wide x width of fabric strip. This means that if you want to make a quilt that has a different print for every anchor, you just need 3 inches of fabric for each one. If you want to piece a quilt that is all one color then multiply 3 inches by the number of blocks you want to make. You’ll actually use less than that, but it’s a good way to figure out what you need.
*Note: There are small pieces in this block, some only 1″ wide. For more accurate piecing, I recommend using Best Press to starch your fabric before you begin.
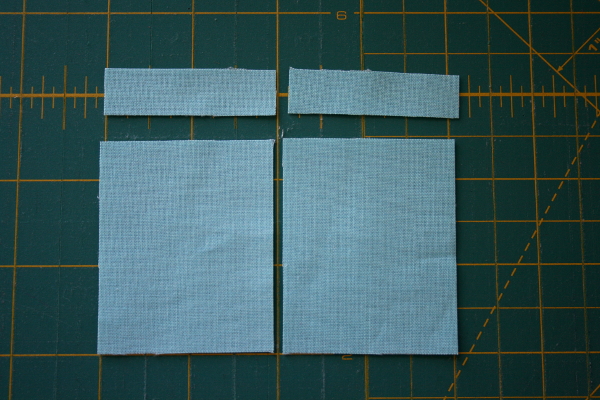
From that strip, cut two pieces that are 1.5 inches wide (by 3 inches tall) and two pieces that are 2.5 inches wide (by 3 inches tall).
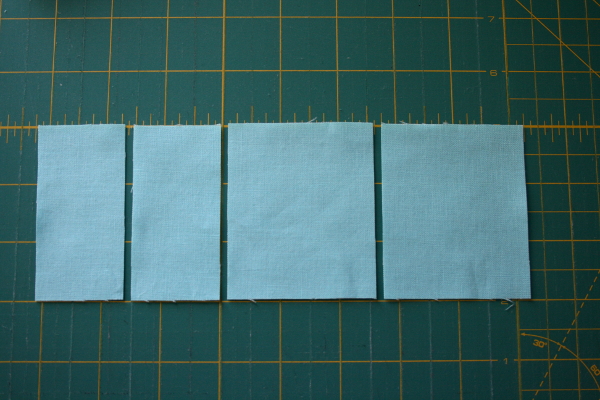
Now carefully cut each piece in half, making them all 1.5 inches tall.

From the three inch strip cut two pieces that are 2 inches wide, then carefully trim 1/2 inch from the top, making them 2 inches by 2.5 inches.
Cut two pieces that are 2 inches wide by 3 inches tall, and one 3 inch square.
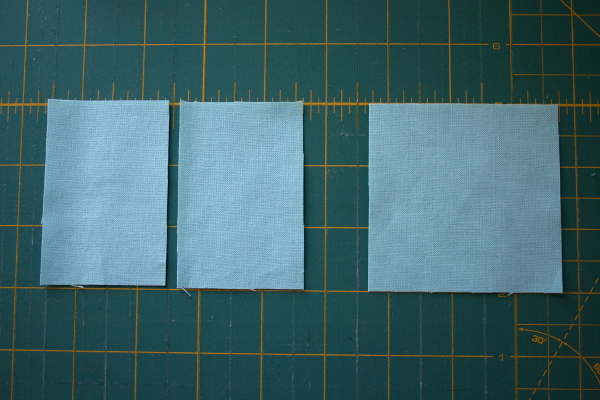
Cut three squares that are 2.5 inches wide and trim 1/2 inch from the top to make them all 2.5 inches square.

And finally, cut a strip that is 7.5 inches long, then carefully cut it in half, making two strips that are 7.5 inches long and 1.5 inches wide.

Each block requires just one of these strips, so if you are using the same fabric for more than one anchor, you only need to cut one of these strips for every two anchors you are making.
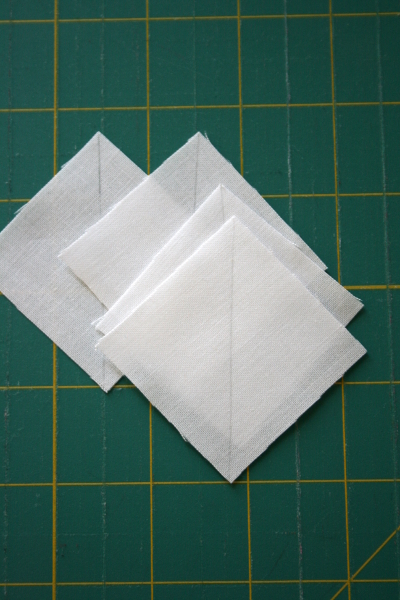
And here are all the pieces of the anchor stacked up together:

From your 3 inch strip, all that is left is a strip that can be used to cut more anchors, and a few tiny scraps, so there is very little waste in this block.

Background Cutting Now for your background fabric! For my background I cut a 2.5 inch strip x width of fabric, a 1.5 inch strip of fabric, and a 4.5 inch strip of fabric.
From the 2.5 inch strip, cut:
2 pieces 1″ x 2.5″ 2 pieces 7″ x 2.5″ 2 pieces 2.5″ square 2 pieces 1.5″ x 2.5″ 2 pieces 3″ x 2.5″ 6 pieces cut and trimmed down to be 2″ square 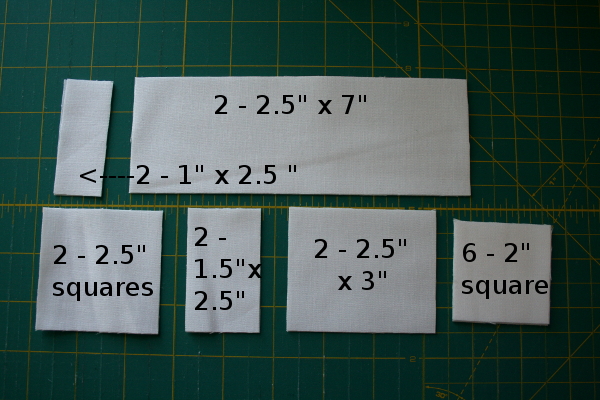 From the 1.5 inch strip, cut:
1 piece 6.5″ x 1.5″ 2 pieces 3″ x 1.5″ 1 piece 3.5″ x 1.5″ 1 piece 1.5″ square 4 pieces cut 2″ wide and trimmed down to 2″ x 1″ 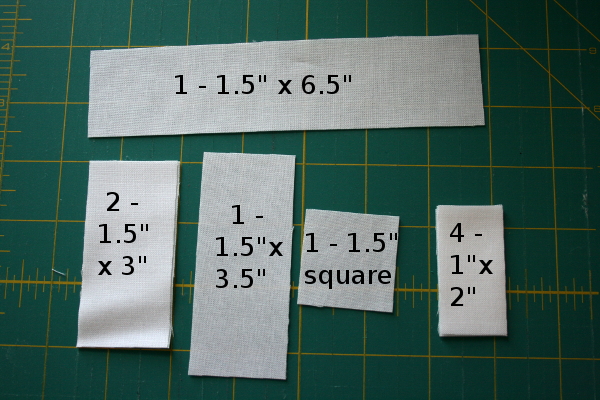 From the 4.5 inch strip, cut:
2 pieces 6″ x 4.5″ 2 pieces 3.5″ x 4.5″ 1 piece cut 3″ wide and trimmed down to 3″ square 2 pieces cut 3″ wide and trimmed down to 3″ x 3.5″ 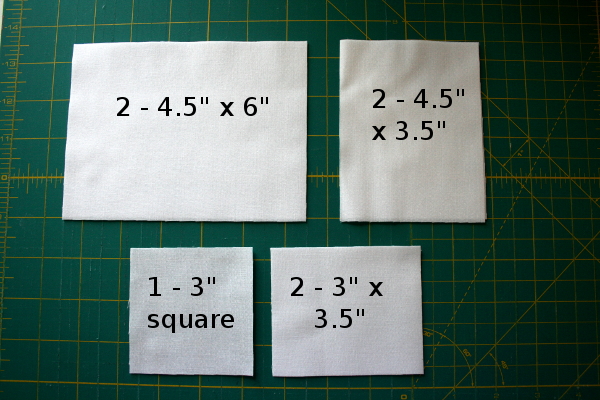 And your cutting is done! I recommend cutting and piecing one block before cutting fabric for an entire quilt.
Let’s start sewing, shall we?
The block is divided into three sections.
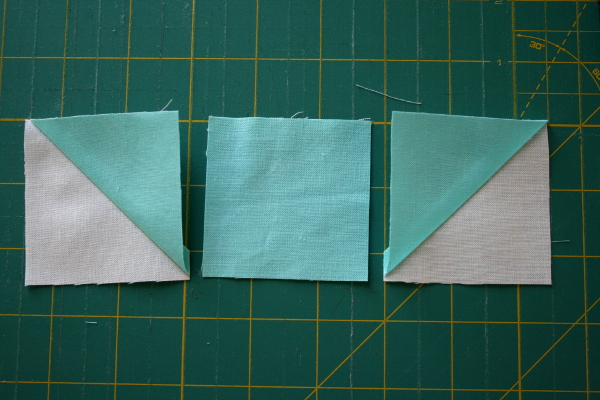
Section 1 Section one is the top part of the anchor. For the first step you’ll need 2 – 2.5 inch squares of background fabric and 2 – 2.5 inch squares of fabric for the anchor. These four squares will be used to make half square triangles.
Trim the half square triangles down to be 1.5 inches square.
Get the 4 – 1.5 inch squares of anchor print and the 1.5 inch square of background fabric and arrange them as you see below to form the top ring of the anchor.
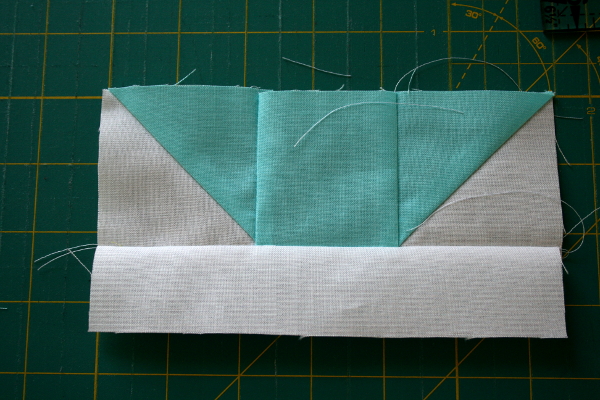
Sew the pieces together into three strips:
Sew the strips together carefully:
Now add the 1.5″ by 3.5″ strip of background to the top:
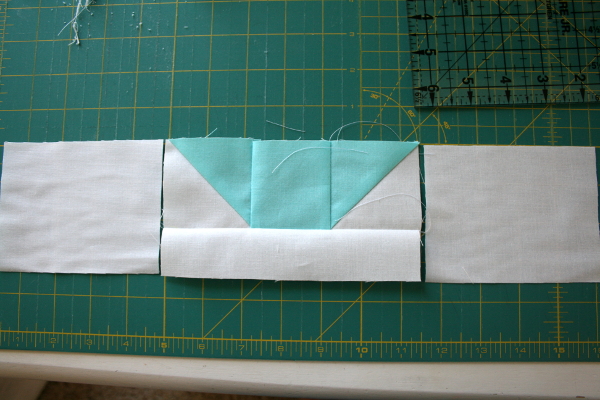
The last step for section one is to sew a 4.5″ by 6″ piece of background fabric to each side.
And section one is complete!
Section 2 This section is the most complex and is divided into four parts.
Sections 2a and 2b These two parts are put together almost identically, except that they mirror one another, so pay careful attention as you piece!
Lay out TWO pieces of each of the following fabrics as you see below:
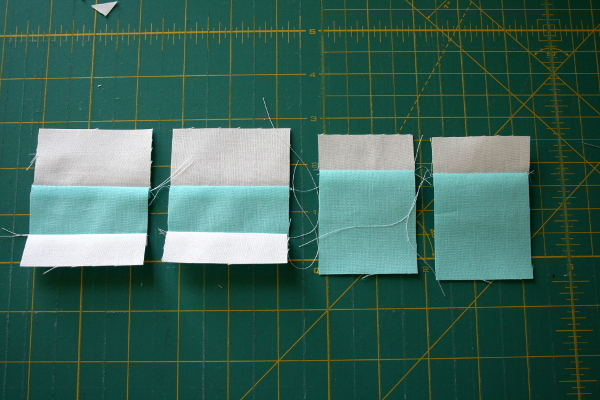
2 – 1.5″ x 2.5″ background 2 – 1.5″ x 2.5″ anchor fabric 2 – 1″ x 2.5″ background and 2 – 1″ x 2″ background 2 – 2.5″ x 2″ anchor fabric 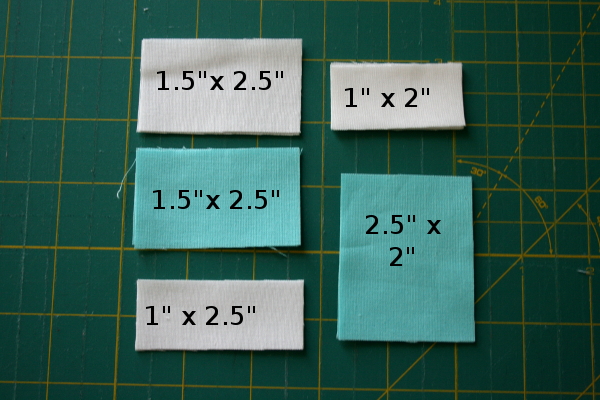 Sew together all the 2.5 inch wide pieces with the anchor fabric in the middle, and sew the 2″ long background pieces to the top of the 2″ by 2.5″ anchor piece as seen below, making two of each:
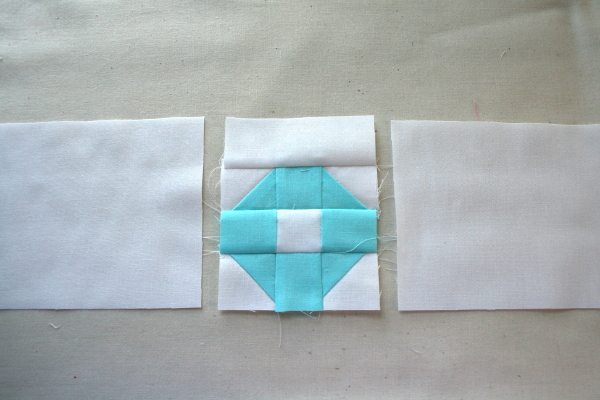
Now take the two pieces that have the anchor print in the middle, and sew a second piece to the left of one and to the right of other as below:
On the outside of each piece, sew a 3″ x 3.5″ piece of background fabric:
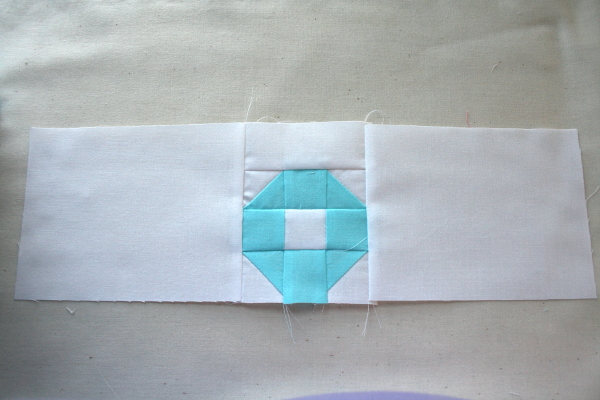
Now attach a 2.5″ x 7″ piece of background fabric to the bottom of each piece:
Sections 2a and 2b are complete. Set aside and work on 2c and 2d.
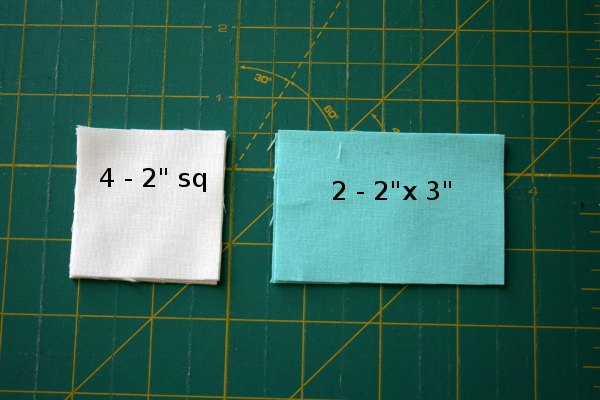
Sections 2c and 2d To begin this section you will need 2 – 2″ x 3″ rectangles of anchor fabric and 4 of the 2″ square background pieces.
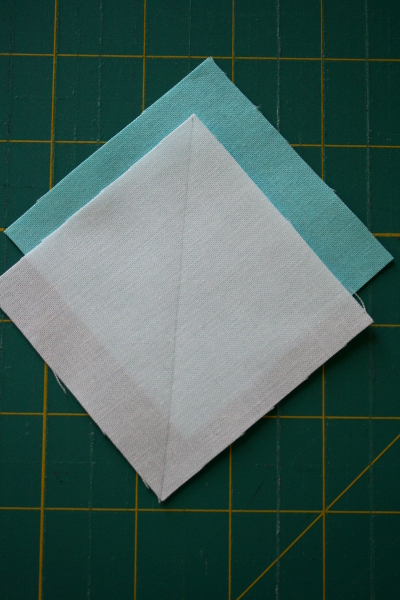
Draw a faint pencil line diagonally across each background square.
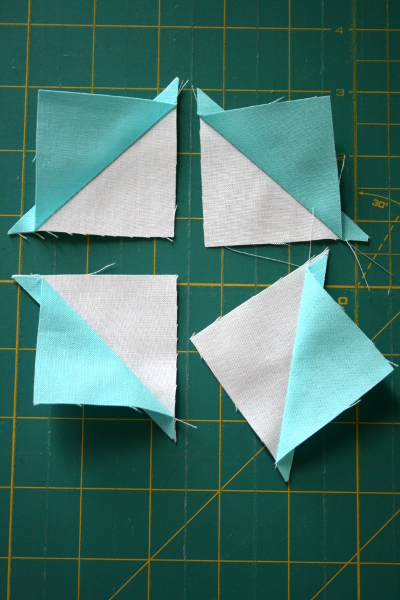
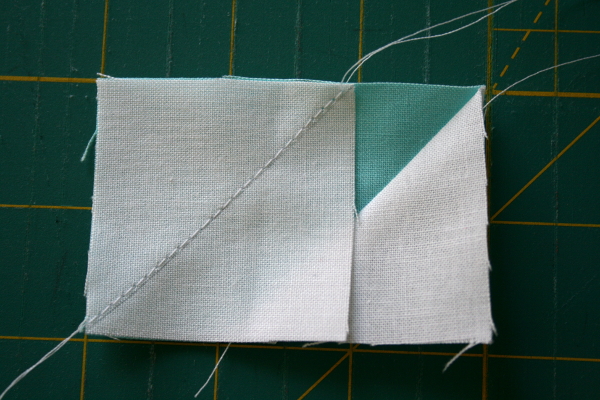
Take one of the 2″ x 3″ anchor fabric rectangles and align a square with the drawn line pointing at the upper right hand corner of the rectangle:
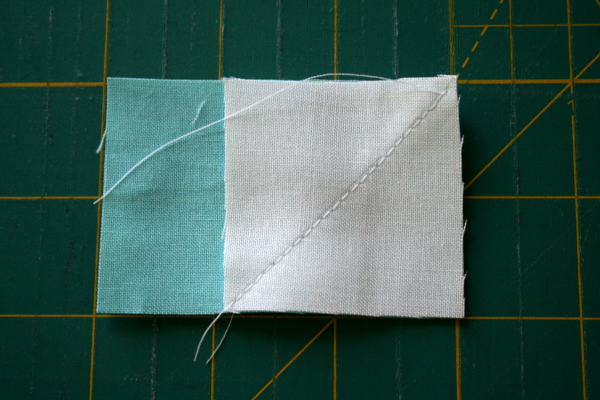
Sew along the line, then trim the bottom right corner with a 1/4″ seam allowance.
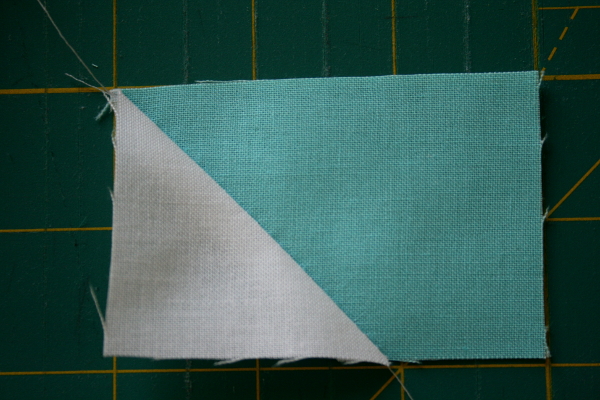
Press open.
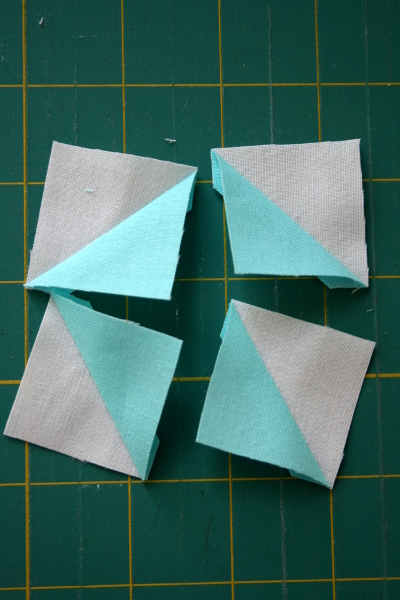
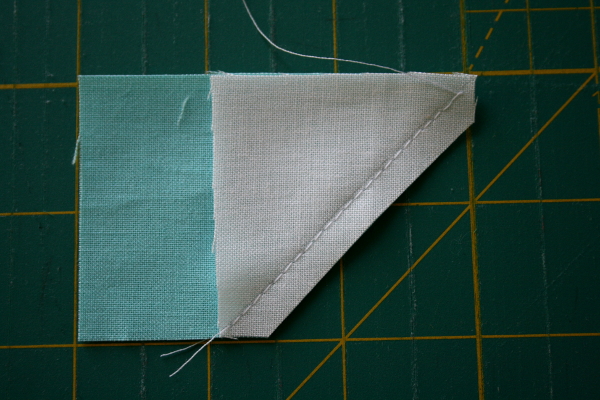
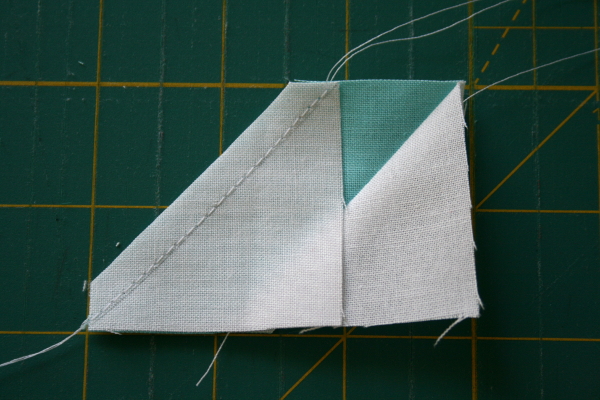
Now take another background square and place it on the rectangle with the drawn line running parallel to the first square, but align this square with the left side of the rectangle. Once again, sew along this line.
Trim the top left side.
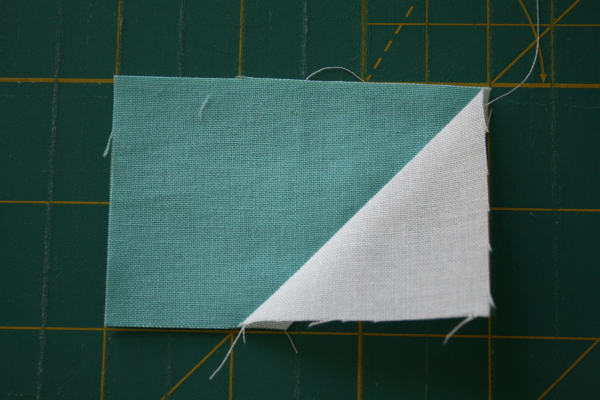
Press open.
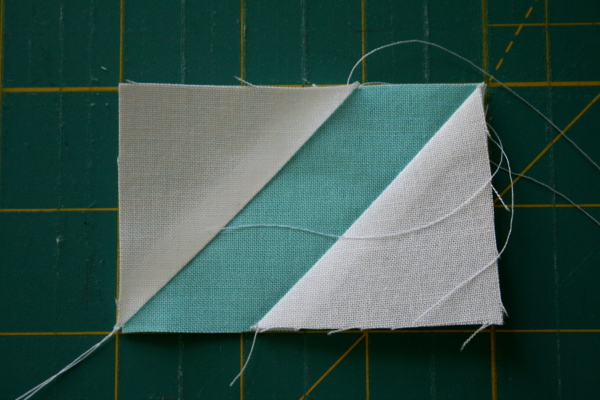
These steps now need to be repeated with the second rectangle and remaining two squares, but must be done with the first square lined up with the left side of the rectangle and the drawn line pointing to the top left corner of the rectangle. Sew, trim and press open.
Do the same thing with the last rectangle, lining it up with the right side of the triangle and the drawn line running parallel to the first. Sew, trim and press open.

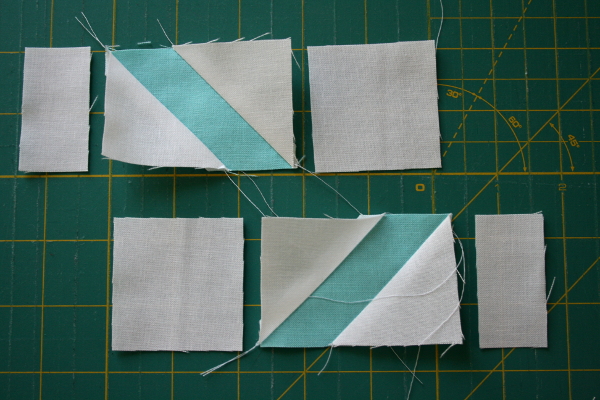
Now we need to sew a background piece to the side of each of these diagonal lines. You will need the last 2 – 2″ square pieces of background fabric and two pieces that are 1″ by 2″. You can see in the picture below that the diganoal pieces run with the piece on the left pointing left and the piece on the right pointing right. The 2 inch squares need to be sewn to the inside of these, and the thin 1 inch strip to the outside of these rectangles.

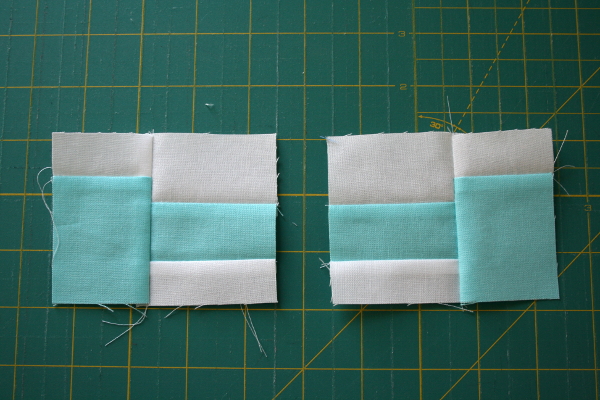
The next step is to use two 1.5″ x 3″ strips of background fabric and two 1.5″ x 2.5″ pieces of anchor fabric.
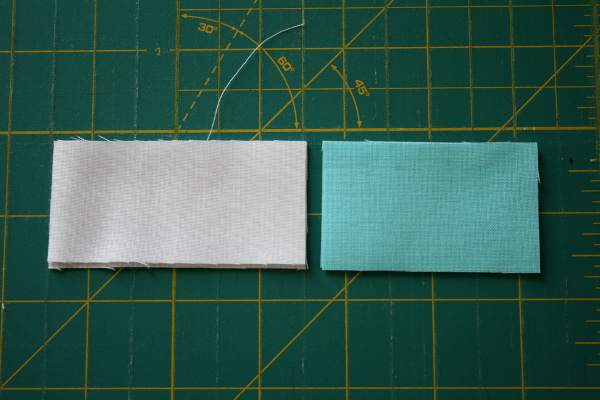
Sew the 1.5 inch sides together.

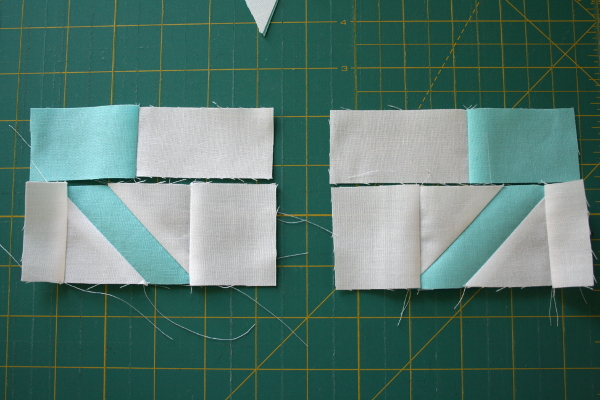
Press open. Flip one strip upside down and sew both to the top of the diagonal strip blocks we just pieced, with the anchor fabric resting at the top of the diagonal strip.
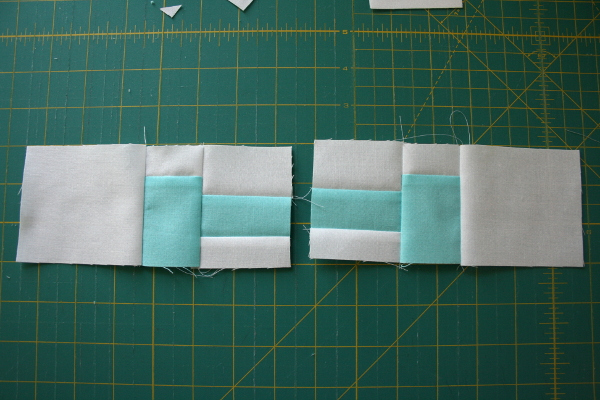
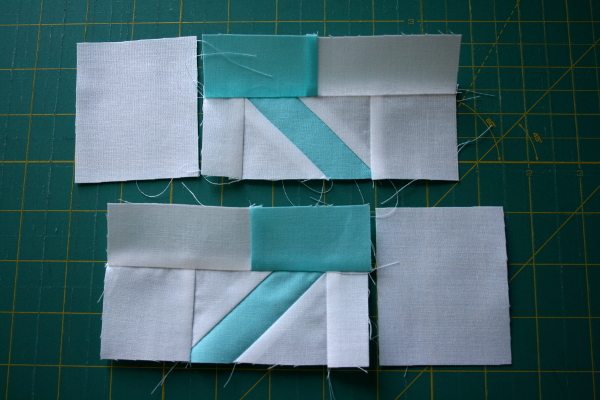
And to the outside edge of each piece, sew a 3″ x 2.5″ piece of background fabric.
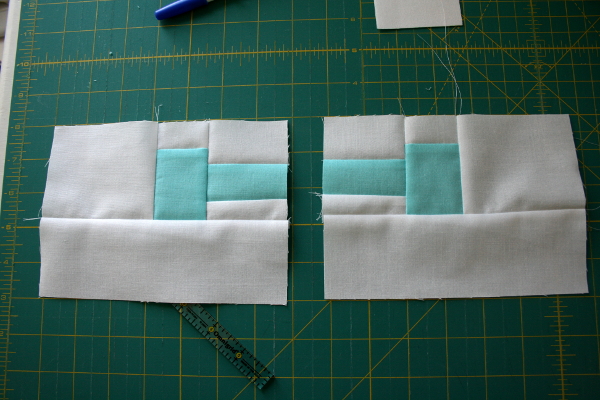
To complete these sections, sew each piece to the bottom of sections 2a and 2b as you see in the picture below.
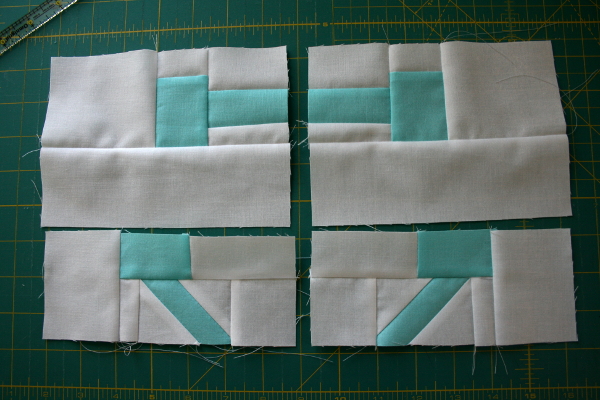
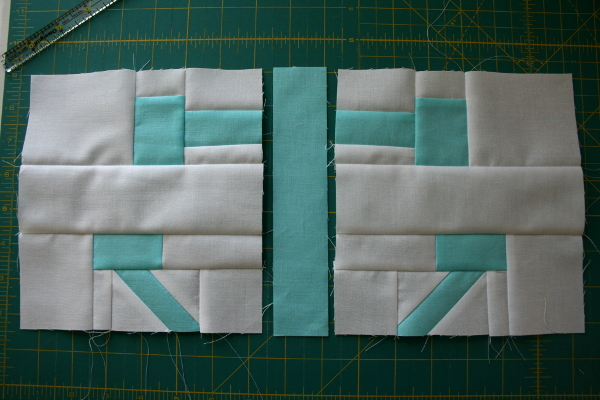
Finally, add the 1.5″ x 7.5″ strip of anchor fabric down the center of these two pieces.
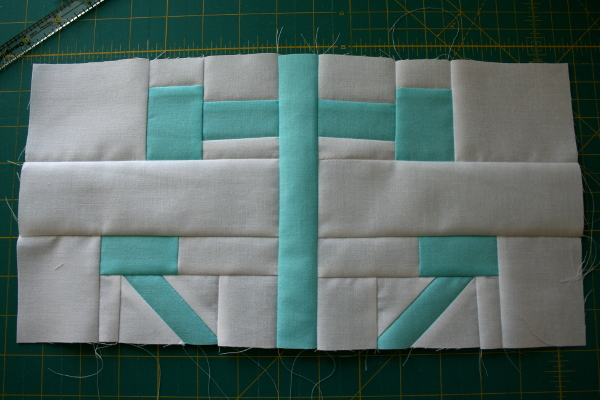
Section 2 is now complete! Time to move to the much simpler and faster section 3.
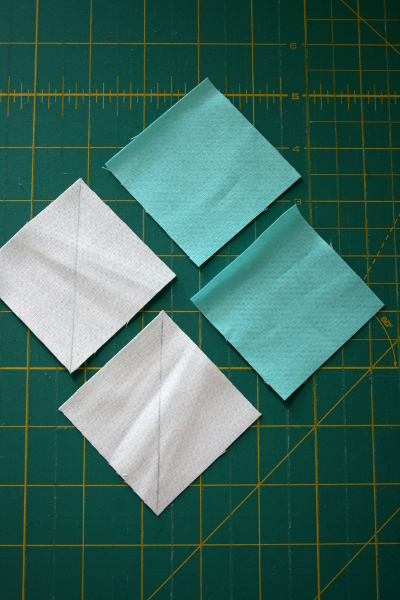
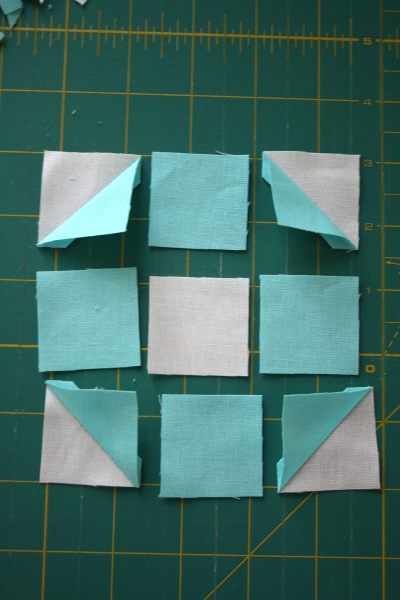
Section 3 This section will use the last of your pieces. Take the 3″ square background square and the 3″ square anchor print square and use them to make two half square triangles. Make sure to use a scant 1/4 inch seam allowance on this so you end up with 2 – 2.5 inch half square triangles.
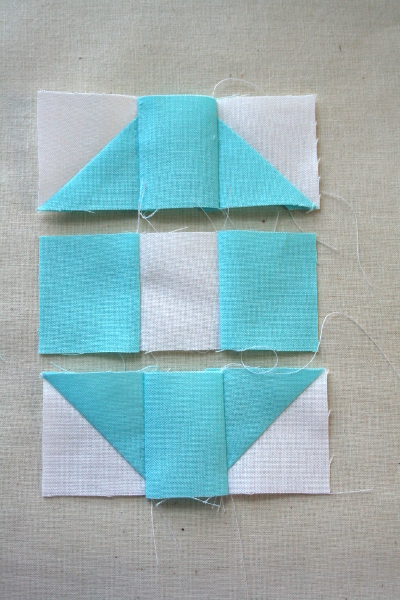
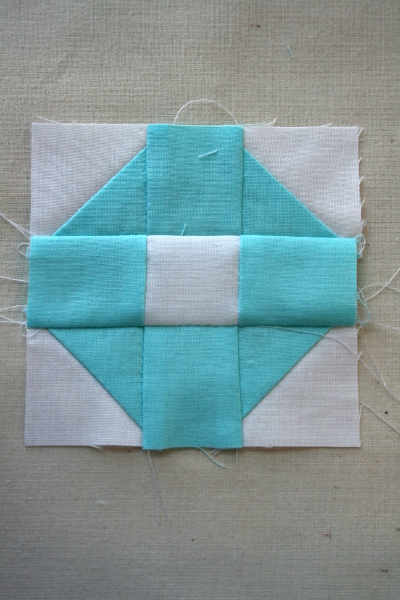
To form the bottom of the anchor, place a 2.5″ square anchor piece between the two half square triangles as seen below:
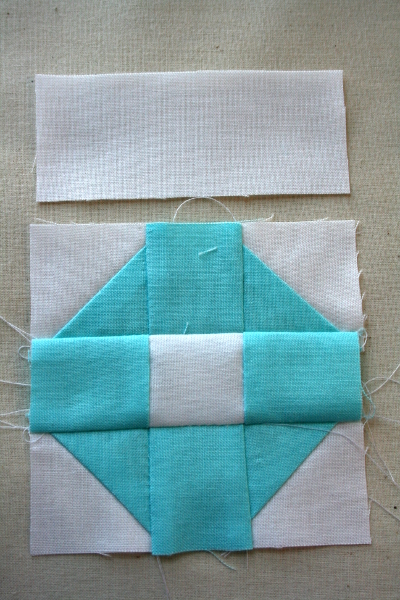
Sew them together, then add the 1.5″ x 6.5″ strip of background fabric to the bottom.
Lastly, add the 4.5″ by 3.5″ rectangles of background fabric to either side. This completes section 3.
Finishing Lay the three sections out with section one on top, section two in the middle and section three on the bottom.
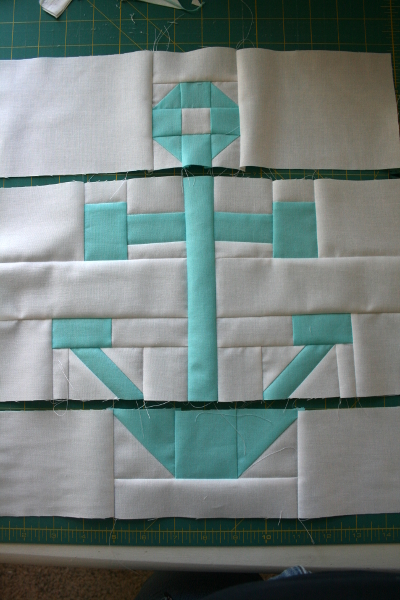
A hint: pin carefully and pay attention to matching your seams well where the anchor fabric needs to line up. These are the seams that matter most, as the seams in the background fabric are different in each section.
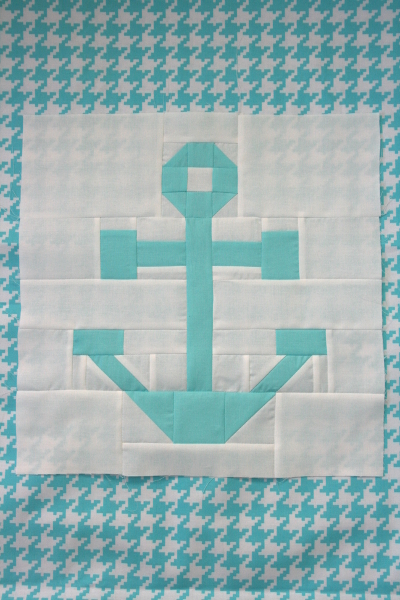
Press open and enjoy your anchor! These blocks measure 14.5 inches square unfinished. The quilt top I made is 4 blocks wide by 5 blocks long for a total of 20 blocks and measures 56″ x 70″. I used a turquoise solid from my stash for 19 of them and pieced the 20th square using Essex yarn dyed linen in black. I pieced a couple of the blocks individually and then cut my fabrics to chain piece the remaining 18 blocks when I was sure I understood the piecing well enough to get it correct.
I hope you make one, and would love to see it!
Jennifer