
Lone Star Tree Skirt Sew Along: Assemble Star & Add Background
Welcome to Week Three of the Lone Star Tree Skirt Sew Along! If you’re just joining us, it’s not too late. The pattern is available here and you can jump in anytime. We’re going to finish our tree skirts well before Christmas!
Last week we sewed our strips into eight large diamonds. This week we will sew the diamonds into a star and add our background. Once again, BE CAREFUL in handling your fabric.
You have a lot of bias edges and don’t want to stretch them!
The video is in two parts again this week. In them you will find my tips for marking, pinning, and sewing – including how to sew a y-seam. You will finish your quilt top this week!
Let’s do this!
That’s it!
Here is one more look at my layout options with my eight diamonds completed:
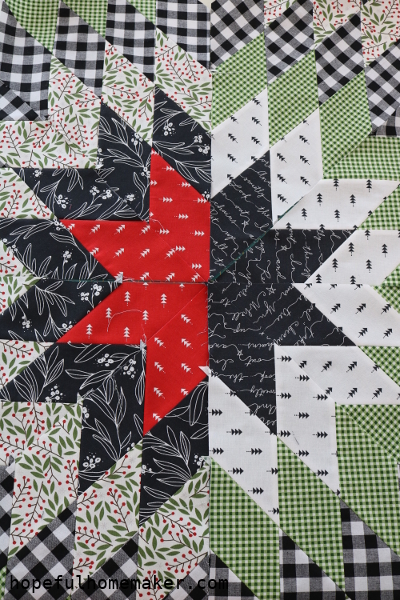
I chose the left option with red in the center, and my diamonds look great when sewn into sets of two.
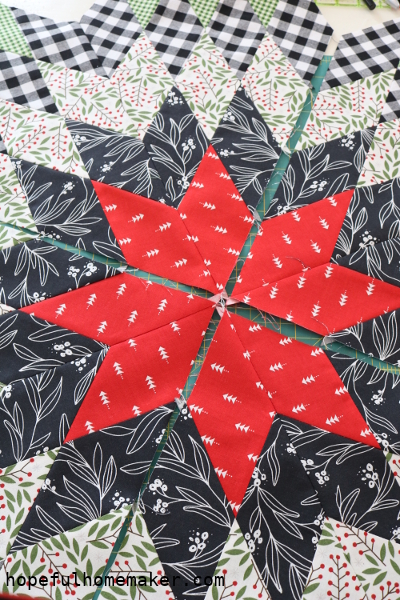
And my finished quilt top after all the background pieces were added and the star sewn together:
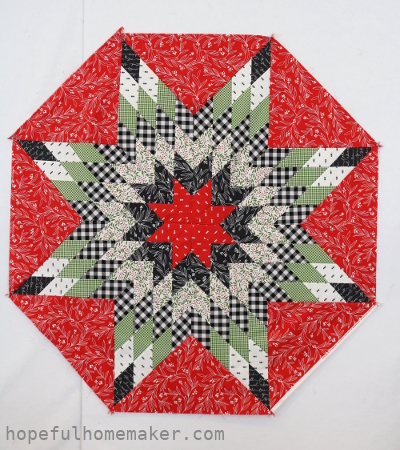
I’m excited about my star and can’t wait to quilt it!
We will meet back here next Monday for week four of the sew along. Please share your progress with the hashtags #lonestartreeskirt and #hopefulhomemaker. I have seen some beautiful stars!
Remember that all posts for this project can be found on the Lone Star Tree Skirt Sew Along page.
Have a great week, and happy sewing!
Jennifer