Ribbon Clothespins

After introducing my new reminder tree to our family earlier this week, my children have enjoyed clipping their information in a fun new place where it’s easy to see.  Tonight when my daughter brought home a one inch wide note about her gymnastics meet (which I had forgotten) we knew right where to put it!  To make it even more fun, I decided to embellish our clothespins with ribbon.  My ribbon organizer is inspiring me to use my ribbon more often.
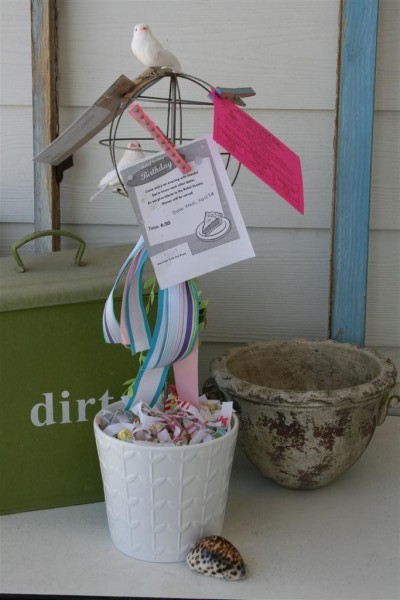

All you need is ribbon, clothespins, scissors and a hot glue gun.
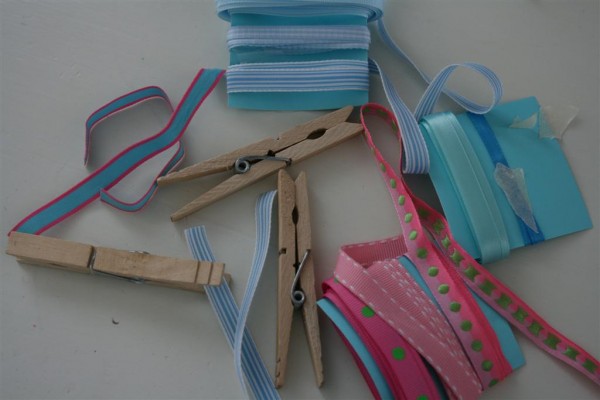

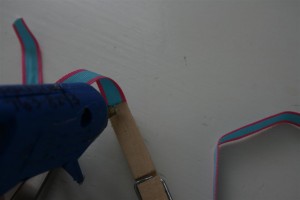
First I measured and cut my ribbon.  With a hot glue gun, I simply went around the clothespin and carefully adhered the ribbon to it.
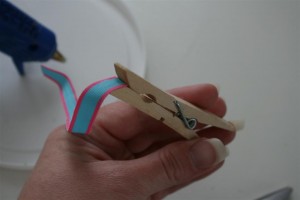

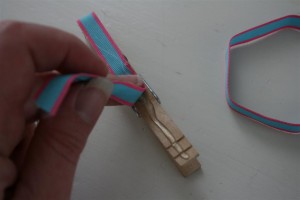
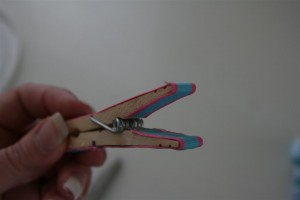


Repeat the process with as many clothespins as you want!
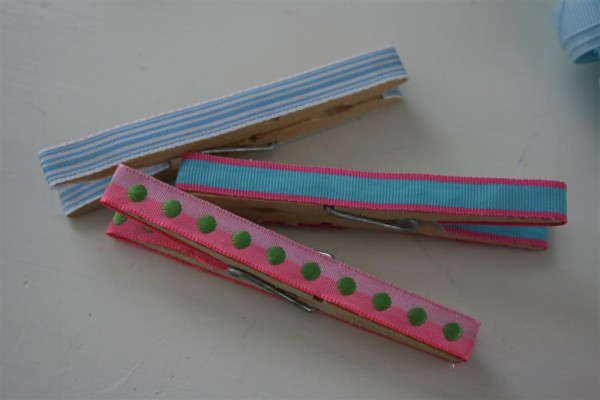

I think they add a fun bit of personality to my topiary-turned-reminder station project.
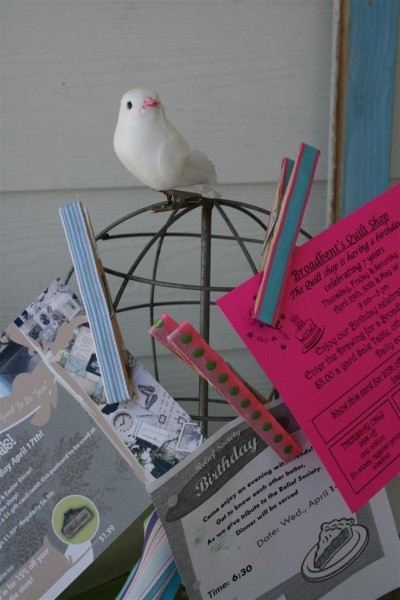

This quick project made me happier than I anticipated.  Suddenly I’m thinking of all the places I can use these cute clothespins!  They will definitely be making appearances in more areas of my house.
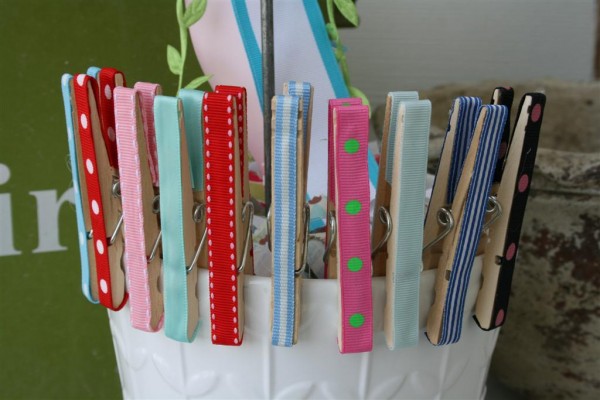
ribbon clothespins

Happy, cheerful, useful.  This was also a no cost project, since I used ribbon scraps and clothespins I had on hand.  If you need to buy clothespins, I found a package of 18 for $1.50 at my local grocery store.  Not bad!  (In this economy, it’s kind of fun to discover things that cost less than $2.00).

What would you use them for?

Jennifer shared at The Inspired Room
Rice and Bean Wraps

This recipe is one of the all-time easiest I’ve made.  It’s also inexpensive, fast, meatless and people really like it.  Oh, and it only requires one pan (easy cleanup!).  It’s one of those recipes that prompt people to tell me, years after sharing it, how often their family eats it.

rice and bean wraps

Ingredients:
1 box spanish rice mix 2 tsp. butter or margarine 2 cups water 1 cup salsa 1 can (14.5 oz) diced tomatoes 1 can kidney beans, rinsed and drained 1 can corn, drained flour tortillas cheese and sour cream for garnish Here we go.  Begin by browning the rice in butter.


Add the diced tomatoes, undrained, as well as the salsa.


Pour in two cups water.


Stir together.  Bring to a boil, then reduce heat.  Cover and simmer for 12-15 minutes or until rice is tender.  Then add the kidney beans, corn and the seasoning packet from the rice mix.


Stir together and cook another 2 minutes or so, just to heat the beans and corn.


Remove from heat.  Spoon onto warm flour tortillas and top with cheese, sour cream, or whatever you’d like!


Serve and enjoy.

rice and bean wraps

My experience has been that children eat this meal well.  I’m  a big fan of using beans in recipes simply because they’re so good for us (did you know that red beans have more antioxidants than blueberries?) and because they’re inexpensive and easy to store.  I try to make at least one meatless meal each week (more often in the summer) and those meals almost always use beans as a source of protein, fiber and vitamins.

I’m also a believer in food storage.  We store a lot of things.  This meal is one of them.  I freeze tortillas and cheese, and everything else can sit on the shelf for a long time.  In other words, this recipe is a winner in many categories.   I hope you try it sometime!

Jennifer

Repurposed Topiary Form

I love it when utility, organization and creativity combine to solve a problem in my life!

That’s what happened today when I put together this little reminder tree for our family.


I’ve been hunting for ways to control the paper clutter that enters my house with my children each day.  I have a file system that I use for the big papers, which works fine if I just deal with the stack consistently.  The little papers are another story.

Most of them come in the form of reminders.  Reminders for Scouts, food assignments, equipment lists for campouts, Activity days reminders, gymnastics info.  Many of the important little details that I MUST see in order for things to run smoothly around here come into my home on 1/4 sheet of paper.

Those papers get lost in the big ones.   I hate it when I find a reminder, too late.  So I’ve been looking for ways to keep track of the little papers.  The fridge is out because too many people like to take the magnets to do whatever with, or rearrange things for fun, and so forth.  My kitchen is very open and all the wall space consists of windows and cabinets (sigh…no awesome chalkboard or bulletin board in my kitchen’s future).   I wanted it in the kitchen, however, because it is the hub of our family activity.

In my basement today my eyes settled on an old topiary form and a light bulb turned on.  I’m going vertical with the reminders!  I gave myself 7 minutes to complete this project (including pictures) from start to finish because I had to pick children up from school.

I took the form and set it in an IKEA pot that was in my pantry.  I weighted it with a bag of dry beans and then filled in the top with some fabric scraps.


The ball on top seemed a bit bare, so I added a couple of birds for fun.


I cut a length of several bright and cheery ribbons (it’s raining today and I need some color to lift my spirits) and tied them in a simple knot at the base of the ball.  It’s ready to go.


A quick collection run around the house turned up some clothespins and we’re in business!  I now have a place to clip those little pieces of paper that are important for about 24 hours at a time before they’re replaced by another.


Amazingly, I didn’t have a single reminder paper for my children that’s current.  Last week was spring break and I guess nobody wanted to bother reminding us about things until after it ended so currently it only holds a couple of coupons I don’t want to forget.


I have high hopes that this little tree will help all of us keep track of those frustrating but essential little papers.  The children were really excited about it when they came home from school.  I’m hoping that they’ll think it’s fun to clip their papers on, and it will be easy to see at a glance which papers are no longer needed.  When a clothespin is not in use it can be clipped wherever, on the ball, the trunk, or even around the edge of the pot.

So there you have it.  Seven minutes to a solution.    It now sits on my kitchen counter, cheerfully awaiting my first reminder of the week (please don’t let us forget the Pinewood Derby later this month).   I was thinking that this could be used for displaying other things, like photos, postcards or greeting cards.  Do you have any other ideas?  What do you think?  What would you use it for?


Note:  to see how I took the clothespins from regular to adorable, check out this post
Thanks for stopping by.  Have a great day.
Hopeful Homemaker linked to DIY Day and Remodelaholic

1 436 437 438 439 440 525