Wonderful Old Crockpot

I just wanted to tell you about my crockpot.  It’s been my friend for 18 years now.
I hope to have it till I die.
IMG_6277 (Large)
It was old when I got it.  My dad bought it for me at a yard sale before I left for college (my Dad and yard sales are an amazing combination.  I swear he can find anything at a yard sale.  I wish yard sales where I live were half as good as they are back home).

At the time, I remember looking at it and thinking, “Wow.  It’s big and it’s ugly, but I might as well take it.”
Now I think it’s beautiful.  And yes, it’s big.  6 quarts!  I love it.

I have newer crockpots, programmable ones, littler ones.   Yet this is the crockpot I use EVERY time.  They really don’t make them like they used to.  It never fails me.  It cooks food the way I want it to, in the time I want it to.  It doesn’t scorch, make its own decisions, or cook too fast or too slow.  It’s just right.  And it holds just the right amount of food for a woman who’s always cooking for a crowd.

This crockpot has cooked dinner for the Cub Scouts Blue and Gold Banquet, potlucks, countless meals for people with lives temporarily upside down.  It’s saved me time and again on a crazy day.  I can’t count how many family dinners it’s helped me with.  I really mean it when I say that I love my crockpot.   It may not be a vintage item that sits out for display, but it proudly parks on my kitchen counter quite regularly to serve as my number one assistant.  In my book, it certainly counts as one of my wonderful old things!

Mom’s Oatmeal Chocolate Cake

Do you have some foods that, when you make them, transport you back to your mother’s kitchen table?
This is one for me.

Last night my Dad was in town, so we had him over for dinner, along with my brother and his wife and my sister and her husband.  I made this cake for them for dessert.

It’s so easy and so wonderful.

Start with 1 cup of oatmeal.
IMG_6294 (Large)
Pour 1 1/2 cups of boiling water over the oatmeal and let sit for 10 minutes.
IMG_6295 (Large)
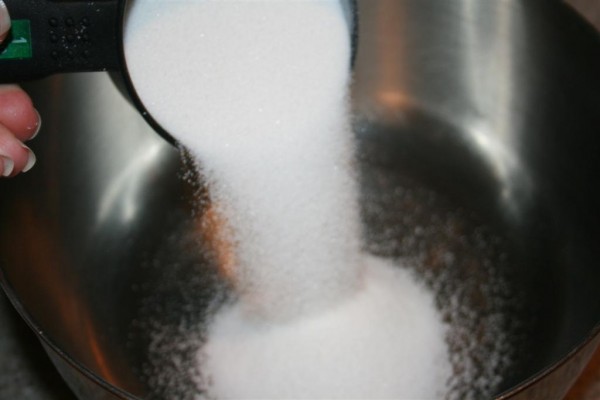
In another bowl (I decided to use my mixer), combine 1 cup brown sugar IMG_6298 (Large) 1 cup granulated sugar IMG_6300 (Large) 1 cup shortening IMG_6301 (Large) Add the oatmeal.
IMG_6302 (Large)
Beat well.
IMG_6303 (Large)
Add two eggs and beat well.
IMG_6304 (Large)
Then add 1 1/2 cups flour, 1 Tablespoon cocoa, 1 teaspoon baking soda and 1/2 tsp. salt.
IMG_6305 (Large)
Stir in 1/2 cup chocolate chips.
IMG_6306 (Large)
Pour into a greased 9 x 13 pan IMG_6307 (Large) Sprinkle the top of the cake with more chocolate chips and some chopped nuts (optional).
I used some pecans.
IMG_6310 (Large)
Bake at 350 for 35-40 minutes.  Remove from oven and cool.
IMG_6320 (Large)
Last night we served it with whipped cream on top.
IMG_6343 (Large)
It’s delicious with ice cream, as well.  Or if you’re like me, you love it plain.
IMG_6347 (Large)
Delicious!  And filled with happy memories of home.

Mom’s Oatmeal Chocolate Cake 1 cup oatmeal 1 1/2 cups boiling water 1 cup brown sugar 1 cup white sugar 1 cup shortening 2 eggs 1 1/2 cups flour 1 tsp. baking soda 1/2 tsp. salt 1 Tb. cocoa 1/2 cup chocolate chips 1/4 cup chocolate chips 1/4 cup chopped nuts Pour boiling water over oatmeal and let stand 10 minutes.   To the oatmeal, add the brown sugar, granulated sugar, and shortening.  Mix well.  Add the eggs and mix well.  Add flour, soda, salt and cocoa to the mixture.  Beat well.  Stir in 1/2 cup chocolate chips.  Pour into greased 9 x 13 pan.  Sprinkle 1/4 cup chocolate chips and nuts over top of cake.  Bake at 350 for 35-40 minutes.  Cool and enjoy!

Making yo-yos

I have a project I’ve been meaning to finish for a LONG time.  It’s a quilt.  It needs me to make some flowers to go on a couple of vines, and it needs to be bound.

I’ve never been a huge fan of yo-yos.  Don’t have a problem with them, but just not in love with them.
Well, it looks like that might have just changed.
At least for this project.

I discovered that Clover makes some plastic yo-yo makers, and I invested in them.
IMG_6096 (Large)
I finally made some yo-yos with them, and now that I know how fast, easy, and uniform they are, I’m hooked!
There are 4 sizes.  The tiny one ends up being around 3/4″ in diameter, the next size up is around one inch, the next is about 1-3/4″ in diameter, and the biggest makes yo-yos that are about 2 inches or a bit larger in diameter.
IMG_6095 (Large)
They’re super easy to use.  In case you haven’t tried these, I’ll show you how simple it is.
First choose your template size and your fabric.  Each maker has two pieces, as you can see.
IMG_6097 (Large)
Lay the piece with the smooth edge (on the left) on a flat surface, with the lip facing you.
Then lay your fabric face down over it.
IMG_6098 (Large)
Now take the corresponding piece and fit it into the piece that is covered with fabric.
You’ll be able to feel it click into place.
IMG_6099 (Large)
Now trim around the edges, leaving a little bit of fabric.
IMG_6100 (Large)
When you’re finished, it should look like this:
IMG_6101 (Large)
Now take a needle and thread it with a corresponding color of thread.
The thread should be longer than the circumference of  your circle.  Knot one end of the thread.
From one of the holes on the bottom, bring the needle through, being sure that it goes through the fabric you left around the edge.  (Your yo-yo maker will come with great instructions, so don’t worry) IMG_6102 (Large) Then take the needle back down through the next hole, going around the entire circle.
IMG_6103 (Large)
When you’ve stitched around the circle, carefully pop the plastic piece on top out.
The fabric should stick to the top piece.
IMG_6104 (Large)
If you turn it over, you can see the stitches going around the outer edges.
IMG_6105 (Large)
Carefully pull the fabric off the template.
IMG_6106 (Large)
You can see that the fabric really holds the shape it had when in the template.
IMG_6107 (Large)
Taking the needle, begin gently pulling on the thread to gather the fabric.
IMG_6108 (Large)
Keep pulling.  All you have to do is sort of tuck the edge of the fabric inside as it gathers.
IMG_6109 (Large)
Slowly but surely, it will take the shape of a perfect circle.
IMG_6110 (Large)
When it’s all gathered together, pull the thread tight and tie a discreet knot in the thread.  Cut it and tuck it carefully inside.  You’re done!
IMG_6111 (Large)
They are quick to make and lots of fun.  Here’s my growing pile:
IMG_6275 (Large)
And guess what I discovered the day after I made a bunch of these?
They just came out with a huge one!  I was so excited.  I tried one, and it is super fun.
The new extra large one is much bigger than the next closest size.  It’s about 3 1/2 inches in diameter.
IMG_6276 (Large)
Now I need to make a bunch more so I can design the clumps of flowers on the quilt.
I’ll show you the finished product as soon as I’ve got enough yo-yos made.
IMG_6113 (Large)
Until then, see what fun you can have with these five sizes!
They also make flower shaped ones, which I have, but I don’t like how small the flower is and how much fabric it uses.  I thought I’d want to use them on the quilt, but I like the round ones best.  I believe that Clover also makes heart shaped templates, but I’ve never tried them.  An online search for yo yo maker will show you what’s available.
IMG_6112 (Large)
There are a lot of quilting and sewing tools that I don’t have and can live without, but these I’m happy to have purchased.  They will be a lot of fun to play with.

1 498 499 500 501 502 516