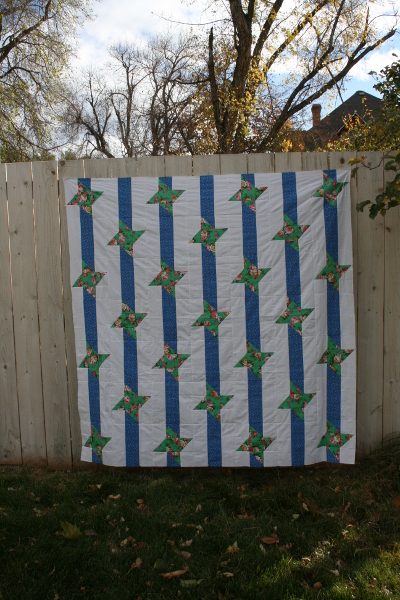
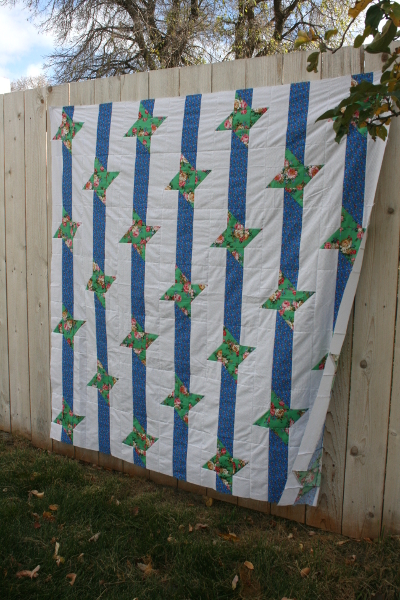
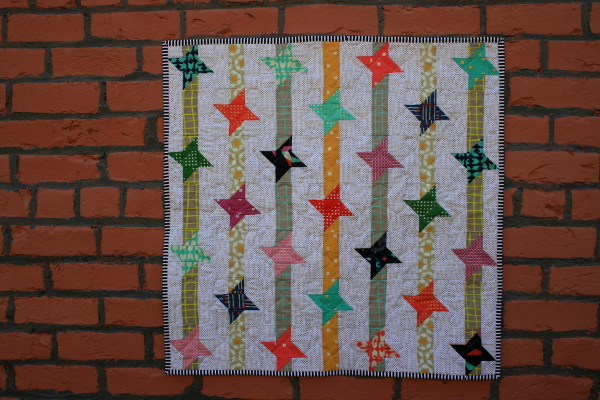
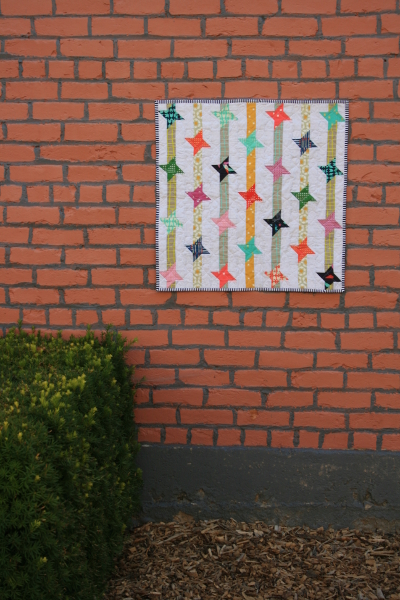
Friendship Star Mini Quilt


friendshipstarmini1

I posted about the American Glory quilt top I pieced, and as I was working on it I wondered what the pattern would look like if it was smaller.  I also thought it would be interesting with a scrappy spin on the fabric choices, so I reduced the blocks and pulled out some scraps.

friendshipstarmini2

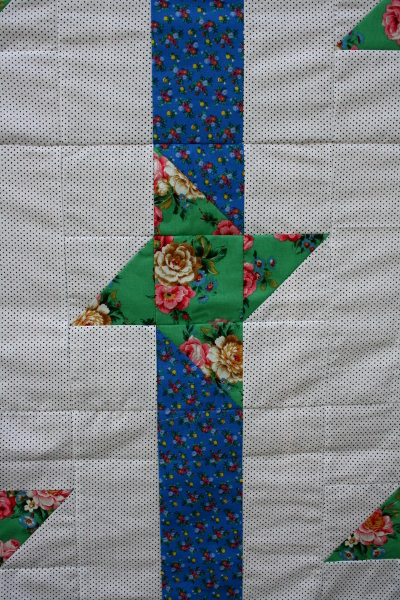
This version required more planning and careful piecing, but I really like the results.  I started with my fabrics for the stars.  For each star I cut:

1 – 1.75 inch square (center square) 2 – 2.25 inch squares (HST squares) The background fabric for these blocks required:

4 – 1.75 inch squares (corner pieces) 1 – 2.25 inch square (HST squares) And finally, I needed:

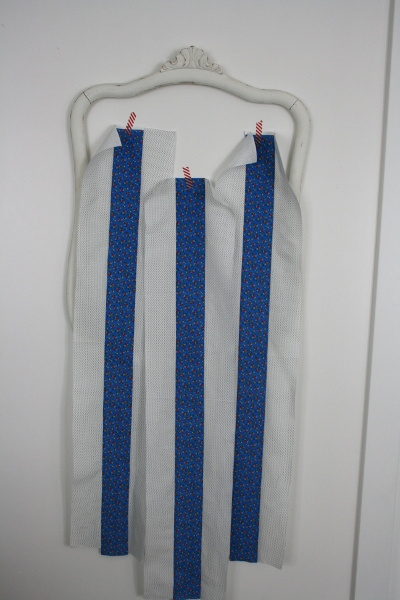
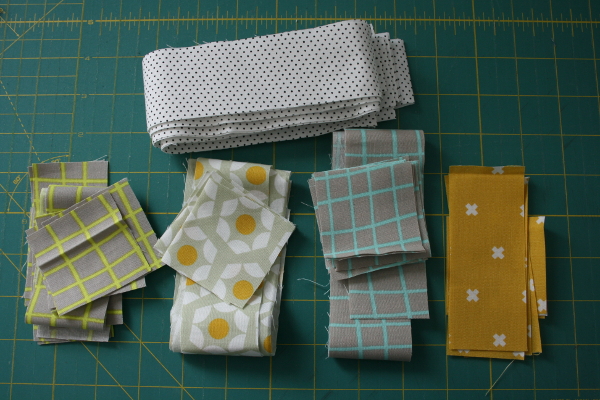
1 – 2.25 inch square of the fabric I wanted to use for the stripe behind the star friendshipstarmini7 
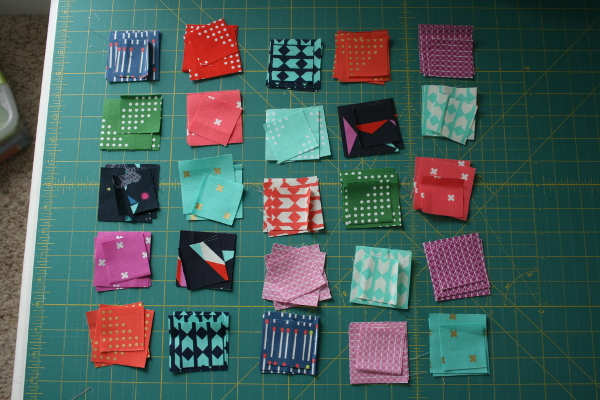
Next I decided to have each vertical strip be consistent, but to alter the fabrics in the strips.  I selected fabrics with grays and yellows in them, to offeset the bright colors of the stars. Where possible, I cut long strips and pieced them the same way I did in my large version of this quilt.  Once again, I used a tiny polka dot for the background.  These strips were all cut at 1.75 inches wide.  For strip piecing I cut them 18 inches long; where I had to find scraps I needed pieces that were 1.75″ wide by 4.25 inches long.  My mini quilt is made with 7 rows of 7 blocks, so some vertical columns needed 4 stripe blocks and others needed 3.  From each of these fabrics (the stripes) I also needed 3 or 4 – 2.25 inch squares for the half square triangles in the star block.

friendshipstarmini8

Once the stripe blocks were finished, I placed everything where I wanted to be certain I was pairing the proper background stripe with each star to make the half square triangle blocks.

friendshipstarmini9

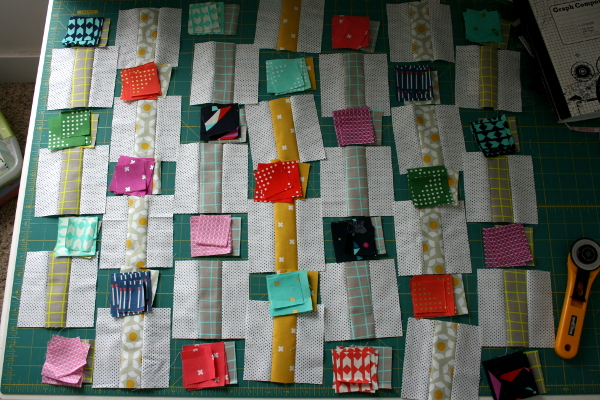
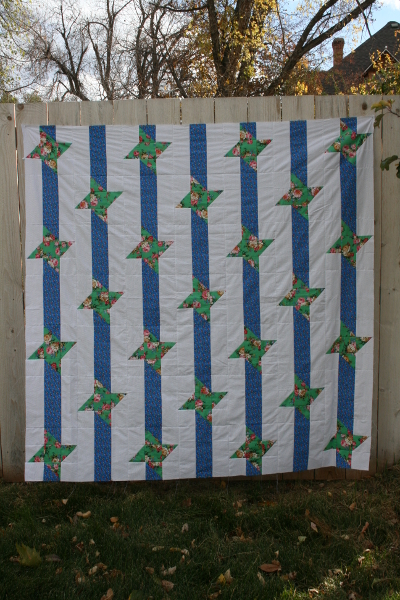
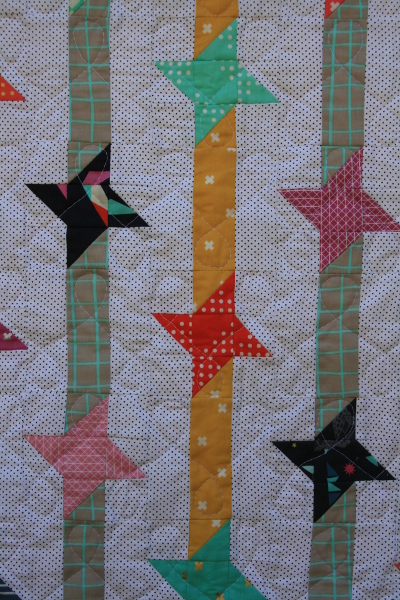
I chain pieced as much as I could without confusing myself too much, and it came together fairly quickly.  I will say that the arranging of all the fabrics did make this version take much longer than the larger version did, where I had only two fabrics to worry about, but the results were worth it.  As with the larger quilt, I found it far simpler to piece the the top together in vertical rows.  Joining the rows together was fast with fewer seams to match because the stripes were already taken care of.  The results, however, were worth it!  I like this pattern much more in miniature – the negative space doesn’t bother me so much, and the stars really stand out against the more neutral stripes (another change from my first version).  These scraps are also a reminder of a special project, and of thoughts & feelings I don’t want to forget, so I’m glad to have them in this mini quilt.  It now hangs in my laundry room, where I’ve claimed a wall for hanging minis.

friendshipstarmini3

I quilted it in loopy horizontal rows.  The backing is an alphabet print from Maude Asbury which I think compliments the Cotton + Steel fabrics nicely.

friendshipstarmini4

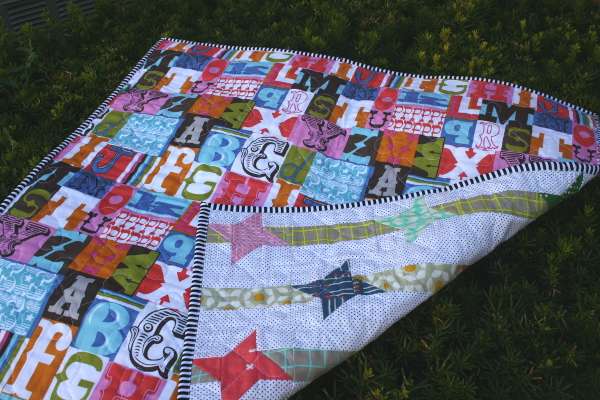
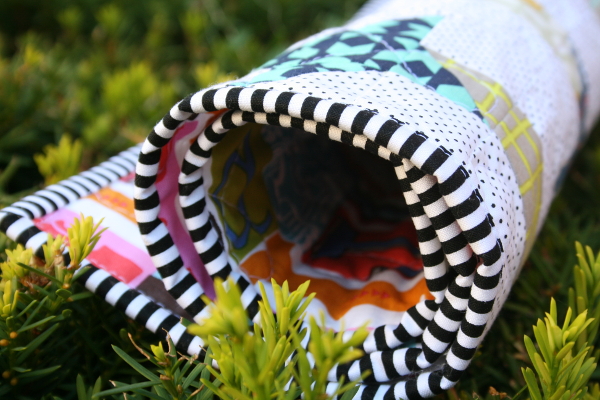
Once again, a black and white binding is the perfect finish for this colorful project.

friendshipstarmini5

This mini quilt measures almost 27 inches square.  Each block is 4.25″ square, so they’re nice and little!  This is the second mini quilt I’ve made, and I’ll admit that before I made one I wasn’t sure I thought they “counted” as a finished quilt (why do I do things like that?!?).  They seemed too small and easy.  Having made this mini quilt and my mini hexagon beehive quilt (one of my favorite projects ever!), I’ve learned that tiny means time, and both of these quilts took honest effort to make.  While the quilting of them is very quick, dealing with such little pieces requires patience and careful piecing for accurate results.  SO, they totally count!

friendshipstarmini6

Hooray for a finish!

Jennifer

“American Glory” Pattern Review


americanglory1

I really enjoy my membership in the Utah County Modern Quilt Group (UCMQG).  You won’t find a nicer group of women anywhere, and it is always fun to see what everyone is making.  I feel like I’ve had very little time to sew in the past few months, so I haven’t been sharing much at our meetings.  In September I had the opportunity to pick a pattern/tutorial on the Moda Bakeshop site, make it and review the pattern.  We shared what we did at UCMQG.  I was assigned the holiday section of the website, and one of the first things I realized about that category is that really, the majority of the projects aren’t strictly “holiday” projects.  Most of them are made from holiday fabric, which is why they’re labeled as such, but the actual design could be used in many other ways.

Knowing I was very low on time for sewing, I chose something that looked really fast and simple to make.  This pattern comes from the 4th of July sub-category, and is called “American Glory.”

americanglory2

If you check out the original post, you’ll see that the stars are a beautiful blue paisley, and the stripes are a red solid.  I was tempted to go in search of a lovely blue floral and replicate the color scheme of the quilt, but decided in the end to practice what I preach and try it in a non-holiday color scheme.  I’m really loving this green floral fabric by Jennifer Paganelli for JoAnn’s, so it was my starting point.  I found a small scale blue floral for the stripes and went to work….

american glory3

So, here’s my review:

1.  The pattern is well-written and easy to follow.

2.  This is a very fast project, made with only two kinds of blocks, especially with the adjustments I made in piecing it.  It would be a great first quilt for teaching someone the basics of quilting, and would also be a good introduction to half square triangles.  Learning to choose two fabric prints that pair well in color and scale would come with this project.    This would also make a really quick baby quilt (at 5 x 5 blocks).

3.  The more rows I added to the quilt, the more I liked it.  I ended with seven rows of seven blocks.  There is a lot of negative space in the quilt, which made me happy I used a tiny polka dot print instead of a solid.  For some reason I noticed the negative space more in my own project than I did in the photos on Moda Bakeshop.  I’m hoping that quilting it will make me like that more.

4.  IT’S MUCH FASTER AND EASIER TO PIECE THIS QUILT IN VERTICAL ROWS THAN IN HORIZONTAL ONES!  Make each vertical stripe separately and them sew them all together.  You’ll have fewer seams to match as you sew your rows together, making accuracy easier to achieve.

Hints:

1.  Sometimes the Moda Bakeshop tutorials don’t use the most effective fabric cuts, because they are designed to use Moda precuts.  I felt that this quilt fell into that category.  It called for a layer cake of both the stripe fabric (in my quilt, the blue stripes) and the background fabric.  However,  if you use layer cakes, you’re cutting two 3.5 inch strips from the ten inch square, leaving 3 inches of wasted fabric.  In my opinion, that is not the most effective use of fabric.  I think this quilt makes more sense using yardage, which was what I did.  Because I did that, I could do a lot of strip piecing.  Half of the blocks in the quilt were finished in just a few minutes by sewing together three strips and then cutting the blocks down to 9.5 inches square.  If it helps, I got 4 blocks out of every strip set (2 – 3.5″ strips x WOF background and 1 – 3.5″ strip x WOF blue).

americanglory5

2.  I also chose to chain piece my friendship star blocks together, which helped with speed.

3. I chose to make my quilt to square in size because I wanted to have a star in every corner of the quilt.  I like the symmetry of it.

So, the top is done and backing & binding are waiting.  This will make a great play quilt for my daughters, who love to play outside with their neighborhood friends.  I’m also excited to practice my free motion quilting on this quilt top.

american glory4

I am grateful to have had an assignment and a deadline, which meant I did a little sewing!  Also, stay tuned to see another, miniature, scrappy version of this quilt – I really loved how it turned out!

Jennifer

Sawtooth Quilt Top


sawtooth4

Last weekend the sudden need to eliminate a project in my life took hold, and the first thing I thought of was this Sawtooth quilt.  I cut the fabric in January of 2013, intending to use fabric from my stash and to complete a simple project in between more complex ones.  Despite the simplicity of it, I only managed to work on some half square triangles here and there without ever really committing myself to the project.  It’s been sitting in strips for over a year.  I got it out on Saturday thinking I had just 14 long seams to sew; it turned out I had sewn three strips – of 32 half square triangles – together wrong, so I ended up spending time with the seam ripper and the project took longer than I’d planned.

sawtooth2

But the quilt top is done!  Looking at these photos, I realize the quilt doesn’t have as much contrast as it appears to have when I’m working with the fabrics up close.  It won’t be a favorite quilt, but I’m sure it will be used and loved like all the others I make.   I like all the yellow and am really looking forward to quilting this one.  I’m going to practice feathers!  I also pieced the backing and binding with high hopes for finding time to quilt it very soon.

sawtooth3

Early this year my sister Kristen challenged me to finish 14 quilts in 2014.  It sounded reasonable at the time, but  I didn’t anticipate how demanding life would be this year, and so far I’ve only finished 5 projects.  I’d better work much faster if I’m going to reach my goal!

1 4 5 6 7 8 53