Scrappy Hunter’s Star Tutorial (a layer cake friendly pattern)
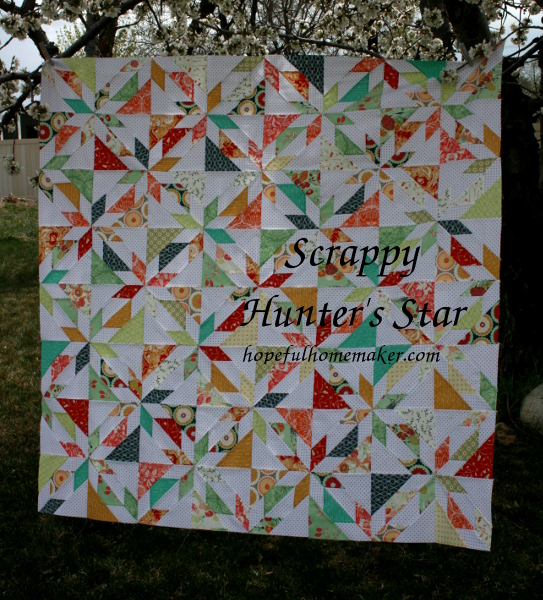
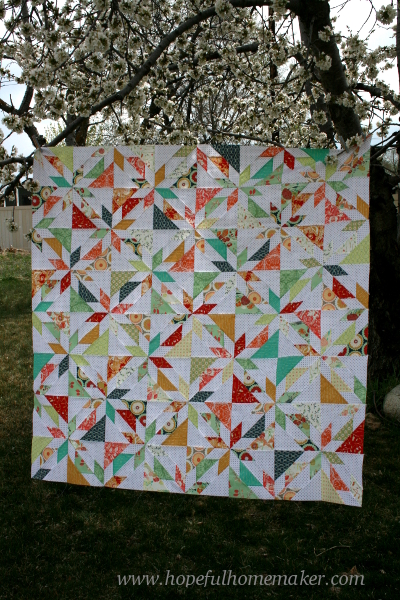
Early this week I shared photos of my scrappy version of a Hunter’s Star quilt . I realized when I was finished with it that I had stumbled on a great pattern for a layer cake, so I thought I’d share a quick tutorial.
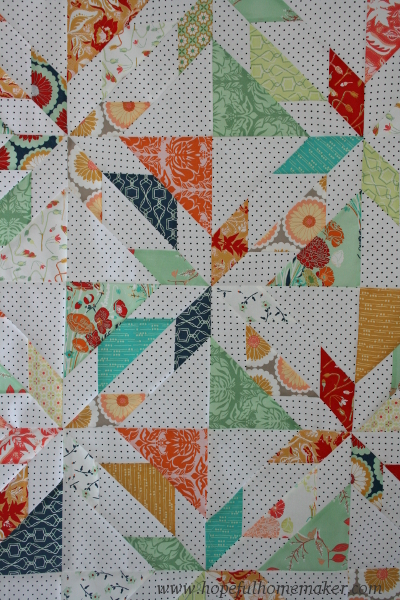
Fabric requirements:
Each 8 pointed star in a hunter’s star quilt is made up of four smaller blocks. For the quilt I made, which is 64 inches square, I used:
32 – 10 inch squares of various fabric prints (which is most of a layer cake, although I cut my own squares from Bonnie Christine’s Reminisce collection for Art Gallery Fabrics) 32 – 10 inch squares of background fabric (2.5 yards of fabric. I used a black on white swiss dot print for my background) Note: If you’re using a layer cake, you should have 40 prints to choose from. I recommend eliminating those prints that most closely match your background fabric so they don’t get lost in the quilt and make it more difficult to see the pattern. For example, if you’re using a solid white background and the layer cake has a solid white print in it, or a white print with a very light pattern on it, you may want to skip it. That said, you can see in the photo above that I did use some low volume prints from the collection in my quilt top. I liked using a few of them, but there were other prints that were even softer which I set aside and didn’t use in this project. Also, because I used a swiss dot print for my background, the softer prints I included still looked different from the background fabric.
If you want to increase or decrease the size of the quilt, know that one print and one background square will make two blocks. Four blocks will give you a full star in the center of the blocks.

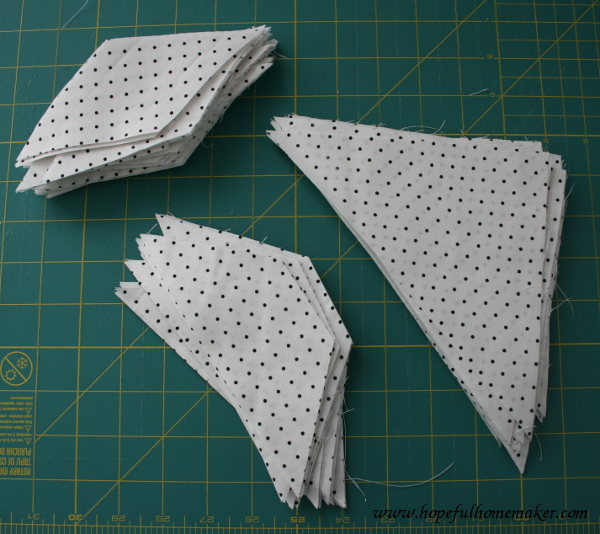
To make the blocks, we’ll be cutting triangles, diamonds and trapezoids from each 10″ square. To begin, cut your square in half diagonally:

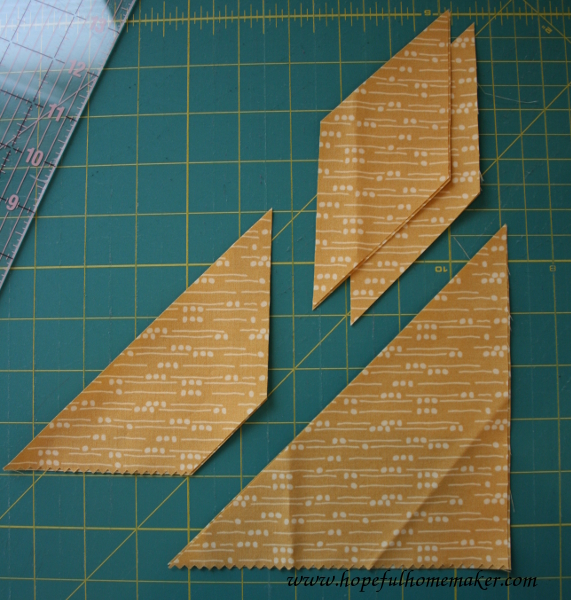
Place the two triangles on top of one another for faster cutting. With a ruler, measure 2.5 inches from the edge of the diagonal cut, as seen below with the small ruler. Notice that on the bottom left and top right edges of the triangle my cutting ruler is more than 2.5 inches from the point of the triangle. The measurement that matters is the one from the diagonal edge we just cut.

Cut along that line, creating two smaller triangles and two trapezoids.

Set aside the triangles and line the trapezoid strip up carefully on your cutting mat. I prefer to use my 45 degree angle lines and I line the far right edge up on an inch line. From that far right side, measure into your trapezoid 2.5 inches once more.

Cut your fabric, creating two diamonds. Repeat once more, measuring another 2.5 inches from the cut you just made and cutting two more diamonds.

From one ten inch square you should now have two triangles, four diamonds and two trapezoids.
Repeat this process with the remaining prints.
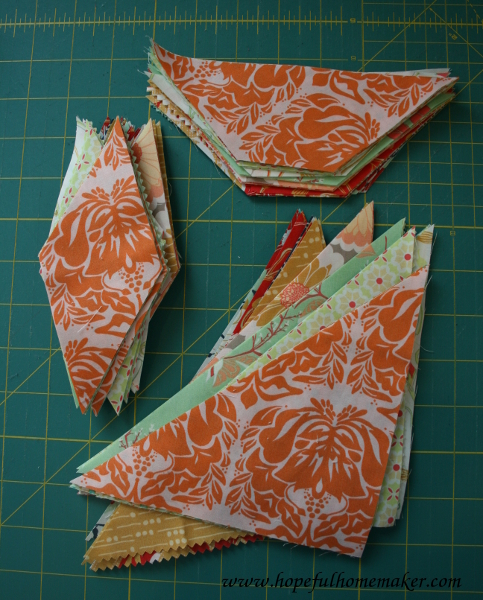
Now do the same thing with all the ten inch background squares. Every piece in this quilt is cut the same way.
Once all the shapes are cut you can put together a block. Think of each block as having two triangles. One uses background fabric for the diamonds and prints for the triangle and trapezoid, and the other triangle uses background fabric for the trapezoid and triangle and the diamonds are prints. Below is the layout for a hunter’s star block:
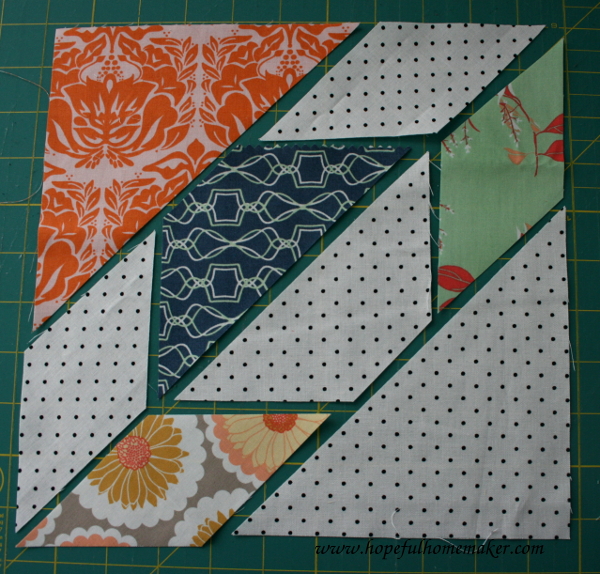
Sew the diamonds first. Carefully turn a printed diamond piece right side down and carefully line it up with the right side of a short end of the background trapezoid. Because we are sewing angles, do not line the pieces up from corner to corner. Instead you will need to have a tiny (1/4 inch) triangle sticking out on each end. This will allow your fabrics to line up straight after you sew them together.
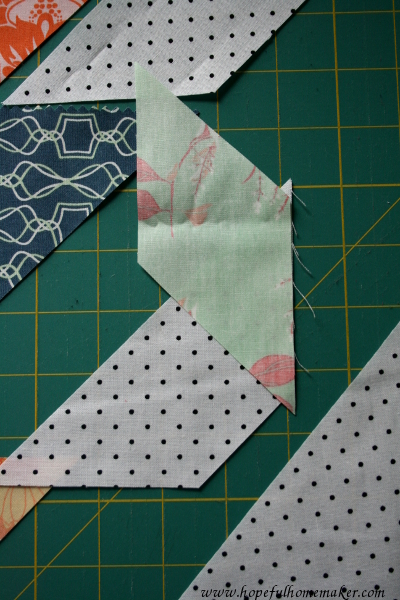
Here’s a closer look at how to line them up. Sew the pieces together using a 1/4 inch seam allowance.
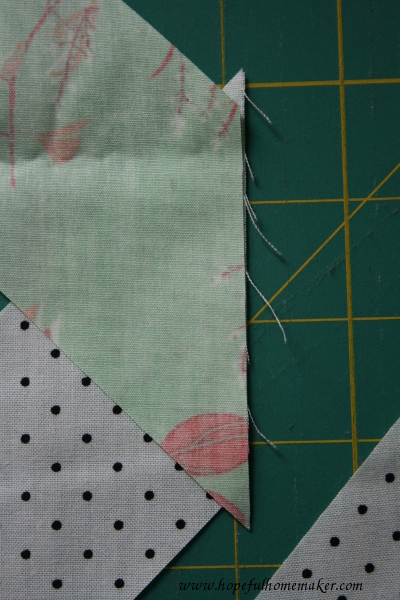
Do the same thing with the diamond at the other end of the trapezoid.

Press the seams open. *In this quilt I pressed every seam toward my printed fabrics so the seams would nest when pieced together.
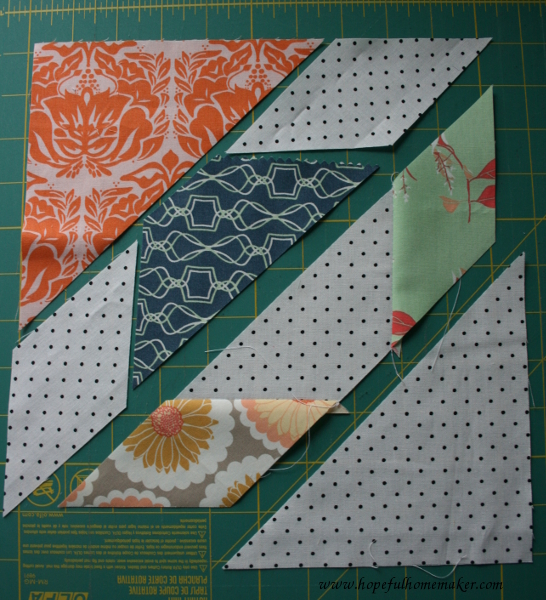
Now repeat the process, sewing the background diamond pieces to the printed trapezoid piece, again ironing the seams toward the print.
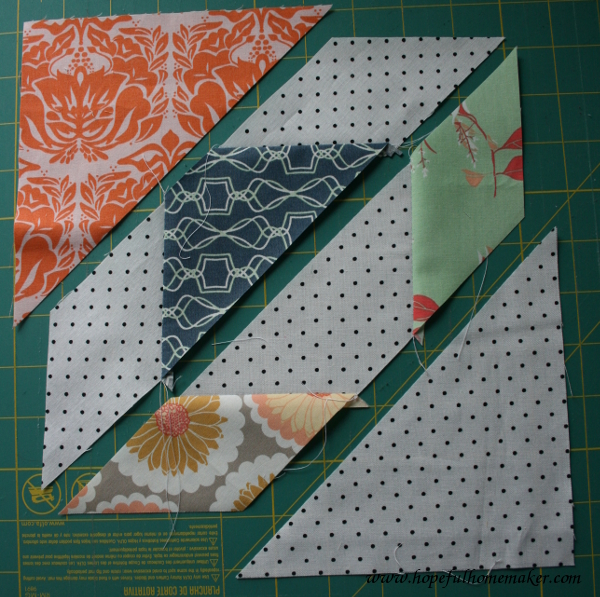
Next, sew the triangles to the trapezoids. Once more, you will have the corners of the triangles hanging over the edges of the trapezoid piece. On this seam the overhang will likely be more than 1/4 inch, which is fine. Just try to center the triangle as best you can with equal overhang on each side. sew together.
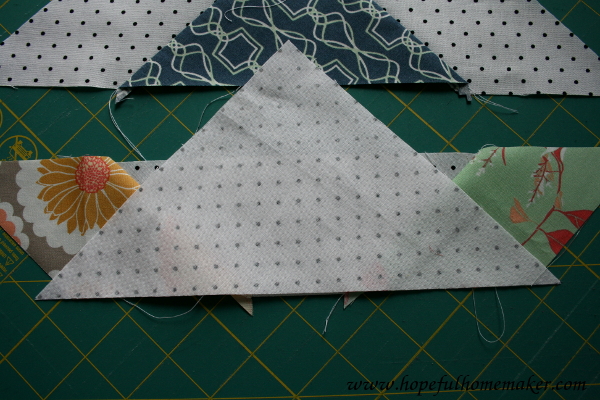
Repeat with the other half of the block. Note: At this point, I ironed the seams toward all the printed fabric triangles, and on the other triangle I ironed my seams toward the printed fabric diamonds. If you do this, your seams will nest when piecing together your quilt top.
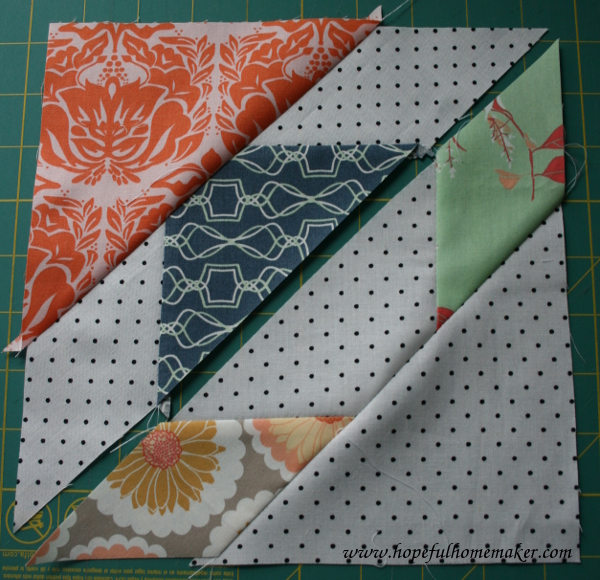
And finally, sew the two triangles together. The most important thing is getting the seams between the diamonds and trapezoids to nest together (see where my pins are).
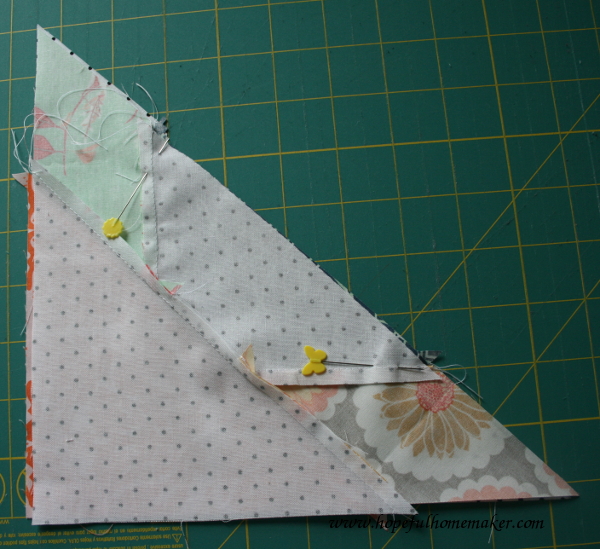
Once again, press the final seam toward the printed fabric diamonds. Your block is finished! Once you have the hang of the block, chain piecing them together is very fast and efficient. I chain pieced a diamond to one end of every trapezoid, then did the same thing with the other end. Finally I chain pieced all the triangles on and then sewed the blocks together. It really is a very fast finish.
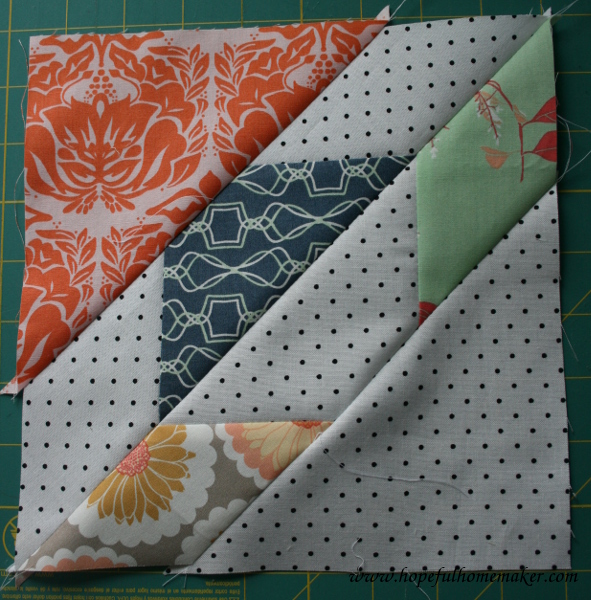
Trim each block carefully to 8.5 inches square and you’re done with the block!
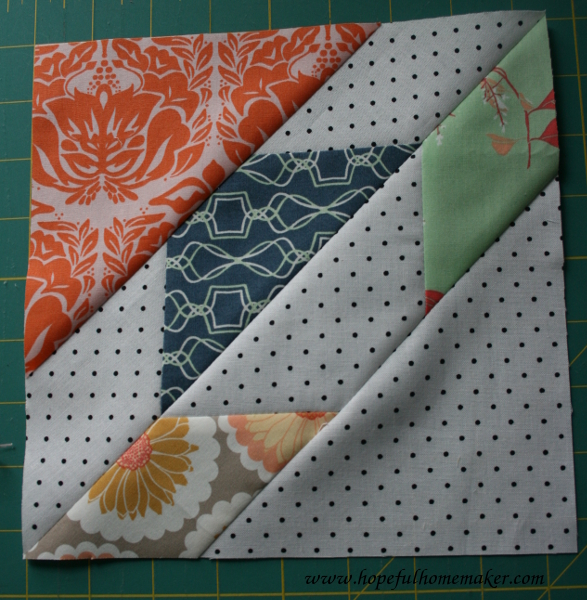
When you’ve pieced your first four blocks together you will see the 8 pointed star that emerges in the corners of the blocks. This really is such a beautiful block.
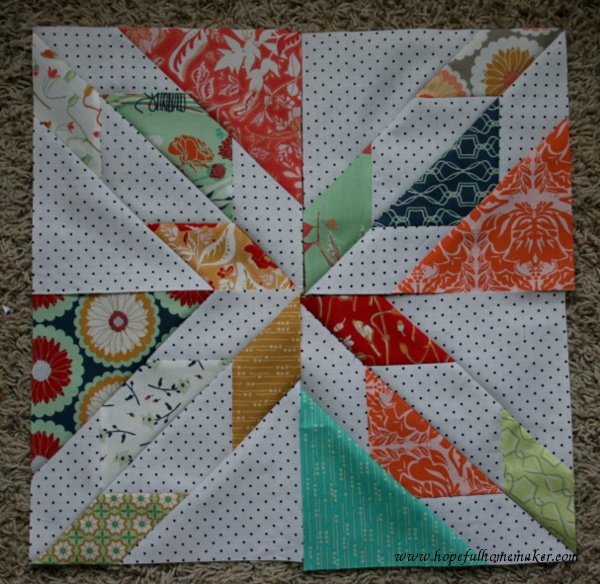
Lay out your blocks in 8 rows that are 8 blocks long (each block making 1/4 of an 8 pointed star) and sew them together, paying careful attention to matching the seams on the diagonal points and in the corners. Sew the rows together and you have a finished quilt top! I really love the scrappy look of this quilt, as it freshens and updates the traditional hunter’s star block in a beautiful way. If you want to see what a quilt would look like in just two colors, you can see my traditional red and white Hunter’s Star quilt here . You can also find pictures of a Hunter’s star made with solid linen and a single print in my Hunter’s Star pillow here . There are so many different ways to interpret this quilt block. I hope you have fun!
Jennifer

