Placemats turned Tablerunner DIY

I was at the dollar store with my friend when I ran across these placemats.


I liked their crisp blue and white color and the stripes.  But I really didn’t need placemats, and remember:  at my house things like that have to come in sets of ten!  Then I remembered my laundry room.  I’ve been looking for a super simple runner to put on top of one of my dryers……..  you know how those  moments go, when inspiration strikes.  I put four of them in my cart and brought them home!

I decided to rip open the seam on the short ends so that I could stitch the entire length of the runner closed at the end, and have it look like one long, tidy seam.


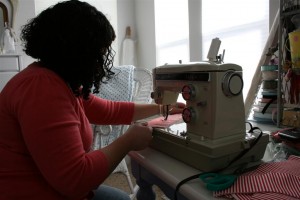
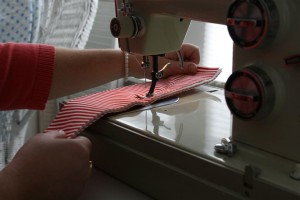
I left the long sides as they were and decided not to unstitch them.  I could handle a thick seam if I ironed well, I thought.  Since this cotton weave frays easily, I also didn’t want any raw edges underneath.  I placed right sides together and stitched the four placemats together lengthwise.  Notice I’m not sewing the sides with the open seams.


Next I pressed the seams open on the back and flipped the runner over to press it once more.


Finally I folded the long sides back under and stitched them up!  This is what the back side of the runner now looks like, with the thick seams connecting the placemats together pressed open, and the hem down the side folded over the seam and stitched up.


The top side of the runner looks like this.  I like how tidy the seam looks.


Ta-da!  Only about 30 minutes in all.


Excitedly I took it to my laundry room to see how it would look…..


Perfect!  I wanted something to protect the top of my dryer from being scratched by my vintage metal basket, and I wanted it to fit the style of the room.


Just what I pictured.  I really like how it’s so simple looking.  The placemats are 100% cotton, but not a quality weave.  Still, they work great and have the look of linen toweling.  The perfect fit for my space.


Simple, inexpensive, and done in 30 minutes.  I like it!
You could do this same thing with lots of materials instead of placemats.  You could use kitchen towels, linen napkins, vintage handkerchiefs, etc.  The sky is the limit (that’s the way creativity works!).

HH

I love white paint!

I really, really love white paint.  It can take anything and make it beautiful.  Well, most anything.
I’d been slowly accumulating old picture frames from the thrift store, so I finally laid them all out and got to painting.

They started in various shades of gold and brown. (And, yes, that’s an obnoxious vinyl tablecloth that I use to paint on) IMG_8439 (Large) This gold one I’m really excited to work on.
IMG_8438 (Large)
I quite like this frame, too.  Great detail!
IMG_8436 (Large)
And this mirror was a find!
IMG_8437 (Large)
I confess I did no priming at all, just went right to work on them with my white paint and a brush.
I just paused every hour or two to brush another coat over everything until I was satisfied…

Just look at this great collection now!
IMG_8497 (Large)
I’m so pleased with how they turned out.
IMG_8498 (Large)
IMG_8499 (Large)
IMG_8500 (Large)
Most of them will end up on my dining room walls with family photos in them, but the mirror is already on the wall!
IMG_8495 (Large)2
Sigh.  I love my living room…
IMG_8496 (Large)2
I also love this sweet face.  She had to try one on.
IMG_8501 (Large)2
I just wish you could hear her little voice saying “cheese” IMG_8502 (Large)2 “Tseez!”  I love those pudgy little hands…
IMG_8504 (Large)
IMG_8503 (Large)2
Too bad you can’t hang that on the wall!  Ka-yoot!

Brinley’s Blossoms baby quilt

My brother and his wife had their first baby last week.  A little girl.  They named her Brinley.
IMG_8396 (Large)2
We visited them this week, and she is adorable!  She looks just like her mommy, and is smaller than any of my 8 babies were.  I loved holding her, even though it made me feel like my baby is huge.

We took Brinley her baby gift, a rag quilt that I designed and named “Brinley’s Blossoms” in honor of my niece.
I managed to get a little tag on it before we wrapped it up:
IMG_8389 (Large)
I used the same fabrics in this quilt that I used in the one I made for my baby a few months ago.  I really loved this line!
(Forgive the poor pictures; we were in a hurry and it was night and I couldn’t take any decent ones.)
IMG_8391 (Large)
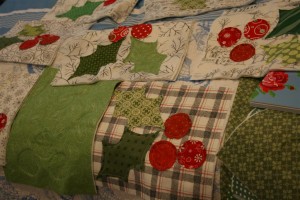
It’s a simple strip quilt with some flowers appliqued on top and in a couple of block strips.
IMG_8392 (Large)
It was a lot of fun to make, and gratefully it was a quick project (or I might never have finished it!)
I always love the way the backs of rag quilts look:
IMG_8393 (Large)
There’s no plain side with quilts like these!

And, finally, here is a close up of a new idea I tried, and I must say I’m really excited about it both because it turned out so cute and because it’s truly my very own idea!  I’ve never seen anyone do anything like this before:
IMG_8390 (Large)
A scalloped border!  I love the way it turned out, and I think that I’m going to try another quilt using this idea.
I’ve got something in mind….

1 486 487 488 489 490 522