
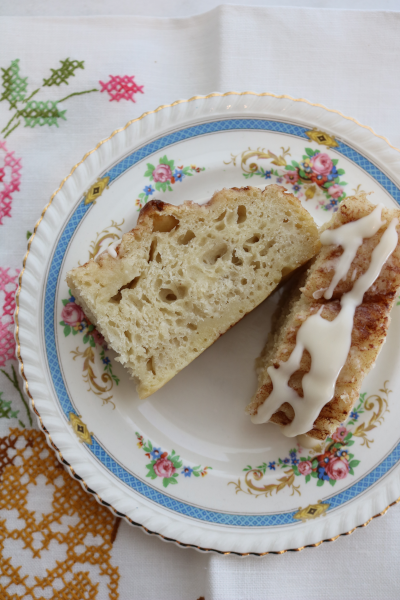
Cinnamon Focaccia Sourdough Bread
I get to gather with my family this weekend, and I am so excited to spend time with them. We’re pausing the busy-ness of life to be together and listen to General Conference, and it’s like we have an extra holiday weekend. I love this time so much, and food is always an important part of gathering a large family! For almost 18 months now I’ve been baking all our bread. Baking sourdough is a huge part of that, and the rhythm of this practice has been so good for me. Today I’m sharing with you my recipe for cinnamon focaccia sourdough bread.
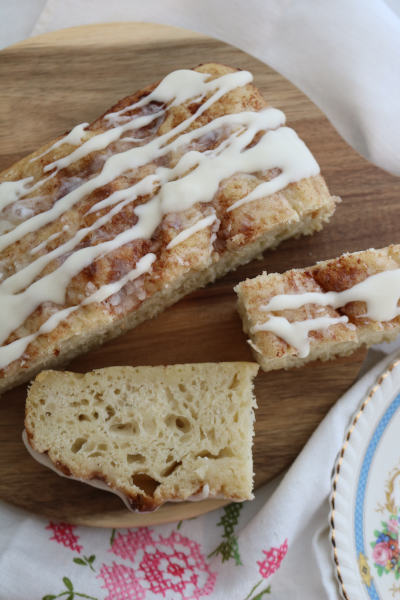
It’s delicious and chewy and my new favorite cinnamon roll style treat. In fact, I don’t want to make cinnamon rolls anymore after making this! It’s SO fast and SO simple, and also has much less sugar. Plus you get the health benefits of sourdough. Yum.
All you need is a sourdough starter, plus water, flour, salt, butter, sugar and cinnamon. I also like to mix up a simple glaze using powdered sugar, milk and vanilla to drizzle over the top. My sister asked me for this recipe last week, and I couldn’t find it until late at night I remembered where I’d written it down. So now I’m putting it here, where it can always be found! I hope you’ll enjoy it. We surely do!
Cinnamon focaccia sourdough bread
100 g active sourdough starter
440 g water
1 tsp salt
515 g all purpose flour
stick of melted butter (but I cut that in half)
1.5 Tb cinnamon
4 Tb sugar
Mix flour and salt in one bowl, then mix water and starter in a second bowl until starter is somewhat dissolved. Pour into flour mixture. Mix together. This is a wet dough.
After about 15 minutes, do one stretch and fold of the dough. It will be very wet, and that’s fine. Cover with a damp cloth and let the dough rise overnight (or all day). I typically let mine rise on my kitchen counter, but you will need to decide what to do in your climate/kitchen.
Butter a deep 9 x 9 or similar sized baking pan (I use a deep dish 7 x 11 pan) and pour dough into it.
Melt butter and mix cinnamon and sugar into it. Drizzle over dough. Wash hands and poke holes all through the dough.
Bake at 425 for 30-35 minutes. Let cool for a few minutes and remove loaf from pan. Top with glaze (powdered sugar, milk or cream, and vanilla).

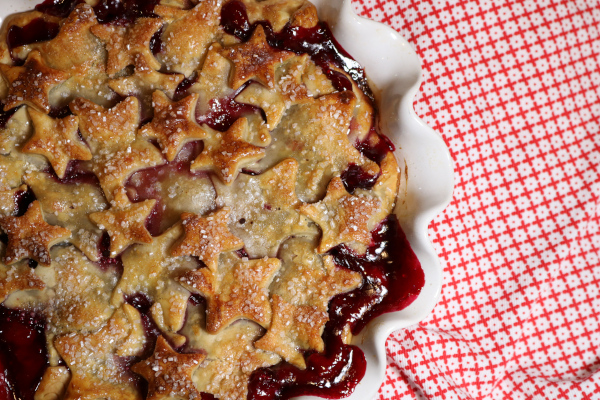
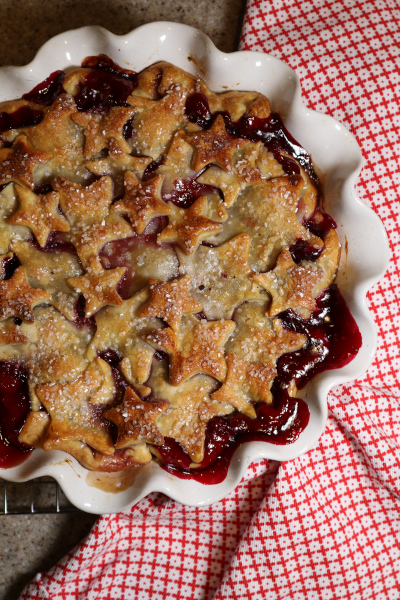
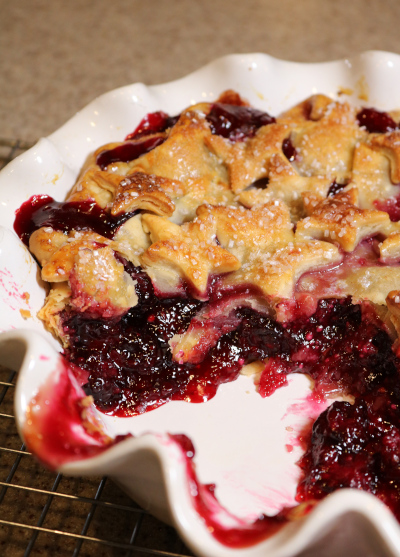
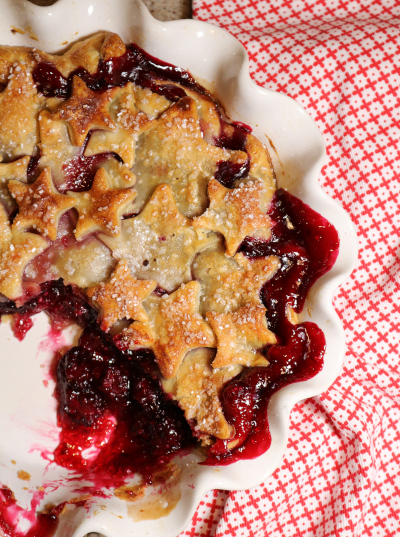 I hope you enjoy this blackberry pie! Happy baking!