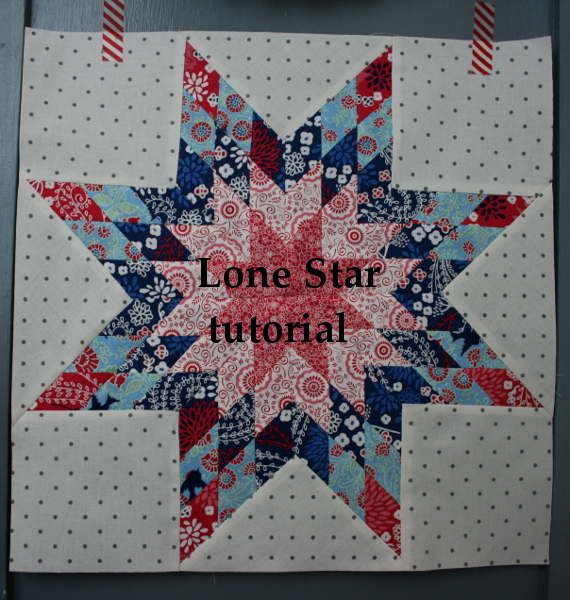
Lone Star Block tutorial
I mentioned here that I made a center block for three different medallion quilts. Two are Marcelle Medallion blocks from the medallion pattern in the Liberty Love book. The third was for the design as you go Medallion project we’re currently working on with the Utah County Modern Quilt Group. For that block I decided to make a lone star block.
I had some requests for a tutorial, and this is it – my method for strip piecing to make a lone star quilt block. I’ll be excited to see how it’s used!
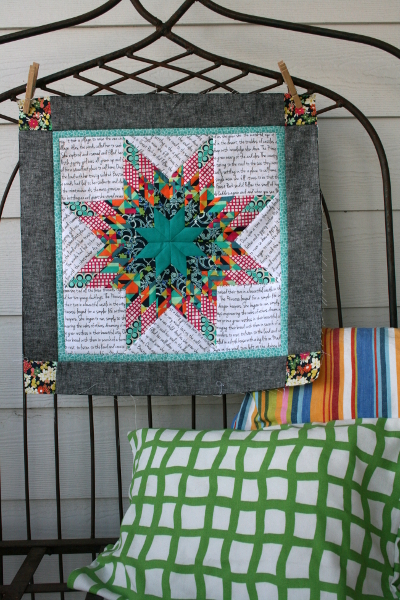
To begin, choose five fabrics for your star colors. The fabrics I’m using in my original medallion block are from the Carnaby Street collection by Pat Bravo for Art Gallery Fabrics. The prints I’m using here are from the Vintage Summer collection by The Yellow Bicycle for Blend. You want prints that look good together but also have enough contrast to show off the beauty of the lone star block.
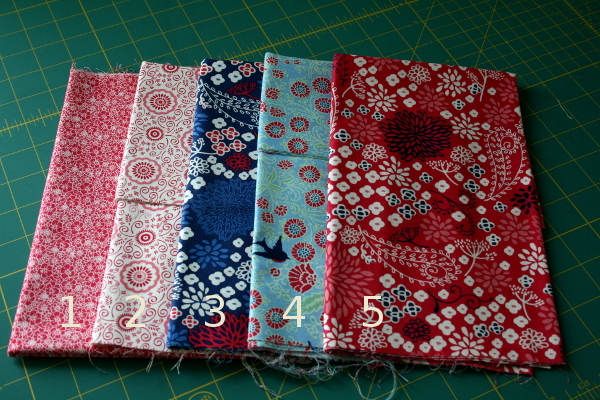
Keep in mind that the fabric you choose for #3 will be the most prominent fabric, with #1 in the very center and #5 on the outer tips of the star.

Cut 1 – 1.5 inch wide x width of fabric strip from fabrics 1, 2, 4 and 5. Cut two strips of fabric #3. You should have a total of 6 strips of fabric that are 1.5 inches wide and 42 inches long. Next cut each strip in half lengthwise by simply cutting at the fold of the fabric, giving you 12 strips of fabric that are 1.5 inches wide and 21 inches long.
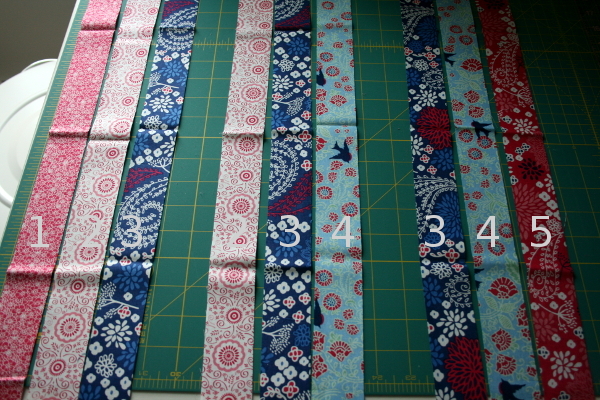
Now we need to create three sets of strips. The first should be fabrics 1, 2 and 3 in a row, then fabrics 2, 3 and 4 in a row, and the last set from fabrics 3, 4 and 5. You will have three strips left, one each of fabrics 1, 3 and 5. They will not be used in this block.
At this point I carefully starch my fabrics. I like to use Best Press, available at local quilt shops. To starch, I spray the back of the fabric, turn it over, then carefully press. Because these strips can so easily be stretched, be sure to simply lift the iron and set it down instead of moving it back and forth to distort the fabrics. Starching your fabrics will go a long way toward helping your seams be consistent and your points matched up. The starch helps the fabric behave more like paper, with less stretching or slipping.
All seams in this block should be an exact 1/4 inch seam. Check your machine to be certain your needle position is where it should be and make sure you know where the 1/4 inch mark is.
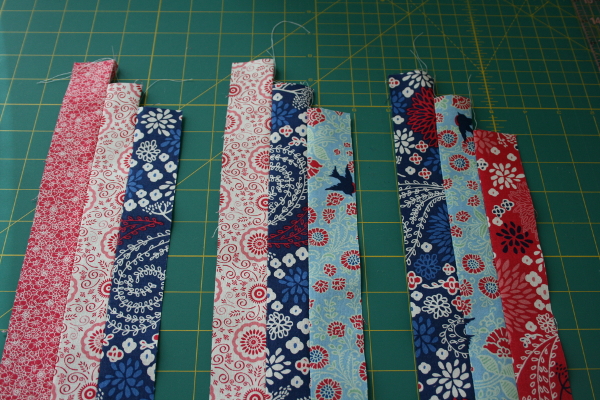
Sew your three sets of strips together in order, but start each strip about 1 inch down from the previous fabric as shown above.
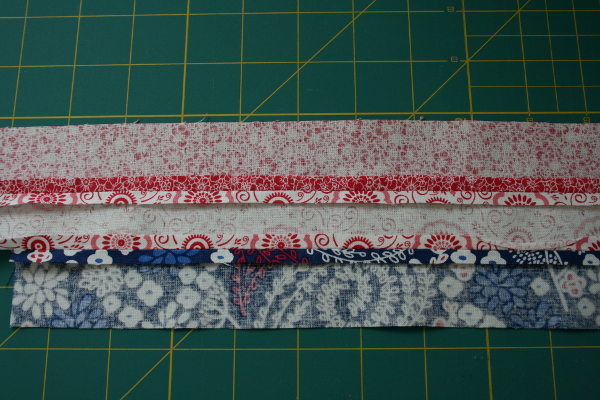
Carefully press your seams open.
*Press all seams open in this quilt block!

With the first strip set carefully lined up on your cutting mat, find the 45 degree line. There should be one on your cutting mat to reference. Cut off the edge to make an even 45 degree cut.
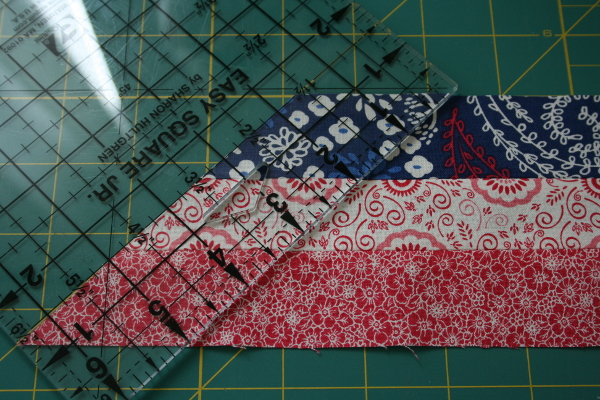
Measure 1.5 inches from the line you just cut. This is your next cutting line. Be exact!
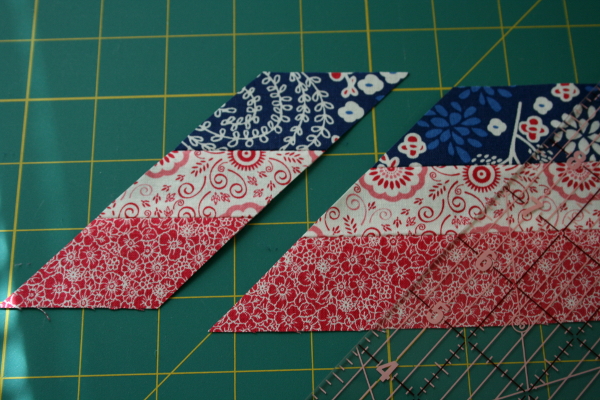
Cut 8 of these strips.

Repeat with the other two fabric strips, making three piles of 8 – 1.5 inch wide strips.
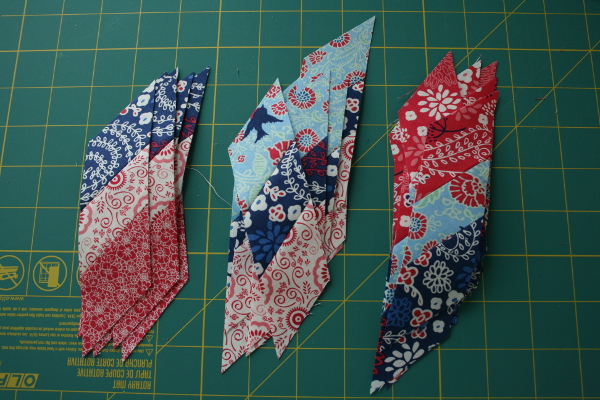
Now to start piecing! We will make 8 small diamonds. We’ll call our first strip (fabrics 1, 2 and 3) strip A, our second set (fabrics 2, 3 and 4) strip B, and our third set (fabrics 3, 4 and 5) strip C. Each diamond will be made with one each of strips A, B and C.
Begin with one strip A and one strip B. Lay them out like so, then flip strip B over on top of strip A with right sides together. I think that the trickiest part of the lone star block is making sure the seams line up in these steps.
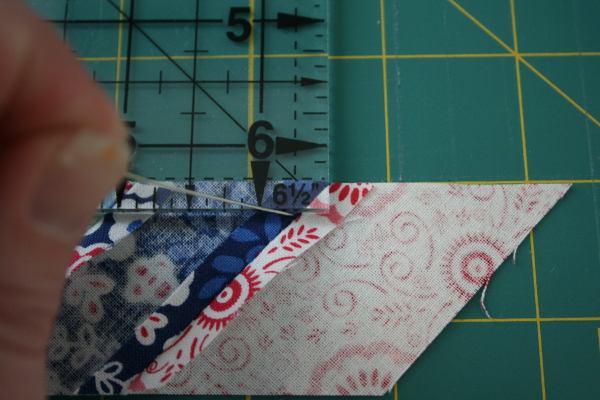
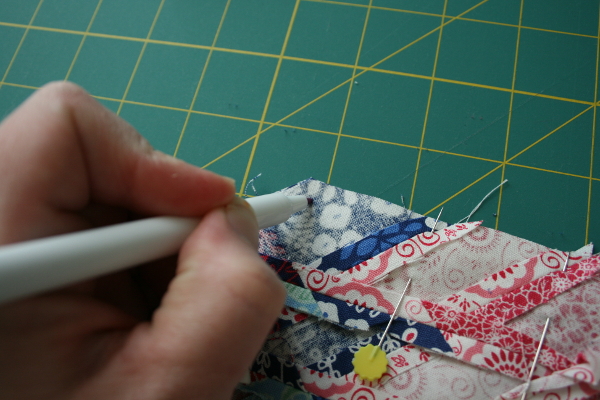
You may find it helpful to measure 1/4 inch on the back of strip B at the seams to understand where the strips need to line up so your points will be perfect. I do this with a pin, sticking it through both fabrics and checking to make sure that the pin goes right through the seams of both strips. I think it’s more important to check this at the intersection of your seams than it is at the ends of the strips. If you take time to pin carefully you will be rewarded with perfect points.
If this first seam doesn’t line up as well as you want it to, simply unpick it and re-pin it until you get it right. Once you’ve figured it out, the others will come much more quickly and easily. My theory is that you’ll be sewing a lot of them, so you might as well learn to do it right!

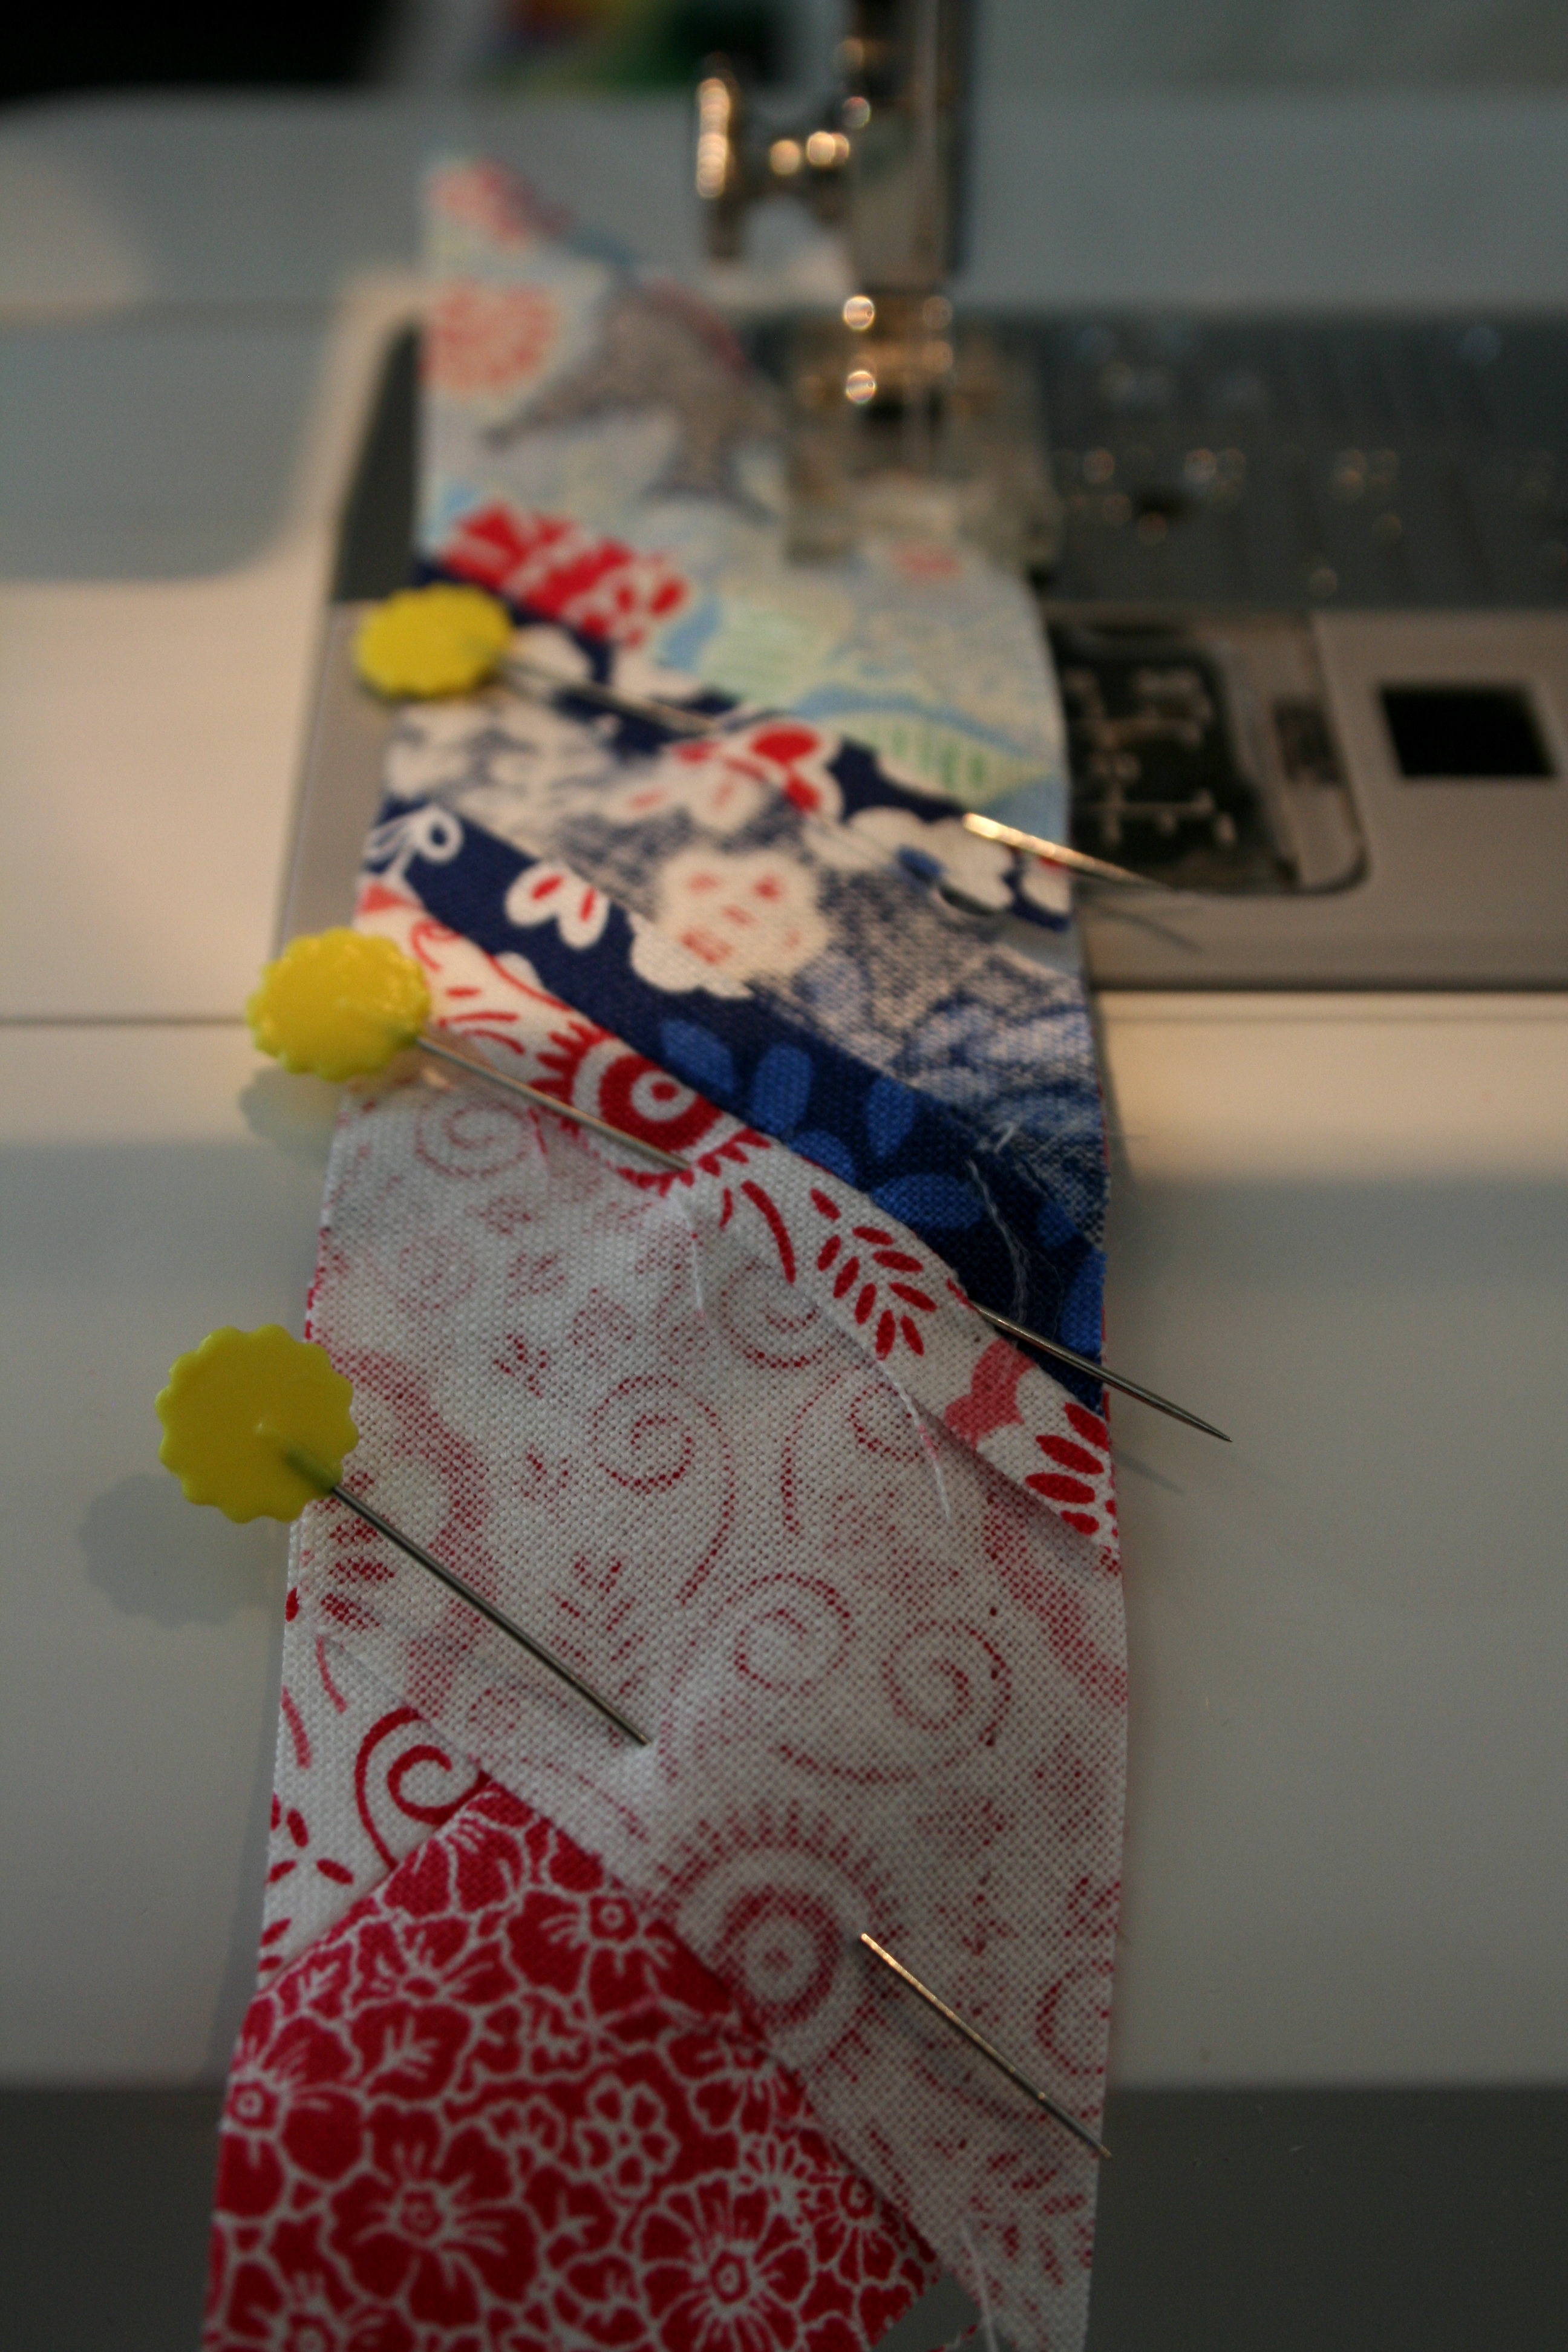
Now repeat with strip C, pinning it carefully (right sides together) to the edge of strip B. Again, pin and sew carefully, keeping your seam allowance even. I always set my machine to the slowest setting when I’m piecing these diamonds.
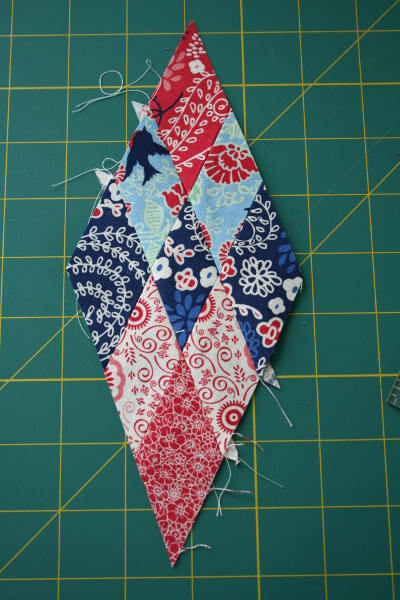
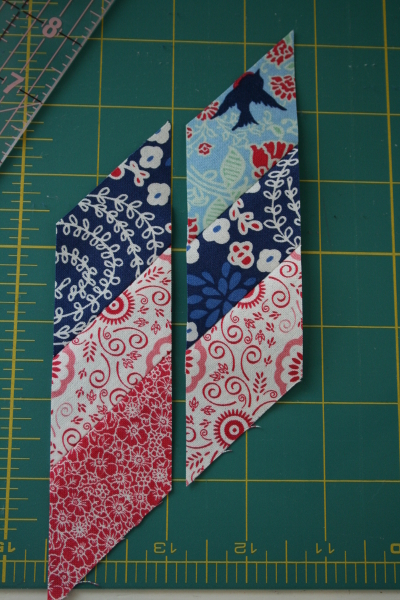
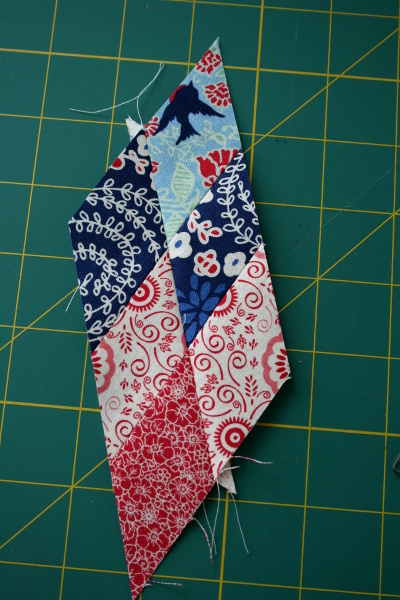
Your first diamond is complete. Iron it carefully, pressing seams open. I starch again at this point.
Repeat this process 7 more times until you have eight diamonds. Time to put the star together!
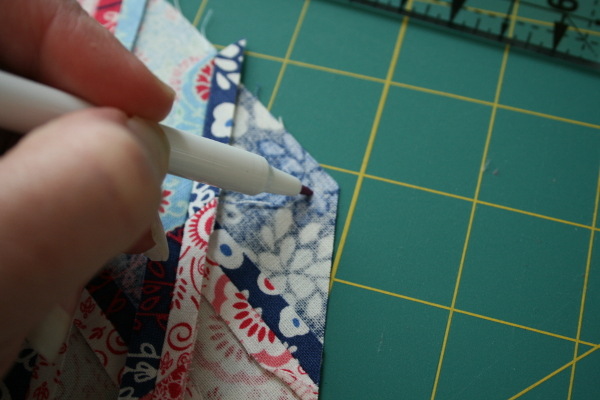
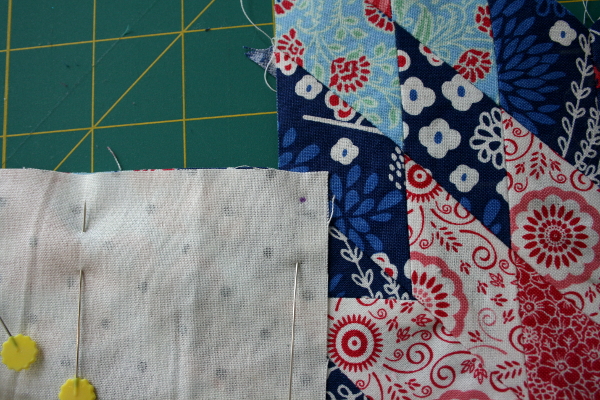
Note: it is important at this point to mark the back of your diamonds so you don’t forget to leave a 1/4 inch seam allowance for the “Y” seams that will add your background. I use a water soluble marker to measure and mark the dots on the side point of each diamond.
Pin the two diamonds together with pins at every seam intersection. I always start at the dot I marked, backstitching to set that thread, then sewing down the diamond to the center point. I always sew from this outer point toward the center for two reasons. First, it helps me remember that dot, and second, it prevents the diamonds from “spreading” so the star fits together nicely.
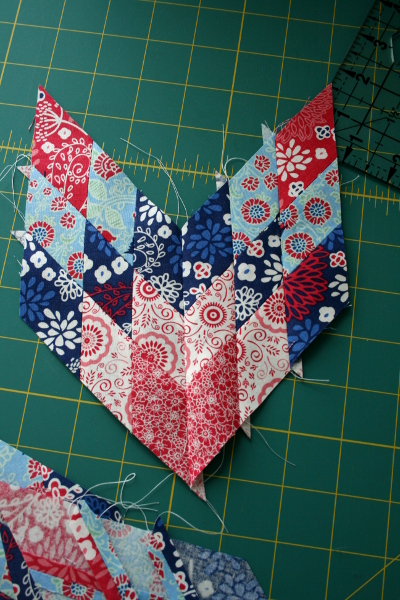
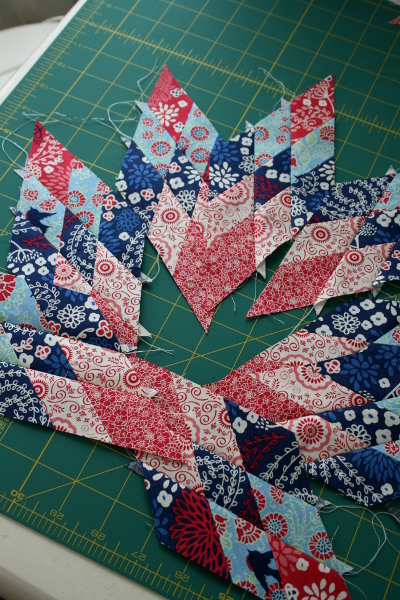
Press open the two diamonds, and you begin to see the star taking shape. So pretty!
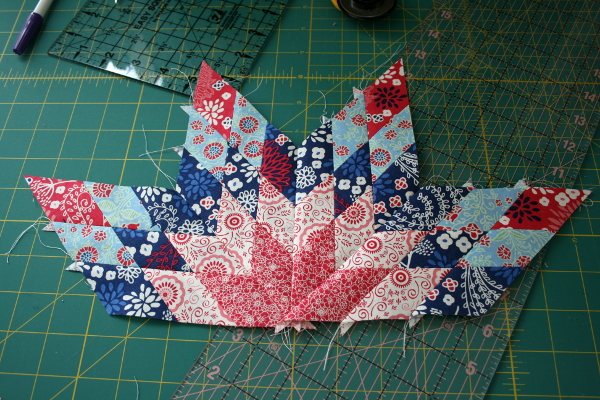
Continue until you have four diamonds sewn together to make half of the star.
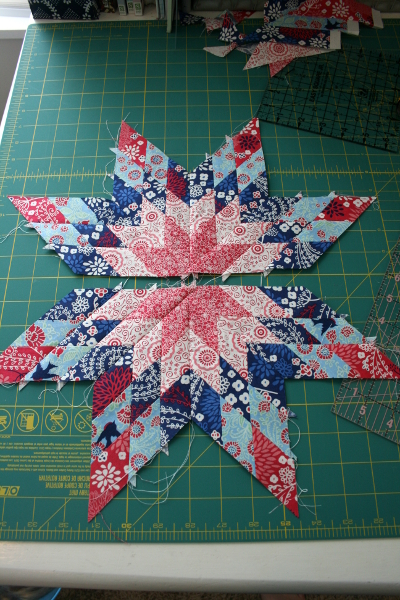
Repeat the process with the other 4 diamonds, making two half stars.
Now we’ll get our background fabric ready.
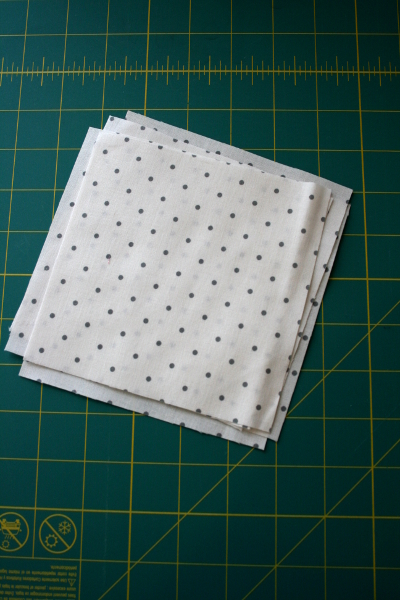
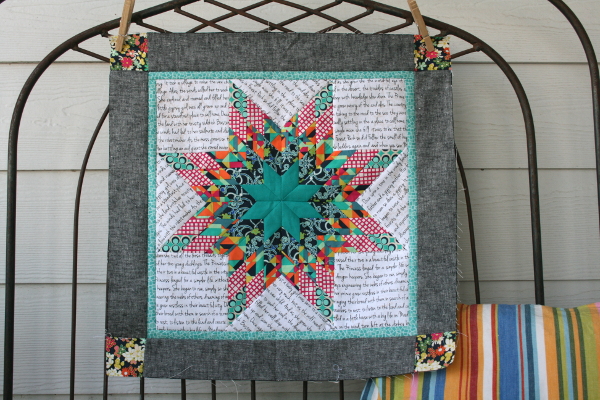
Cut six – 5.5 inch square pieces of your background fabric. For my original block I used the text print from the Madrona Road collection. For this block I’m using the gray dot print from the Cruizin collection by Barbara Jones.
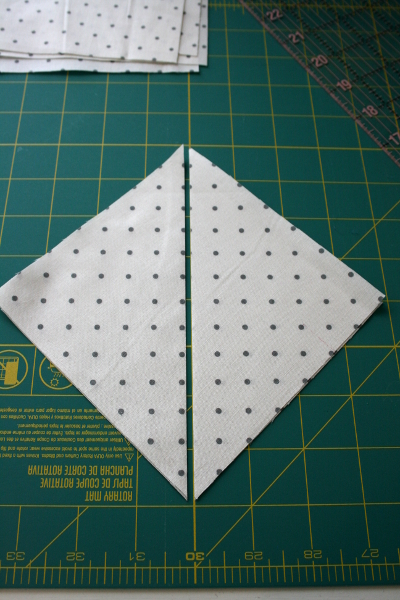
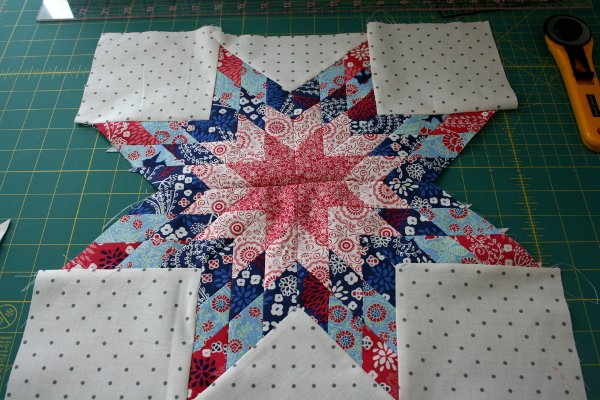
Cut two of those squares in half diagonally. You now have 4 squares and 4 triangles.
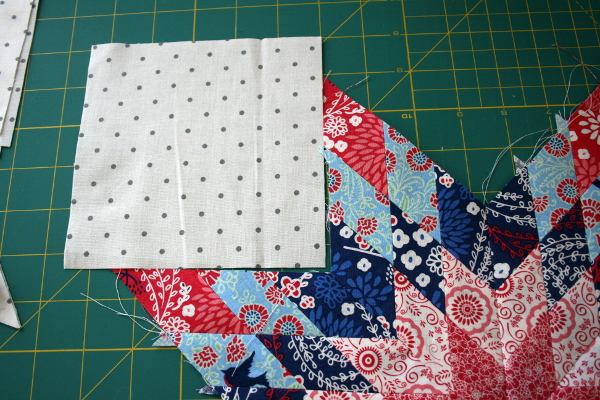
Time to start your “Y” seams.
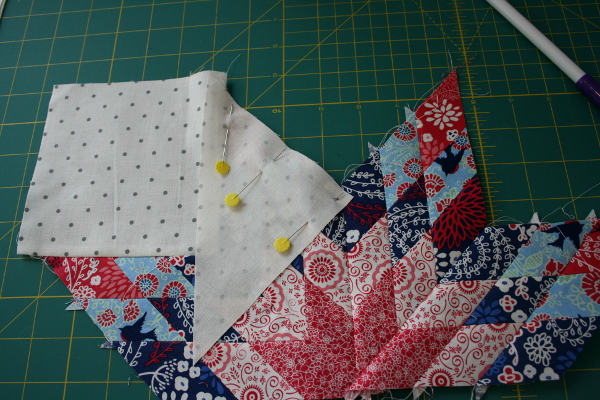
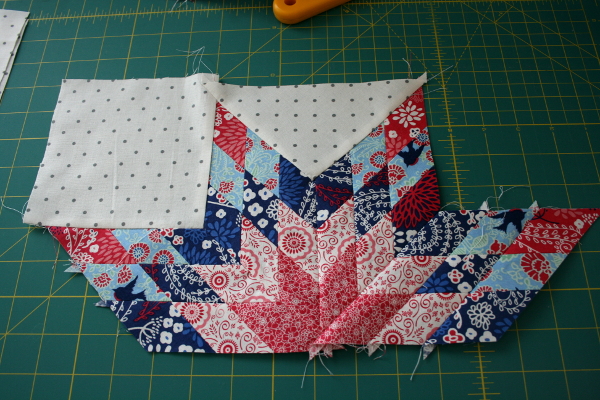
Here is another tutorial if you’d like to read one, or you can also watch tutorials on YouTube. Set a square in the top left corner of your star so you understand where it goes. Then flip it right side down along the bottom line with the bottom edge still lined up with your star.

Once again, mark your 1/4 inch point on the back of the square in the corner. This mark should line up with the seam on your star that is open 1/4 inch because you marked the diamonds as well. Pin at this point, and along the seam.
Beginning at the outer edge of the block, sew the background square to the side of the star until you get to your mark. At this point, keep your needle down, right on that dot.
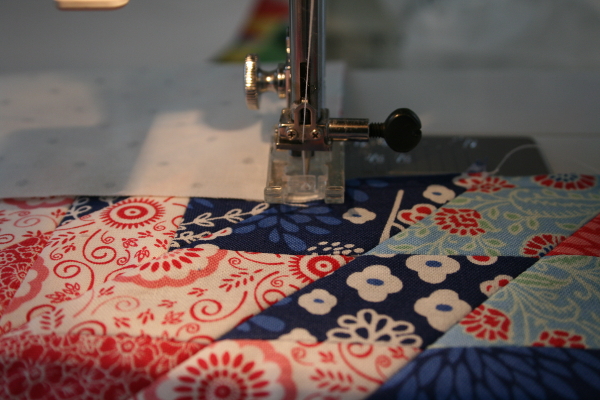
Lift your presser foot, keeping the needle down, and gently pull the edge of the background square toward the front of the sewing machine while also rotating the star towards it. Rotate your fabrics until both line up on a straight line and you can finish the seam.
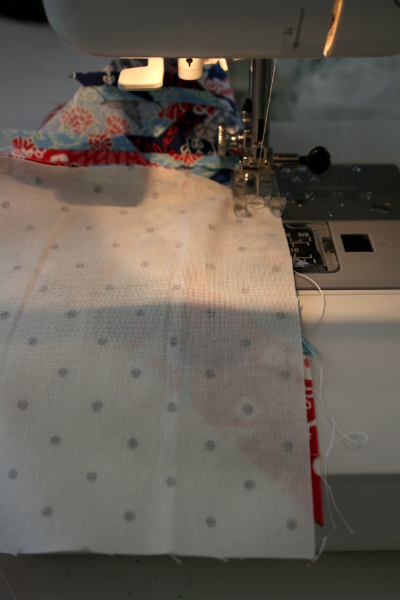
And the Y seam is done! Press the fabric and get ready for the next one.

Repeat the process in the center with a triangle, again marking your pivot point, and sewing carefully.
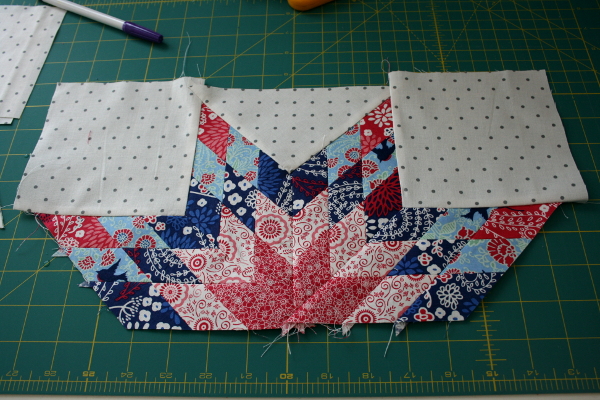
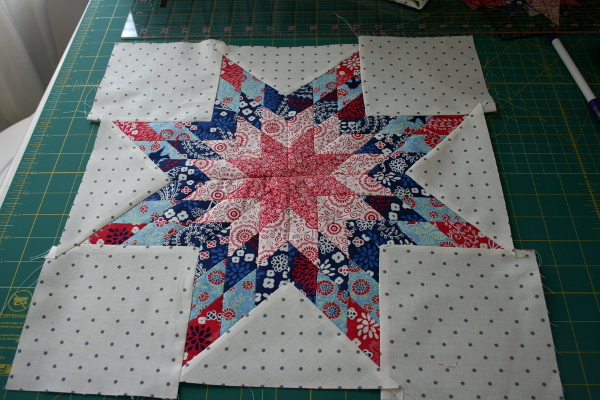
Now on to the right corner with another square until you have three pieces of background set in.
Repeat the process with the other half of your star.
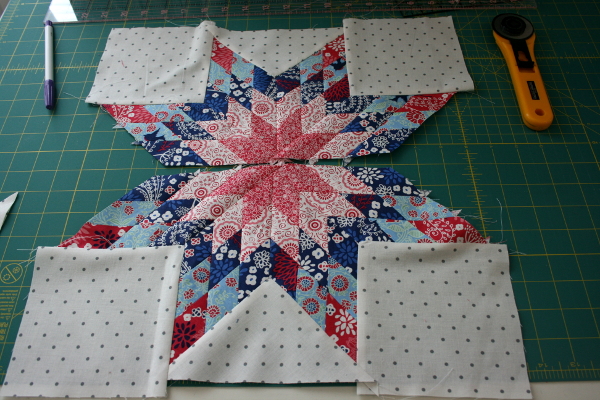
Now it’s time to sew the star together.
Once again, pin carefully at every seam intersection (especially the center one) and don’t forget your two marks on either end where you will backstitch. I had to darken mine a little so I wouldn’t forget them. Sew carefully.
Press seams open and you’re ready to add the last two triangles to either side.
And it’s done! You just pieced lots of diamonds and 8 Y seams. Well done! Trim your block, being careful to make sure the corners are square, to 15 inches. Before you start trimming, make sure you’re leaving a 1/4 inch seam allowance at each star point so you don’t lose the points when you add borders.
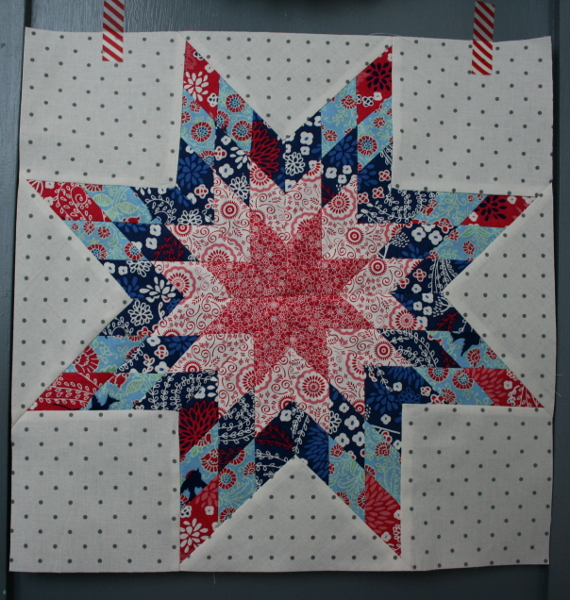
And there we have it. A lone star medallion center block.
*Edited to add:
Want to make a large, single-block lone star quilt? Try my Mod Lone Star Quilt Pattern . It uses the same principles in this tutorial, with wider and more strips, to create a stunning star.
See the quilt here.
I’ve created a simplified version of this tutorial in PDF form if you want a simple list of basic steps to follow without all the photos and instructions. This PDF includes a chart for cutting strips of various widths to create larger or smaller blocks.
Click here to download the Latest PDF FREE I have also created a page with links to all my lone star projects, which include a lone star quilt with 8 different sizes, a 64″ lone star block, and other variations of the lone star. Hopefully these posts will inspire you to begin a lone star project in whatever size interests you! Click here to visit my Lone Star page.