Modern Medallion Border 5


3border5

The Utah County Modern Quilt Group met last Saturday morning, and I stayed up ridiculously late Friday night, determined to finish another border in time to share it at the meeting.

2border5

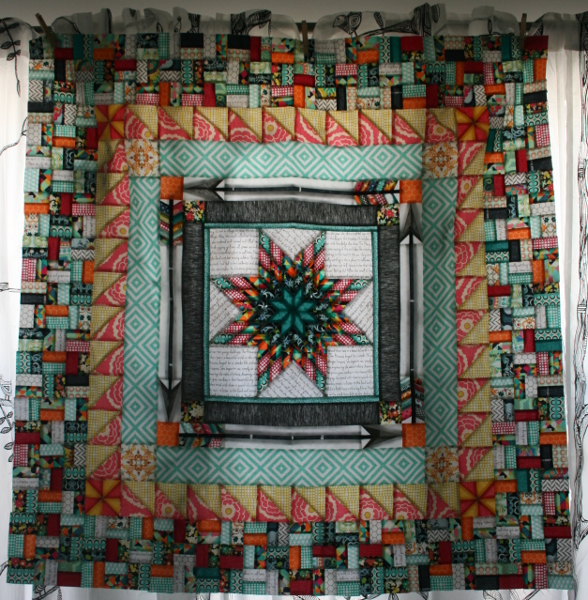
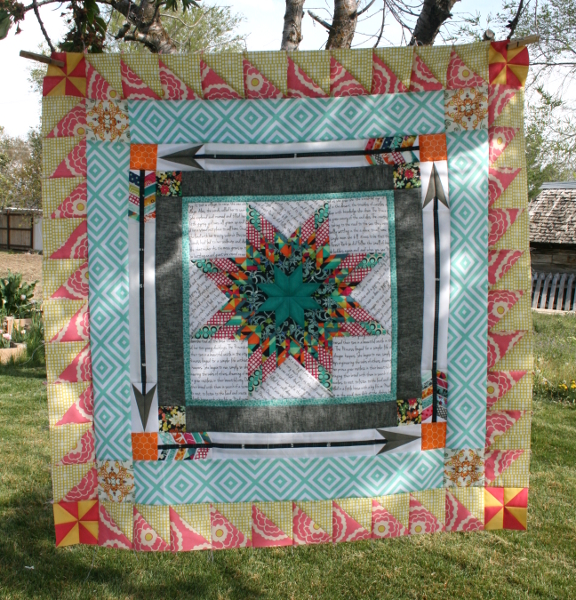
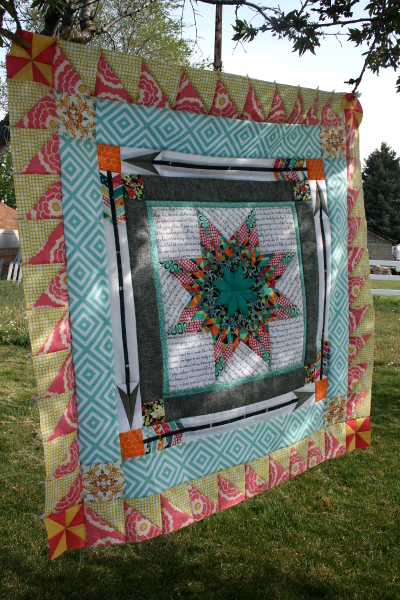
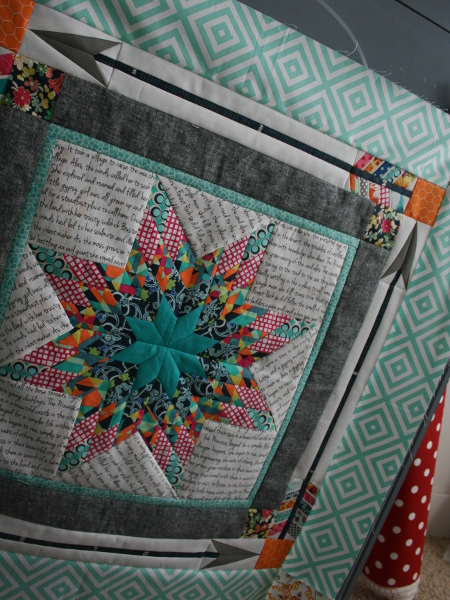
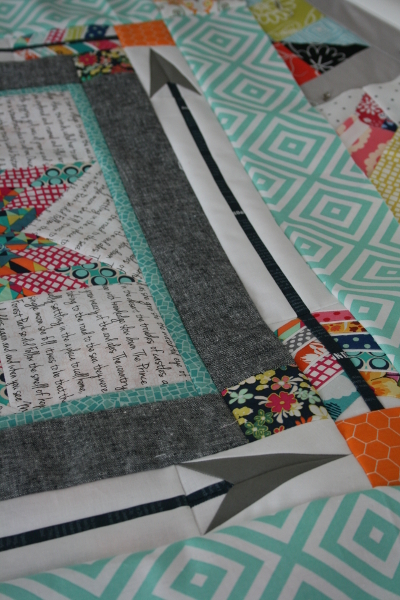
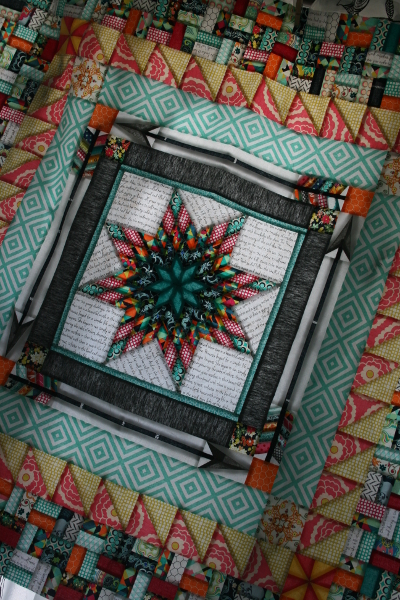
In these photos the quilt top is hanging over a window, so the back lighting shows all the seams and makes the colors look more saturated than they otherwise would, but I think it looks kind of cool.

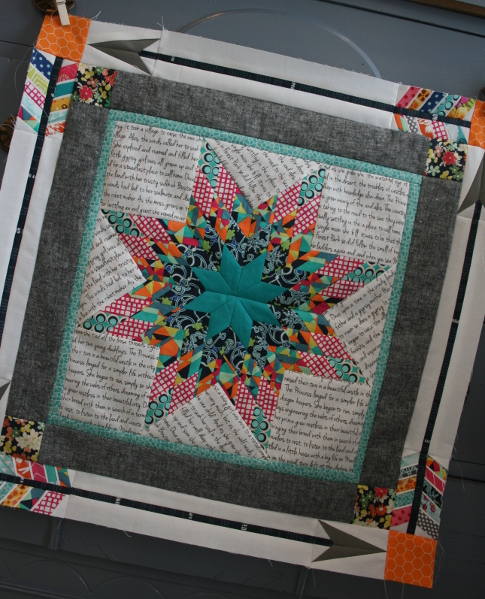
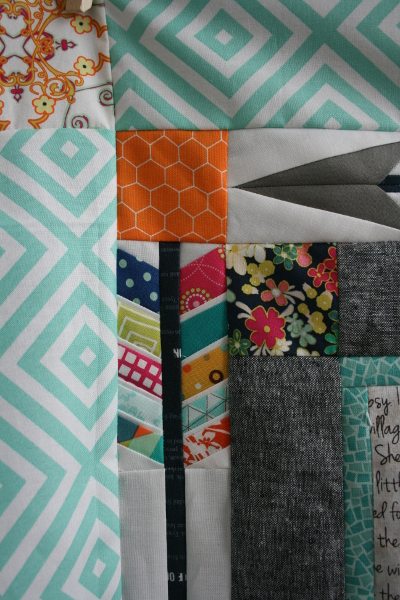
One of the leaders of the group did this border on her quilt and I really liked the mosaic feel it had.  My measurements are different than hers, but construction was the same.  To make mine, I needed 28 – 6.5 inch squares.  Each square is made up of a nine patch block, and the “squares” in each block are two rectangles.

4border5

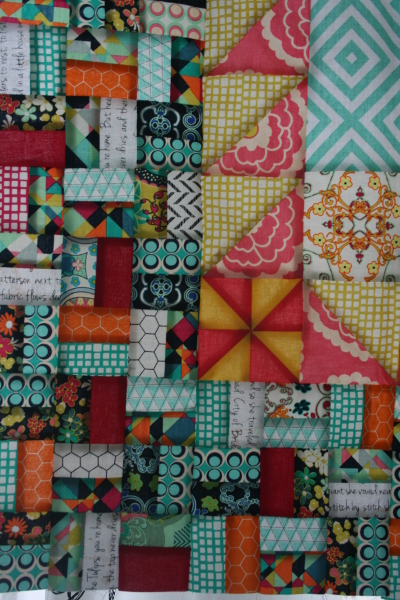
To make my border, I cut 30 – 1.5 inch wide strips of fabric (averaging about 41 inches long).  I paired the strips, starched them carefully so they wouldn’t begin to curve, and sewed them together.  This gave me 15 strips of fabric that was now 2.5 inches wide.

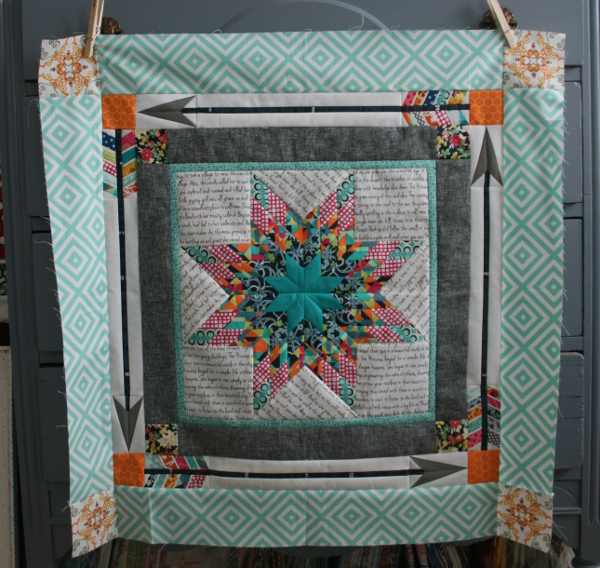
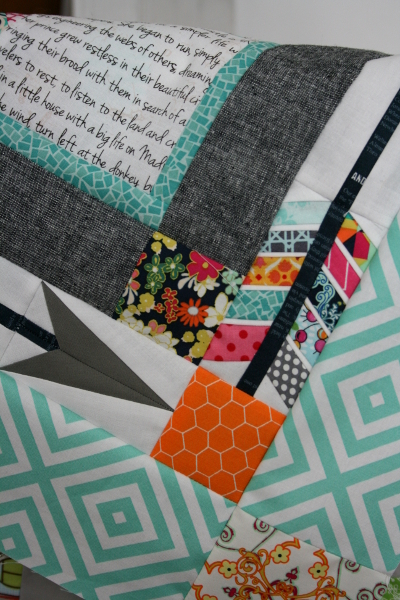
I then cut each strip into 2.5 inch widths.  I then started laying the squares out in three strips of three blocks, with the blocks alternating in a horizontal and vertical orientation.  I pieced these together until I made 28 of them, then made two rows of 6 and two rows of 8 blocks.  They were then sewn to the quilt and it now measures 48.5 inches square.

5border5

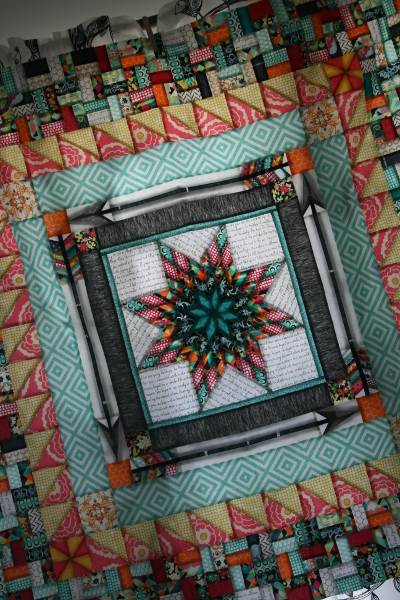
Now I have decisions to make.  I want to keep adding borders to this quilt, but I also need to start deciding how large I’m going to let it be.  One thing is certain:  I am loving this project!

Jennifer

Medallion Quilt Top: Border 4


medallionborder4

I managed to get the 4th border on my medallion quilt, and that’s no small accomplishment at this time of year!

(My 15 minute approach
was what made it happen.)

For this border I went with half square triangles made from two of the prints in the Carnaby Street collection by Pat Bravo.  I really like how the pink and citron are so unexpected.

medallionborder4corner

For the corner blocks I made a simple pinwheel using solid fabrics.  The pink and yellow are similar but a little brighter and I’m pleased with how the corners stand out without competing with the rest of the border.

How I made it:

Half square triangles:  cut 20 – 4 inch squares of two contrasting fabrics.  Use these squares to make 40 half square triangles.  Trim them to 3.5 inches square.  Sew 10 squares together.  Make four strips.  Strips should be 3.5 inches wide and 30.5 inches long.

Corner pinwheels:  cut 8 – 2 5/8 inch squares of two contrasting fabrics.  Make16 half square triangles.  Trim to 2 inches square.  Sew four squares together to make pinwheel.  Make sure pinwheel block is 3.5 inches square.  Sew a pinwheel block to both ends of two of the half square triangle strips.

Attach the border:  carefully pin and sew a strip of pinwheels to one side of your medallion quilt top.  Press.  Attach a second strip to the opposite side of the medallion.  Carefully pin and sew a strip with pinwheels to one of the remaining sides.  Repeat with remaining border.   The quilt top should now measure 36.5 inches square.

medallionborder4b

This is a medallion quilt of my own creation.  You can see previous posts, including measurements and other instructions (including where to find the paper pieced arrow pattern), in these posts:

Lone Star Medallion center
Lone Star medallion center tutorial Paper Pieced Arrow Arrow Border and Border #3 I’ve started working on border #5 and am excited to see how it looks.  This quilt top is turning out to be one of the most fun projects I’ve ever worked on.   And my Marcelle Medallion ?  Still hanging in the sewing room, waiting for the flying geese border.  Hopefully I’ll get to it soon.

Happy Sewing!
Jennifer Linking to Freshly Pieced

Arrows


border2angle

I finished all the arrows, and border 2 on my modern medallion quilt is complete!  I’m so glad I took the time to do this.  Not only was it fun to try paper piecing for the first time, it looks as good as I pictured.  Relief!

I mentioned last week that I found the pattern on Craftsy, by Sew What Sherlock.
I shortened the length of each arrow by 1/2 inch so it would fit on each side.  Because the measurements of my center block were a little bit random, I decided to add a third border that is just a single print to bring the measurements to a number that’s a little easier to work with.  With the arrows, the quilt top now measures 24 inches unfinished, or 23.5 inches finished.

border3

I cut four strips that are 3.75 inches wide by 24 inches long, plus four 3.75 inch squares to make the third border.  I love this Jennifer Paganelli print from her Poodle collection in the perfect shade of mint.  It looks fabulous with the Carnaby Street prints! The corners are fussy cut from another Carnaby Street print.  Now the medallion measures 30.5 inches unfinished, or 30 inches square finished which makes the math much less complicated.

border3a

I went scrappy with the arrows, using lots of little pieces in the general color scheme of my lone star.  I must say it is really fun to have those tiny strips of white show up between the arrows.  There’s a precision about paper piecing that’s awfully fun, although I felt like I made a new mistake every time.

border3b

I’m so proud of myself for figuring this out!  I’m in spring sports mode with my children, which means that sewing has come to an almost standstill, but I find myself walking into my sewing room just to peek at it again.  I used a navy blue text print for the arrow shafts and love the little patches of white text that show up along the shaft.  It gives each shaft a bit of variation that I’m pleased with.

border3c

In fact, I like it so much I keep thinking “maybe I should do another arrow border…”

border3d

And this medallion thing?  I really enjoy it, and there are so many different things you can do!  SO much fun.

I’ve got the next border planned and hope to work on it soon.

Jennifer Linking to Freshly Pieced

1 2 3 4 5 6