Making yo-yos

I have a project I’ve been meaning to finish for a LONG time.  It’s a quilt.  It needs me to make some flowers to go on a couple of vines, and it needs to be bound.

I’ve never been a huge fan of yo-yos.  Don’t have a problem with them, but just not in love with them.
Well, it looks like that might have just changed.
At least for this project.

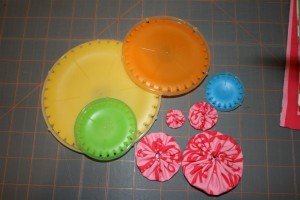
I discovered that Clover makes some plastic yo-yo makers, and I invested in them.
IMG_6096 (Large)
I finally made some yo-yos with them, and now that I know how fast, easy, and uniform they are, I’m hooked!
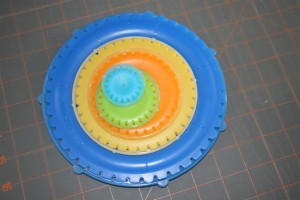
There are 4 sizes.  The tiny one ends up being around 3/4″ in diameter, the next size up is around one inch, the next is about 1-3/4″ in diameter, and the biggest makes yo-yos that are about 2 inches or a bit larger in diameter.
IMG_6095 (Large)
They’re super easy to use.  In case you haven’t tried these, I’ll show you how simple it is.
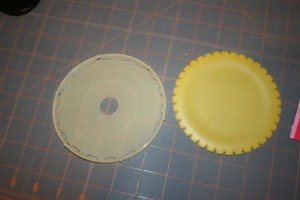
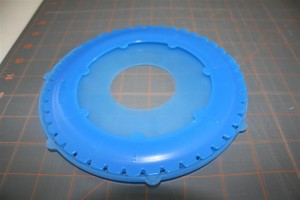
First choose your template size and your fabric.  Each maker has two pieces, as you can see.
IMG_6097 (Large)
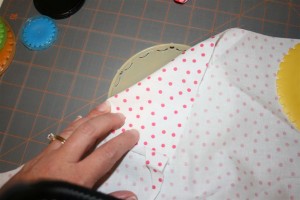
Lay the piece with the smooth edge (on the left) on a flat surface, with the lip facing you.
Then lay your fabric face down over it.
IMG_6098 (Large)
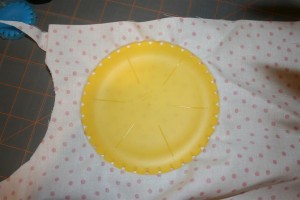
Now take the corresponding piece and fit it into the piece that is covered with fabric.
You’ll be able to feel it click into place.
IMG_6099 (Large)
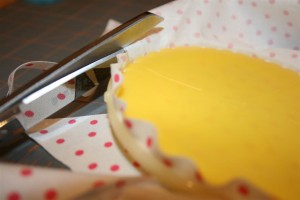
Now trim around the edges, leaving a little bit of fabric.
IMG_6100 (Large)
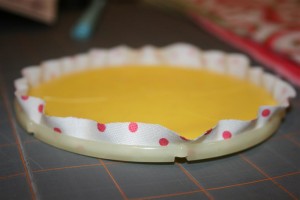
When you’re finished, it should look like this:
IMG_6101 (Large)
Now take a needle and thread it with a corresponding color of thread.
The thread should be longer than the circumference of  your circle.  Knot one end of the thread.
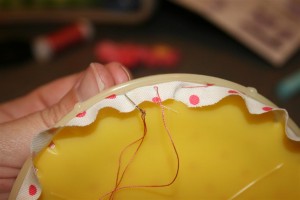
From one of the holes on the bottom, bring the needle through, being sure that it goes through the fabric you left around the edge.  (Your yo-yo maker will come with great instructions, so don’t worry) IMG_6102 (Large) Then take the needle back down through the next hole, going around the entire circle.
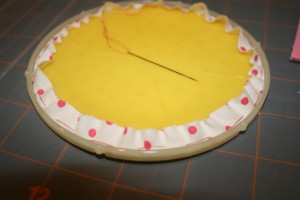
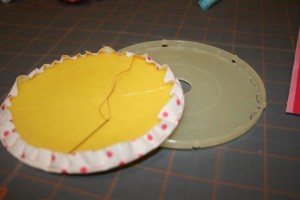
IMG_6103 (Large)
When you’ve stitched around the circle, carefully pop the plastic piece on top out.
The fabric should stick to the top piece.
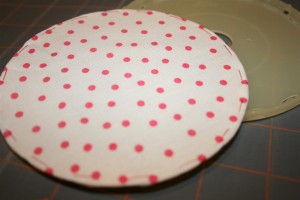
IMG_6104 (Large)
If you turn it over, you can see the stitches going around the outer edges.
IMG_6105 (Large)
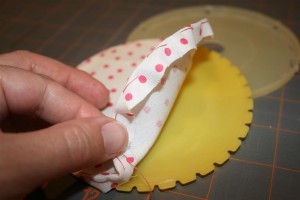
Carefully pull the fabric off the template.
IMG_6106 (Large)
You can see that the fabric really holds the shape it had when in the template.
IMG_6107 (Large)
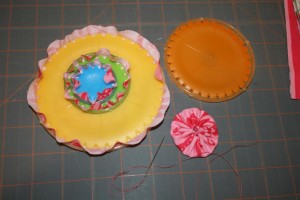
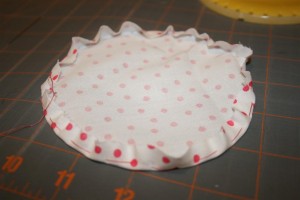
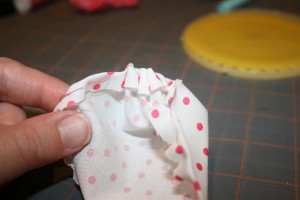
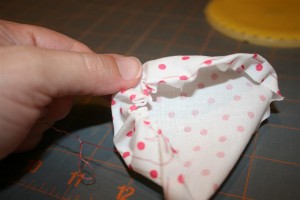
Taking the needle, begin gently pulling on the thread to gather the fabric.
IMG_6108 (Large)
Keep pulling.  All you have to do is sort of tuck the edge of the fabric inside as it gathers.
IMG_6109 (Large)
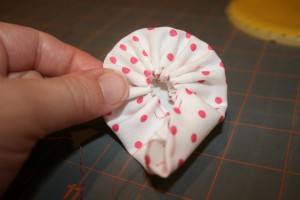
Slowly but surely, it will take the shape of a perfect circle.
IMG_6110 (Large)
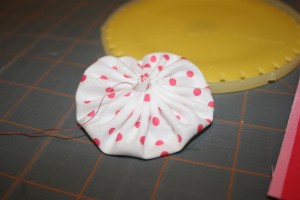
When it’s all gathered together, pull the thread tight and tie a discreet knot in the thread.  Cut it and tuck it carefully inside.  You’re done!
IMG_6111 (Large)
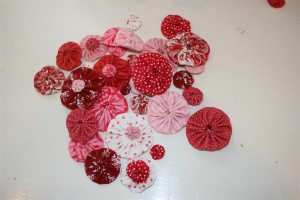
They are quick to make and lots of fun.  Here’s my growing pile:
IMG_6275 (Large)
And guess what I discovered the day after I made a bunch of these?
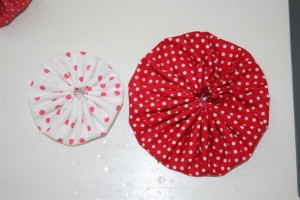
They just came out with a huge one!  I was so excited.  I tried one, and it is super fun.
The new extra large one is much bigger than the next closest size.  It’s about 3 1/2 inches in diameter.
IMG_6276 (Large)
Now I need to make a bunch more so I can design the clumps of flowers on the quilt.
I’ll show you the finished product as soon as I’ve got enough yo-yos made.
IMG_6113 (Large)
Until then, see what fun you can have with these five sizes!
They also make flower shaped ones, which I have, but I don’t like how small the flower is and how much fabric it uses.  I thought I’d want to use them on the quilt, but I like the round ones best.  I believe that Clover also makes heart shaped templates, but I’ve never tried them.  An online search for yo yo maker will show you what’s available.
IMG_6112 (Large)
There are a lot of quilting and sewing tools that I don’t have and can live without, but these I’m happy to have purchased.  They will be a lot of fun to play with.

Organize a Desk

For months, my daughter’s desk has been driving me crazy.  It’s always so covered with stuff that there is no point in having a desk.
IMG_5099 (Large)
I think that secretly I’m probably inclined to be a neat freak, but having 7 children really curbs my opportunities to enforce that kind of lifestyle.  I’ve concluded it’s a good thing; probably God’s way of rescuing me from developing OCD.  Still, neat and tidy goes a long way toward making a happy mother in this house.   We all have piles sometimes, myself included, but I really strive for some sense of order.  With this desk, I’ve tried multiple ways of encouraging her to keep things a little bit neater, but all to no avail.

Here is my little office space.  We have a room in our home that doubles as a guest room and my own space.

I love it.
IMG_5191 (Large)2
I really love the fact that my rack is filled with containers that are whimsical and fun to look at, which are filled with supplies I use all the time for sewing, wrapping gifts, paper projects, etc.  I can get things out and put them away in a matter of seconds.  I love the easy access, the fact that I can store an awful lot in such a small space and in plain view.  Organizing my spot like this was one of the best ideas  I had when we moved into this house.
IMG_5190 (Large)
The thought occurred to me the other day that perhaps my daughter would like to have a space like mine.
(I was pretty sure she’d go for it, given the amount of time she spends going through my stuff.)

After searching high and low, I finally got my hands on another baker’s rack like the one I already have.
We cleared the space and got busy.  All you need are two basic things:  the rack or shelves or whatever you’re going to put things on and a variety of cute containers for holding stuff in.  Pretty simple.
IMG_5171 (Large)
Here’s a sampling of the containers we used.
IMG_5170 (Large)
My theory with the containers is the cheaper the better.  The yellow bowl I’ve had for years but now it has a crack in it so I never use it in the kitchen.  Then there is the ceramic bowl with holes that I picked up on clearance after Easter.  The blue bucket was the same.  The blue wood paper organizer was just kicking around the house.  That’s pretty much what we did:  we walked around the house and looked for things we could re-purpose to make for an interesting display.  We found a glass candle holder in the pantry to use, a small white flower pot for pencils and pens, and so forth. You get the picture.  This was not an expensive undertaking.  But my theory is that the whole point is to be creative and find ways to encourage her to take care of her space in a cute, fun, but tidy way.

We started by sorting like objects into their own containers and began placing just a couple of things here and there.
IMG_5172 (Large)
We made room for her jewelry box and cd player, and kept filling it in.
IMG_5173 (Large)
The finished product:
IMG_5174 (Large)
She’s got everything she needs within arm’s reach:  paper, markers, pencils, pens, stapler, glue, books, music, and so forth.  She likes it because it is cute and  makes her feel grown up.  I like it because she can see everything she has, use it and put it away easily, and there is actually a white desk underneath it all for her to work at!  I also like that there’s room for us to add more containers as needed.  And, at the date of this writing, her desk has been clean for almost two weeks.  Now THAT is impressive.  A ten year old girl with a clean desk… this could be a world record in the making!

Using a baker’s rack like this can be a fun way to organize a space.  As I said, I’ve loved it in my office and am hopeful about the long-term potential for my daughter.  I also have a smaller one that I hung above my bathtub to help organize that space, too.
IMG_5303 (Large)
Honestly, they’re cool racks for a kitchen and someday I’d love to have one displaying pretty plates, but I love their potential in other ways, too.  Kitchen, office, bedroom, bathroom, and think how cute it would be on a potting table storing gardening supplies!  These racks are awesome because they’re so versatile.

As for the desk, mission accomplished.   Hooray!

Jewelry Board

I have a shelf in my bathroom closet that houses my jewelry.
It’s not expensive jewelry, but some of it I really like.  It fits my stage in life.

But lately, between my girls going through things and me falling asleep on the couch every night while I check my email (what can I say, it’s my 8th pregnancy!) which has caused me to become somewhat lazy with my bedtime routine, the jewelry shelf has become rather, well, scary.
IMG_5192 (Large)
Time to organize.

I’ve been looking for ways to accomplish this, and the other day I looked at one of my old picture frames that is now painted white and had an idea.   Today I’m going to make it happen.

To make this board, all you need is a picture frame, a piece of foam core board, and fabric of your choice.   I went to my cupboard which holds my stash of heavier weight decorating fabric for ideas.
IMG_5124 (Large)2
I love all those colors!  Stacks of fabric are so beautiful.

I came up with this frame and fabric:
IMG_5120 (Large)
Step one is to carefully measure the opening of your frame.   This is done by turning the frame over and measuring the size of the hole where the glass would sit if you were inserting glass.  On older frames especially, measure carefully because the frame sizes weren’t so standardized as many are today.  Mine was 16 inches by 12 1/4 inches.  Next I cut a piece of foam core board (available at any WalMart for a couple of dollars) the same size.
IMG_5177 (Large)
Next you need to cut the fabric, but it needs to be cut larger than the foam.  I cut mine 3 inches wider on both sides, making it 19 inches by 15 1/4 inches in size.  You can go even larger than this if you like, but I prefer not to have tons of fabric hanging around on the back to deal with.
IMG_5178 (Large)
You can see how it is bigger than the foam.
IMG_5179 (Large)
Now for the assembly.  Place your material face down on your work surface.
IMG_5180 (Large)
Now center the foam on top of the fabric.
IMG_5181 (Large)
All you need now is a bunch of straight pins with flat heads.  They are super cheap and can be found in any fabric store.
IMG_5189 (Large)
In the center of one side of your foam, pull the fabric tight around the edge of the foam board like this:
IMG_5182 (Large)
Carefully push a pin into the edge of the foam, pushing it all the way in.
IMG_5184 (Large)
Now do this in the center of all four sides of the board.  Then come back and start pinning all the way down every side of the foam.  I place my pins about one inch to 1 3/8 inches apart.
IMG_5186 (Large)
The only two things to remember while pinning are to keep the fabric taut so it doesn’t bubble anywhere and to get the pins in straight so they don’t come poking out of the foam in the front or back.  If your fingers become sore, just use the end of a pencil or something to push them in.  When you’ve done all four sides, turn it over and it should look like this.
IMG_5187 (Large)
Now all you have to do is insert your fabric covered board into your frame.  If you measured and cut carefully, it should stay in pretty well on its own, especially because the pins will help make it a snug fit.  If you need to, you can tape the back to make it stay if you’re concerned it won’t hold.
IMG_5188 (Large)
I’m excited to try mine out!  I leaned it against the wall on my shelf and used some big pins that I had on a different bulletin board to hang jewelry on.
IMG_5287 (Large)
And here is my finished project!
IMG_5286 (Large)
Now I’d call that an improvement!  One organized, tidy shelf.  (Around here, baby steps are good things, especially when you’re pregnant and you just used all your second trimester energy getting 5 children through their soccer seasons.)
IMG_5285 (Large)
I like it!  This project took me about 20 minutes from start to finish (but would take longer if you had to paint your frame or something like that.)  Do you have a trouble spot somewhere that could be helped by a board to hang things on?  Try it out!  It’s fun, pretty, and inexpensive.

And it will motivate you to stay organized.  That’s a good thing.

1 213 214 215 216 217