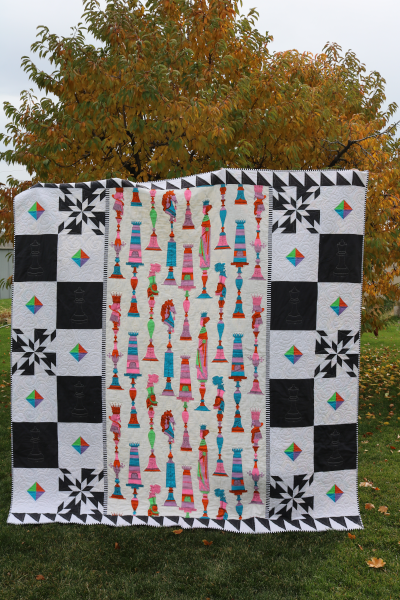
City Sampler Quilt
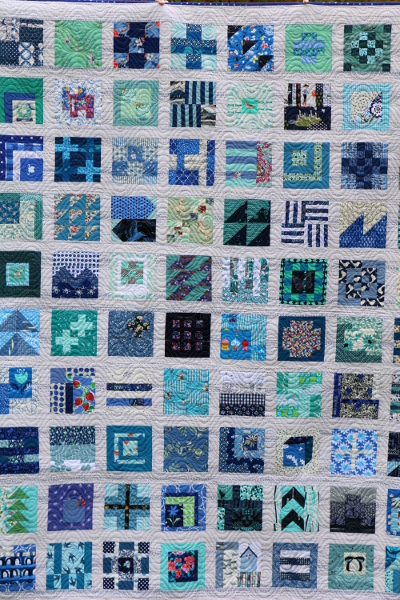
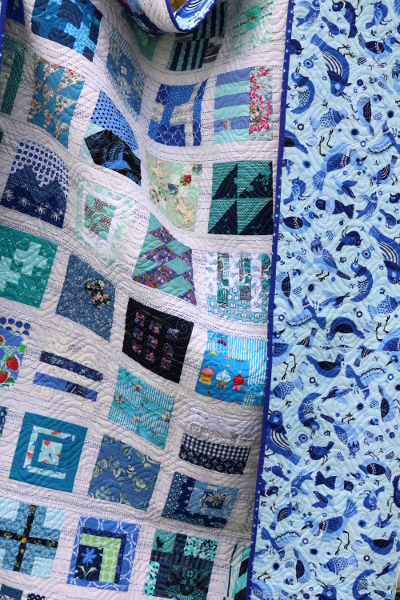
This quilt is a big one! It’s my City Sampler Quilt , quilted and bound and making me smile. It’s made of 100 different blocks, all of them different. And although it sounds like a lot, it never felt like too much, because I did it as part of a sew-along.
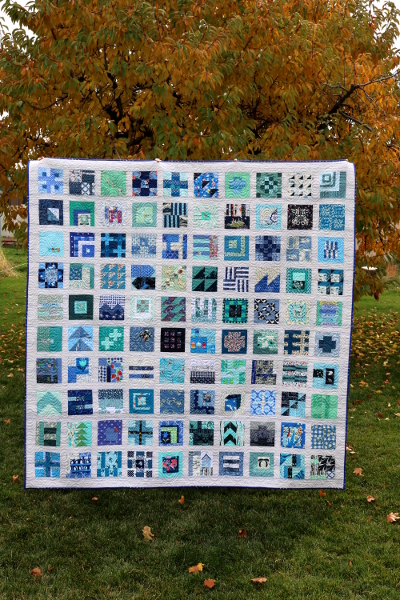
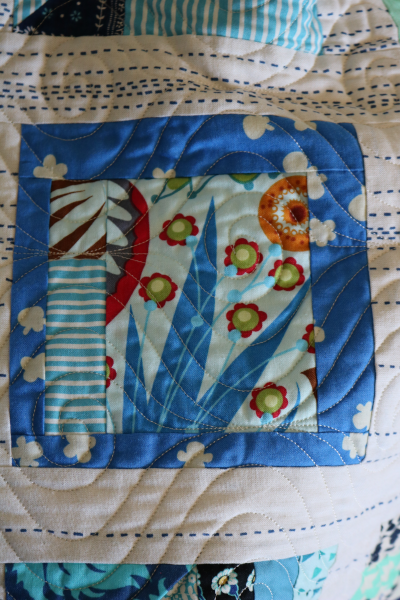
I chose to make all my blocks in blue fabrics. Seriously, give me all the blues! A rainbow of them. I love blue so much, and always have. So it felt right to make an entire quilt of blue blocks.
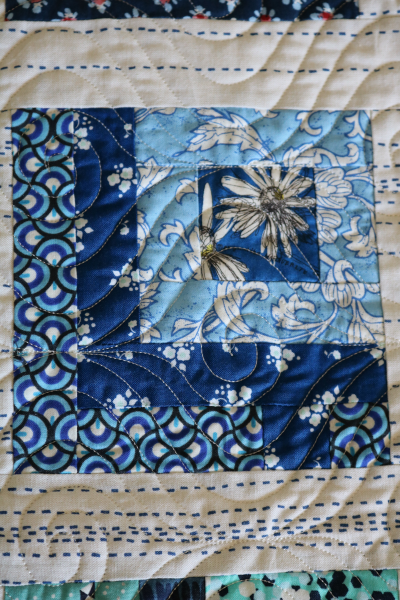
I went through all my fabrics, all my scraps, and used as many different pieces as I could. It was incredibly fun to put pieces together until I found combinations I loved for each block design. And Tula Pink did an amazing job of making an incredible pattern. I would definitely make this again.
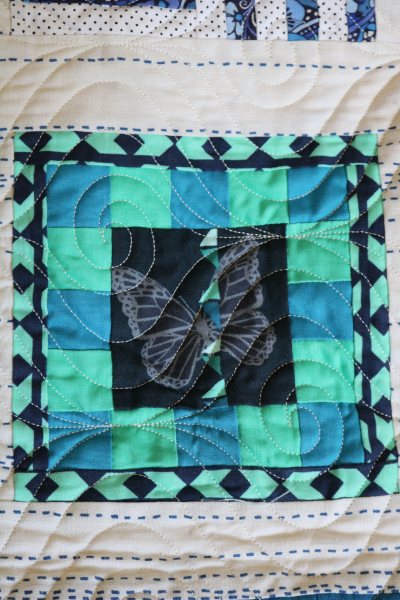
It didn’t take long for me to include aqua and a few greens in my color scheme. I particularly enjoyed making the butterfly block below, mimicking the little triangles in the print in the checkered border around it. In fact, this quilt was an early part of personal storytelling in fabric for me.
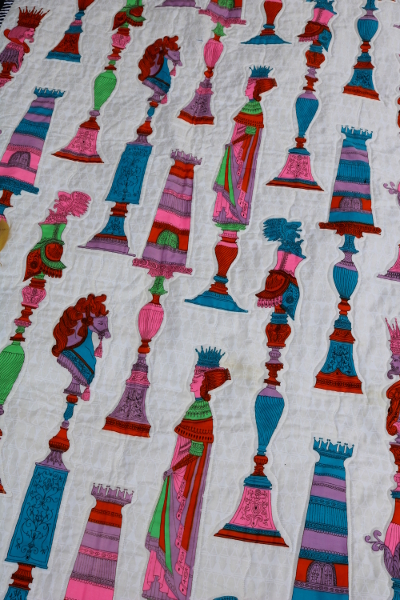
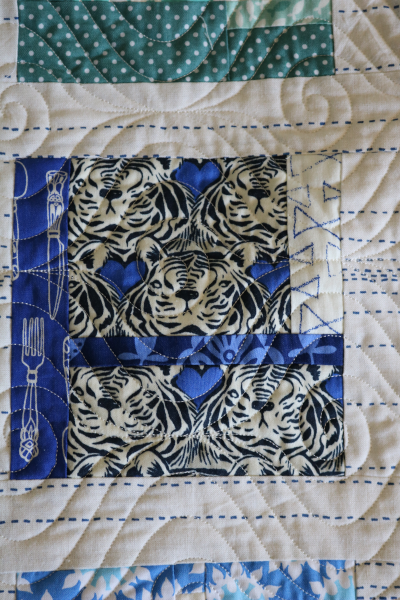
I found myself putting together fabrics and colors that reflected my day, my experiences, my feelings. The tiger block below still makes me laugh. You see these hungry tigers, not looking particularly happy, with bow ties on the right and a knife and fork on the left. This block was my representation of my then 16 year old son when he came home from football practice, looking for food to eat. I love it! Now he’s a responsible, handsome adult, I’m even happier I have this block to remind me of that stage.
When I first saw the striped sashing fabric, I was in love. Seriously, it’s the greatest print (made by Andover) so I immediately chose it for sashing. The trick was to keep the stripe running consistently across the quilt from left to right. This involved hours and special cutting, but I accomplished my goal. It feels like the running dialogue of life weaving through the quilt, making it a perfect sashing.
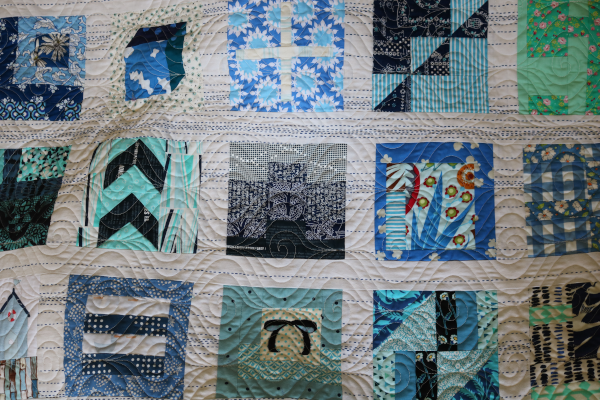
The wavy/swirly quilting is a great compliment to the quilt blocks. My final layout was simply a random placement of blocks that I didn’t overthink.
I found a gorgeous Japanese bird print for the back, and used a Lizzy House blue to bind it. The City Sampler Quilt is a favorite of mine, large and happy and FULL of colors/fabrics I love. Really, there are SO many treasures in this one!
Sometimes I feel like I’ll never catch up on all the things I’m inching forward in my life. These blocks were made in 2016, and sharing the quilt with you today reminds me that the joy of finishing is a great feeling anytime. So I’ll go get to work on another!
I hope your October is off to a great start. I love the crisp air, blue sky, and feeling like so much is happening! Happy sewing!
-Jennifer