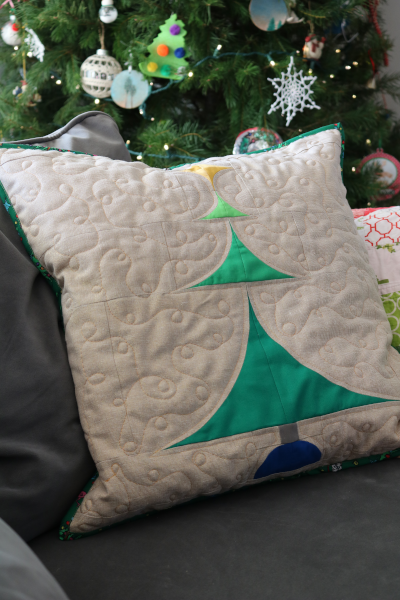
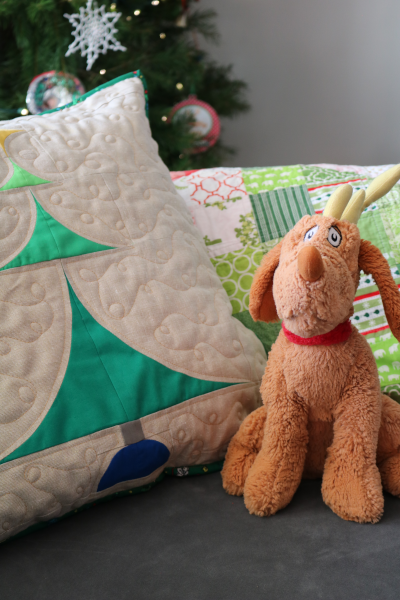
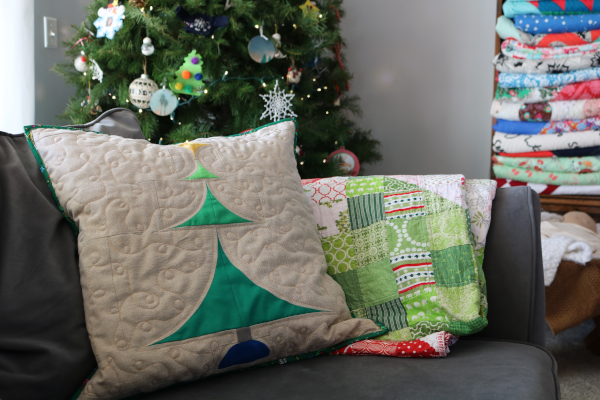
Curved Christmas Tree Pillow
All of a sudden it’s mid-December and the Christmas season is in full swing. My lists of “need to do” and “want to do” things are still long, but I’m trying to pause a little here and there to enjoy it. As I looked for fabric scraps to coordinate with my Whimsy Lone Star blocks, I came across this Christmas tree block made from curves. I decided on the spot to make it into something useful. Now it’s a new curved Christmas tree pillow.
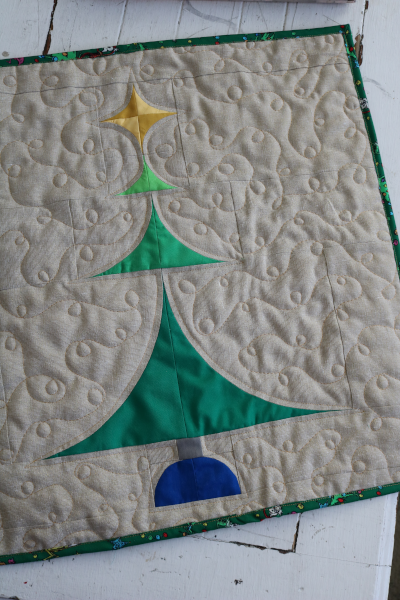
I remember making this block one year as part of an online curves workshop. Honestly, I thought I’d posted about it way back when so I didn’t bother taking a picture before I got started. I used all solids on a shimmery gold background.
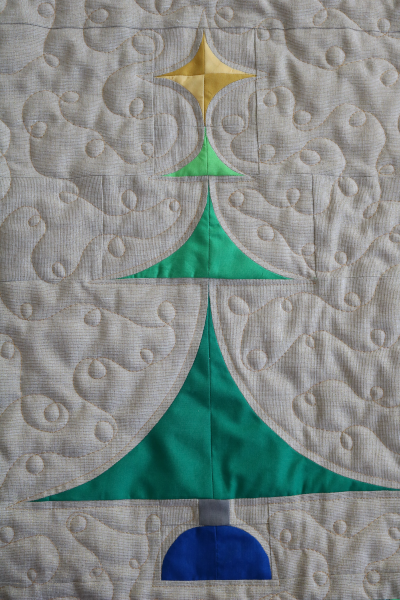
I quilted my block with loops in a gold thread. It reminds me of strings of lights and feels appropriate for a tree block.

After I quilted the block, I decided to make a pillow. This Grinch fabric was a great match for the solids in the block. I think the mid-century style of the tree also lends itself to a Dr. Seuss style. Double the reasons to use Grinch fabric! Once upon a time I always used zippers for my pillow covers. Now my grown up children often start pillow fights and I always feel bad when someone gets hit with the zipper. So I usually make an envelope closure, which is what I did here.
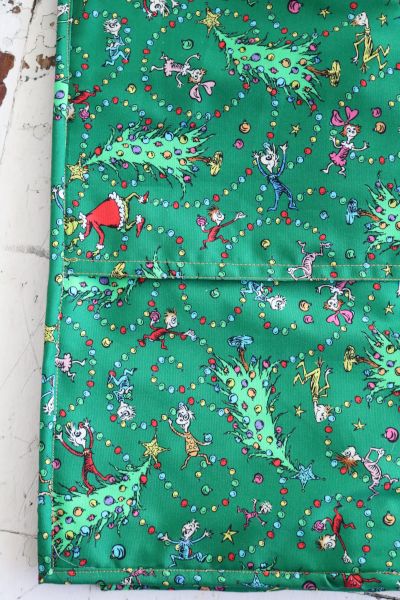
I bound the block with more of the Grinch fabric.
We have a stuffed Grinch and a stuffed Max that are treasures to my children. They played endlessly with them when they were little. Now their nostalgia is part of our Christmas decor. The curved Christmas tree pillow will be a good addition.
It’s nice to have years of holiday projects out to enjoy. I folded and stacked our everyday quilts to make room for the Christmas quilts, like my Swooning for Christmas quilt. I laugh every day, however, to see that the #1 favorite is my Christmas flannel rag quilt. I’m glad it’s still in great condition after 13 years of Christmas snuggling. Lots of memories in these threads.
It’s a small finish, but it feels good! I took one thing out of storage and made one useful thing with it. Perhaps more importantly, I took a break to be creative. It feels good, and helps me relax.

I hope you’re enjoying the Christmas season!