Flower Rag Quilt

About a week ago I decided that it’s about time I did something to sort of acknowledge that we have another baby joining our family.  I happened upon a pattern that I really liked, and then went on a hunt for some fabric that really grabbed me.

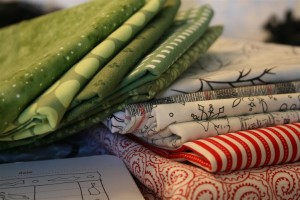
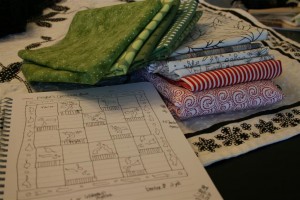
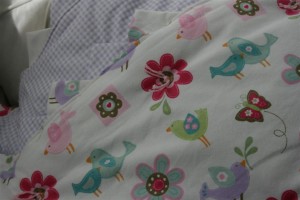
I was hoping for flannel, but found these cotton prints instead.
IMG_6094 (Large)
The pattern I chose is called “Lazy Daisy” by Sweet and Shabby Designs .
The fabric line I chose is a new one called “Whimsy” by Pillow and Maxfield for Michael Miller Fabrics.
The fabric is definitely retro but I loved it.  Of course, I supplemented with lots of fabrics from my stash, which is always good because the finished product has more personality that way.

In case you’re not familiar with a rag quilt, it is a quilt that has the seams on the top facing out instead of facing the inside of the quilt.  It’s  kind of a shortcut, because you quilt it as you go, but it’s also a kind of quilt that really has its own style.  The way the seams look after they’ve been washed is really fun.

The pattern wasn’t difficult to follow, and had a mistake or two in it, but I noticed a correction on their blog.

First, I cut all the fabric according to the instructions.  I love how quilting takes these stacks of fabric, and then you cut (carefully of course) and end up with these tidy little stacks of fabric in various shapes and sizes.
IMG_6114 (Large)
Next I cut the batting.  I decided to use cotton batting.
IMG_6115 (Large)
Next I assembled each square for the quilt.  I did this by laying the bottom piece face down, then a piece of batting, and then the top piece face up, like you’re assembling a sandwich.
IMG_6116 (Large)
IMG_6117 (Large)
IMG_6118 (Large)
Repeat this with all the fabric and batting.
IMG_6119 (Large)
Now it’s time to start quilting each block.  On the long, thin strips for the borders I just sewed a straight line down the middle of the fabric.  On the large blocks I sewed diagonally from corner to corner, and then went the other direction so they had a big X on them.
IMG_6131 (Large)
The squares with the flowers were fun.  I tried a quick new trick and am really happy with the results.
It’s called a washable glue stick.  The key word is “washable.”  I also like the price:  15 cents.  Tell me what you can buy for 15 cents now-a-days!  I call that the deal of the week.  Using the glue stick allows you to stick the piece in place while you sew, but the glue will wash right out when  you wash the quilt.
IMG_6147 (Large)
On the wrong side of the flower, just swipe the glue in enough spots to hold it in place while you sew around the edges of the flower.  I love that this means I didn’t have to use any pins!
IMG_6139 (Large)
Glue the fabric on your square and sew around the edge of the flower, about 1/4 inch in from the edge.
IMG_6142 (Large)
Repeat with the larger circle for the center, and then the smaller circle as well.
IMG_6143 (Large)
IMG_6144 (Large)
IMG_6145 (Large)
After sewing the three pieces on, the back of the square is now quilted in a cute flower, too!
IMG_6146 (Large)
When all of the pieces to your quilt have been quilted, it is ready to assemble.
For the sake of holding less fabric, I decided to snip the edges of the flowers before assembling.
Just make sure you don’t cut through the seam!
IMG_6148 (Large)
It will look like this when you’re done.
IMG_6149 (Large)
Now just lay out your squares as you want them to look.
Whenever I’m doing this I feel grateful that my office doubles as a guest room because the bed is a great spot to lay things out and move them around until I like them.
IMG_6170 (Large)
For this pattern, you must first sew the strips to the bottom of the flower pieces, and then sew the pieces together into rows.  You ‘ll have four rows of four pieces, and then you sew the rows together, too.  Add the border last.
IMG_6173 (Large)
The seams look rather ridiculous at this point.  Whenever I make a rag quilt, when I get to this point I always wonder why I picked a rag quilt instead of a regular one.  But it’s too late now, so carry on.
IMG_6174 (Large)
The back always looks fun at this stage!
IMG_6175 (Large)
Your last real step is to snip carefully into all of those rows of seams!
IMG_6244 (Large)
Once again, be sure you don’t cut the seam.   If you do, you’ll need to restitch it so your quilt won’t come undone.
This step seems to take forever.  You can either do it in little pieces, or if you’re like me, you know that you won’t feel like picking it up again so you’ll just plow through and do it in a single sitting.  I always regret the way my hand feels after doing it, but it doesn’t last long.  This is certainly the boring step in the quilt, but I remind myself that it’s not super exciting to sit and bind a quilt by hand, either.

After cutting everything, the next step is to toss the quilt in your washing machine.  Wash it and then dry it in your dryer.  This step is what will make the seams look right.  (Be sure to clean out your lint filter on your washer because there will be tons of lint from this blanket.)
IMG_6274 (Large)
When the quilt is done drying, the seams will be soft and cute.
Use your scissors to cut off the longer strings.  TaDa!  You’re finished.
A lovely, new, baby-sized quilt in just a few hours.
IMG_6270 (Large)

Making yo-yos

I have a project I’ve been meaning to finish for a LONG time.  It’s a quilt.  It needs me to make some flowers to go on a couple of vines, and it needs to be bound.

I’ve never been a huge fan of yo-yos.  Don’t have a problem with them, but just not in love with them.
Well, it looks like that might have just changed.
At least for this project.

I discovered that Clover makes some plastic yo-yo makers, and I invested in them.
IMG_6096 (Large)
I finally made some yo-yos with them, and now that I know how fast, easy, and uniform they are, I’m hooked!
There are 4 sizes.  The tiny one ends up being around 3/4″ in diameter, the next size up is around one inch, the next is about 1-3/4″ in diameter, and the biggest makes yo-yos that are about 2 inches or a bit larger in diameter.
IMG_6095 (Large)
They’re super easy to use.  In case you haven’t tried these, I’ll show you how simple it is.
First choose your template size and your fabric.  Each maker has two pieces, as you can see.
IMG_6097 (Large)
Lay the piece with the smooth edge (on the left) on a flat surface, with the lip facing you.
Then lay your fabric face down over it.
IMG_6098 (Large)
Now take the corresponding piece and fit it into the piece that is covered with fabric.
You’ll be able to feel it click into place.
IMG_6099 (Large)
Now trim around the edges, leaving a little bit of fabric.
IMG_6100 (Large)
When you’re finished, it should look like this:
IMG_6101 (Large)
Now take a needle and thread it with a corresponding color of thread.
The thread should be longer than the circumference of  your circle.  Knot one end of the thread.
From one of the holes on the bottom, bring the needle through, being sure that it goes through the fabric you left around the edge.  (Your yo-yo maker will come with great instructions, so don’t worry) IMG_6102 (Large) Then take the needle back down through the next hole, going around the entire circle.
IMG_6103 (Large)
When you’ve stitched around the circle, carefully pop the plastic piece on top out.
The fabric should stick to the top piece.
IMG_6104 (Large)
If you turn it over, you can see the stitches going around the outer edges.
IMG_6105 (Large)
Carefully pull the fabric off the template.
IMG_6106 (Large)
You can see that the fabric really holds the shape it had when in the template.
IMG_6107 (Large)
Taking the needle, begin gently pulling on the thread to gather the fabric.
IMG_6108 (Large)
Keep pulling.  All you have to do is sort of tuck the edge of the fabric inside as it gathers.
IMG_6109 (Large)
Slowly but surely, it will take the shape of a perfect circle.
IMG_6110 (Large)
When it’s all gathered together, pull the thread tight and tie a discreet knot in the thread.  Cut it and tuck it carefully inside.  You’re done!
IMG_6111 (Large)
They are quick to make and lots of fun.  Here’s my growing pile:
IMG_6275 (Large)
And guess what I discovered the day after I made a bunch of these?
They just came out with a huge one!  I was so excited.  I tried one, and it is super fun.
The new extra large one is much bigger than the next closest size.  It’s about 3 1/2 inches in diameter.
IMG_6276 (Large)
Now I need to make a bunch more so I can design the clumps of flowers on the quilt.
I’ll show you the finished product as soon as I’ve got enough yo-yos made.
IMG_6113 (Large)
Until then, see what fun you can have with these five sizes!
They also make flower shaped ones, which I have, but I don’t like how small the flower is and how much fabric it uses.  I thought I’d want to use them on the quilt, but I like the round ones best.  I believe that Clover also makes heart shaped templates, but I’ve never tried them.  An online search for yo yo maker will show you what’s available.
IMG_6112 (Large)
There are a lot of quilting and sewing tools that I don’t have and can live without, but these I’m happy to have purchased.  They will be a lot of fun to play with.

Make a seat cover!

So, I have a theory about chairs.  I’ll acknowledge that it’s likely because I have a large family, and therefore need more of them, and because I know that children tend to thrash them, especially the chairs around the kitchen table.  So, I don’t buy them new.  They’re so expensive!  When we finally bought a new kitchen table that would seat all of us, I was stunned at how much money it would cost me to buy ten new chairs to go around it.  Not only was my checkbook cowering at the number, I couldn’t stomach it.  So I started hitting the thrift store and snatching up chairs.  A few months ago I found this old chair.  It’s  incredibly sturdy, and I liked the look and lines.

I especially liked the design on the back of the chair.  I don’t usually love dark wood, but this is an exception.


But I hate the seat.  The fabric is old and yucky, but I wasn’t in the mood to take the chair apart and re-cover it.  Not that it’s difficult to do; I just didn’t want to tackle that today.


So today I was in the mood to do something quick and creative to add a bit of style to my chair.
I settled on a chair cover.  You’ll learn that white is my go-to color, and I whipped out the bolt of white fabric I keep in my sewing room for projects such as this.


Now, let me list a few things you will quickly learn about me and the way I approach projects.

First, I am not a pattern person (except when I am quilting).  I don’t have the patience.  I do measure carefully, but I am comfortable with imperfection and prefer to just dive in.
Second, I am a mother, not a professional.  I’m not afraid to slipcover a chair, a couch, and so forth.  I have enough confidence to do it, but I’m sure professionals have tricks and tips that I don’t know.  I am busy raising kids and I usually have several helpers, so my goal is to achieve a look that I can be satisfied with while openly acknowledging that I am an amateur.

My purpose in sharing projects like this is to send the message that it really isn’t hard to do.  If you can stand back a few feet when your project is done and appreciate the overall look of what you’ve accomplished, then I call that success.  I also believe that nobody else will ever look closely enough to really see the flaws, and if they do, you can probably guarantee that they would never have the courage to do it themselves, so who cares what they think! (That was probably a run-on sentence.)

So, with the above disclaimers, let me share with you how I went about sewing a cover for my chair.

First, I measured the dimensions of the seat and cut a piece of fabric the same size.  I then cut two strips of fabric long enough to use as ties in the back, and I cut three strips of fabric 4 inches wide that could be sewn together to make a pleated skirt around the seat.  I decided to turn the hem under twice to be sure no unraveling will ever happen, and I do believe that taking the time to iron first makes everything look much better!


After ironing, I carefully sewed together the three strips of fabric for the pleats, and then carefully stitched all of the hems.


I was left with four pieces of fabric:  two ties, one very long piece for the skirt, and the largest piece which covers the seat of the chair.  I laid them all out, putting right sides together, folded the skirt into pleats, and pinned it together.  This meant I only had one seam left to finish the entire project.
Note:  when arranging the pleats, I decided to have the two seams in the skirt fall on the corners so they would hang well and look more tailored.


I also pinned the two pieces for tying the skirt to the chair.  I placed them at the ends.


With the pinning done, I could sit down at my sewing machine, sew a seam around three sides, and walk directly to the chair to tie it on!


Ta Da!  One chair with potential just became something much more pleasant to look at, not to mention the fact that it now looks much more at home in my family room.


This entire project took me less than one hour to complete.
I was using 54″ wide fabric, and at that width I used  only about 2/3 a yard of fabric.
At $3.99 a yard, I just made a chair cover for under $3.00!


Is it perfect?  No.  I would do a couple of things differently next time, like make the ties a bit shorter and much wider.  But it’s done, the effect from a few feet away is one I’m happy with, and I’m also pretty confident that nobody is going to notice or point out the things I know are wrong with it.

So pick a chair, choose a bit of fabric (or raid your stash if you’re like me) and have some fun!
At $3.00, you can afford to experiment!

Hopeful Homemaker

1 158 159 160